Blowing out the water lines in your RV before winter storage is crucial to prevent freezing and cracks. We’ve winterized countless RVs over the years. Trust us when we say blowing out your water lines before storage is absolutely important to prevent pipe damage. So, we will show you exactly how to properly blow out RV water lines using an air compressor.
Summary/TL: DR
Properly winterizing your RV by blowing out water lines is critical to prevent pipe damage from freezing. We will cover the key steps to force all moisture out of the plumbing system using an air compressor:
- Safely drain and flush all water tanks before blowout
- Attach a plastic blowout plug to the city water inlet
- Connect an air compressor at optimal 30-40 PSI setting
- Open valves one at a time to force air through each line
- Disconnect compressor and bypass hot water heater
- Add antifreeze after draining to displace leftover moisture
- Extra tips for winterizing campers, checking for leaks, adding insulation
- Recommendation for quality oil-free air compressor
How To Blow Out RV Water Lines?
Step 1: Turn Off the Water Heater and Allow the Lines to Cool
Turn off the gas and electric power to the RV water heater. This stops it from reheating and burning you during the blowout process.
Also, open the pressure relief valve to allow hot water to drain out faster. Wait at least 24 hours for all lines to cool to a safe temperature.
Step 2: Drain and Flush All Waste Tanks
Open the release valves and drain out all freshwater, greywater and blackwater tanks completely. This clears the pipelines and allows you to route the incoming air pressure through the valves.
Use a tank disinfectant cleaner before refilling to keep tanks hygienic.
Step 3. Disconnect Any Inline Water Filters
Unhook any in-line water filtration units, softeners or purifiers that are attached to your RV’s plumbing system. This allows unobstructed airflow to push out the remaining water from the pipes.
Step 4. Open All Faucets to Drain Out Lines
Once tanks are drained, open up all faucets, including the shower, bathroom sink taps, kitchen taps, etc. Verify both hot and cold lines are opened up fully.
This depressurizes the plumbing lines and lets gravity pull out all the remaining droplets of stagnant water stuck inside that the blowout will push out forcefully.
Let the faucets run for a few minutes until the dripping stops completely.
Step 5. Connect Blowout Plug to City Inlet
Find the city water connection inlet, a special portal for sending pressurized water into the RV’s plumbing system. Remove any existing hoses.
Then, firmly screw in the plastic blowout plug and attach an extension hose leading to the air compressor. This creates a sealed pathway to supply high-pressure air.
Step 6. Attach Air Compressor to Blowout Plug
Connect the air compressor using the extension hose and preset it to 30 to 40 PSI output pressure. Do NOT exceed 50 PSI to avoid damage.
Use a compressor with minimum 10-gallon tank size and output volume capabilities for optimal home winterization needs.
Here are improved steps 7-10 with more details:
Step 7. Blow Air Through Plumbing Lines
Turn on the air compressor to send pressurized air into the RV’s plumbing lines. Open one water line valve at a time and let the air blast through for several minutes to force out all traces of water.
Make sure to blow air separately into both cold lines and hotlines connected to the water heating system.
Listen for any sputtering or gurgling sounds that indicate trapped water escaping successfully from pipes.
Step 8. Turn Off the Compressor and Disconnect
Once done, turn off the air compressor before disconnecting to avoid any accidents due to pressure differences. Unscrew the blowout plug and detach the compressor hose.
It helps to have a second person controlling the compressor ON/OFF switch when disconnecting.
Step 9. Bypass Water Heater Lines
The water heater tank can hold 5-6 gallons of water at once. To save on antifreeze usage, install bypass valves to isolate and eliminate this section when winterizing the RV pipes.
Use an automatic diverter kit specifically sized for your RV water heater make and model rather than temporary plugs.
Step 10. Pour Antifreeze Into Lines
After the blowout, pour RV-safe antifreeze into horizontal pipe runs and drains via the city water inlet to displace any remnants of moisture.
Use a non-toxic propylene glycol formula antifreeze for best results.
One gallon is usually sufficient for most RV classes. Smaller campers may need less quantity. Let the mixture flow into all branches by turning ON the water pump briefly.
Blowing Out Water Lines In RV With Air Compressor
As RVers, we recommend using a high-powered air compressor when winterizing to force water out of the pipes.
- Hook up a quality compressor in Step 6 when attaching the blowout plug. Wear protective gear – the pressurized air is loud!
- For RV winterization, we suggest the Porter Cable CMB15 150 PSI Oil-Free Compressor because:
- It has a durable pump for consistent airflow even under heavy use
- The large 16-gallon tank has greater capacity than smaller models
- No need to stop and wait for the tank to refill!
- We’ve tried cheaper compressors before, but they tend to overheat quickly.
- Investing a little more gives you reliability that saves tons of time and prevents burst pipes all winter.
- As an RVer, this is one winterizing accessory we think is well worth spending extra money on year after year.
Blowing Out Water Lines In Camper
Blowing out the water lines in smaller campers follows nearly the same winterizing process, but we have a few extra tips:
- Camper trailers and pop-ups tend to have pretty basic plumbing compared to larger RVs. So take time to trace all the hot and cold pipe runs throughout before getting started. Missing one line can spell disaster.
- For the antifreeze fill step, calculate the specific amount needed based on your actual freshwater tank capacity after draining. Too much antifreeze is just wasted money.
- For these compact trailers, we recommend using 2 gallons or less unless you have an unusually large freshwater tank.
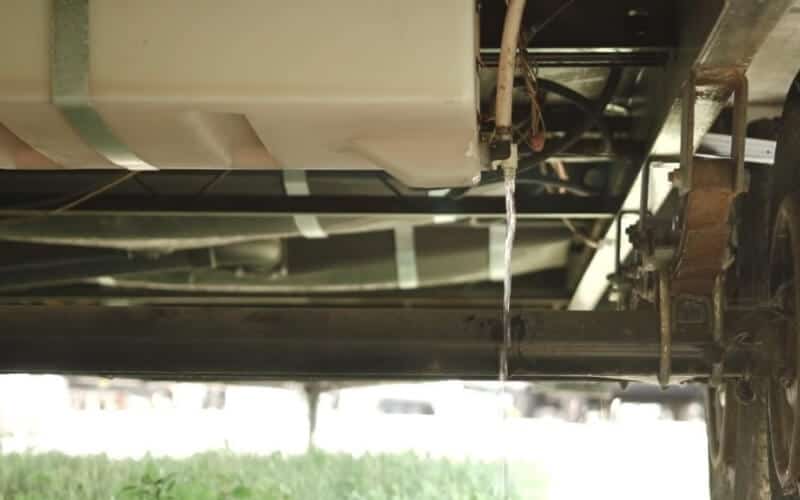
- Once finished, thoroughly inspect underneath the entire camper exterior. Check for any drips or puddles indicating blown air pushing water out of unnoticed cracks or unsealed joints.
- Catching a leak early makes a quick fix now versus a much bigger issue if left unaddressed over the freezing months in storage.
How Much PSI Do You Need To Blow Out My RV Water Lines?
| RV Type | Recommended PSI |
| Travel trailers / Popup campers | 30-40 PSI |
| Class A Motorhomes | 30-50 PSI |
| Class B Camper vans | 25-35 PSI |
| Class C Motorhomes | 35-45 PSI |
Use the above table as a guideline for setting the right pressure based on your RV type. Do not exceed the 50 PSI limit or risk damaging plumbing lines.
When Do You Need To Blow Out My RV Water Lines
Here are the signs indicating it’s time for a blowout:
- Freezing nighttime temperatures in your storage area
- Planning to store RV through winter months
- Notice leaks, drips, or cracks in the water system
- RV has remained unused/unwinterized for over 6 months
Ensuring System Integrity Post-Blowout
After completing the RV water line blowout, we take a few extra steps:
- Double check all valves and drains are CLOSED tight to prevent contamination.
- Use a flashlight to inspect all piping for missed damp spots indicating leftover moisture. Press joints by hand to feel for drips.
- Recheck compressor fittings and accessories to ensure proper winter storage.
- For cold climates, add supplementary foil-backed pipe insulation to prevent cracks from deep freezes.
A User Tip, I agree with:
“When trying to loosen stuck drain valves, always start by pouring hot water mixed with dish soap into the tanks. Let it sit for 10-15 minutes. The heat and detergent help dissolve solid buildups which may be preventing valve movement. If that doesn’t work, carefully use a plumber’s snake to break up debris clogs from the outside going inwards. Lubricating valves and cables are key to preventing this issue year after year.” – Dave from RV Travel
Tools and Materials
Gather these supplies before getting started:
- Air compressor (min 10 gal capacity)
- Blowout plug
- Water tank disinfectant
- RV antifreeze (between 1-3 gallons)
- Hose/attachments to connect air compressor
- Gloves, eye protection
- Bypass kit for water heater
Following proper technique for winterization and blowing out RV water lines prevents expensive plumbing repairs and keeps your system ready for next season’s adventures! Reach out with any questions.

![The 8 Best Truck Campers with Slide Outs in [currentyear] 7 Best 2021 Truck Campers With Slide Outs](https://www.rvingknowhow.com/wp-content/uploads/2020/11/Best-2021-Truck-Campers-With-Slide-Outs-150x150.jpg)
4 Comments
Stephen
3 years agoThanks for the great information, it is very helpful. One thing I didn’t see is that you didn’t mention putting some antifreeze in the P-traps under any sinks. Mine has frozen and busted in the past.
Marcin
2 years agogreat tip! thanks
Jess
3 years agoIf you are going to pump antifreeze through all the lines with the water pump anyway, why blow out the water first?
Tim
2 years agoWater can dilute the antifreeze making it less effective. Just an extra step to assure your pipes stay safe.