Travel trailer batteries are often an afterthought until they cease to do their job properly.
This is largely what leads many travel trailer owners or inexperienced RVers to ask: do I need a battery for my travel trailer?
The answer is yes! Unless you always leave your travel trailer in one place and it’s plugged into shore power 100% of the time, a battery is crucial to the safe operation of your travel trailer. It is required to provide power to the electrical components that allow you to safely tow your trailer to new destinations. Without a battery, towing your trailer safely (and legally!) is virtually impossible.
But even if your travel trailer is permanently parked, you’ll need a battery to convert the shore power that you’re plugged into to the correct current for your appliances to utilize.
When all is said and done, a travel trailer battery is essential to the operation of almost all of the electrical components inside and outside of your travel trailer.
So, instead of asking if you really need a battery to operate your travel trailer safely, the better path is to learn how to use them, how to replace them when they reach the end of their life, and how to select the correct type and size of battery for your specific trailer.
Luckily for you, that’s exactly what we’re going to focus on today. So let’s jump in!
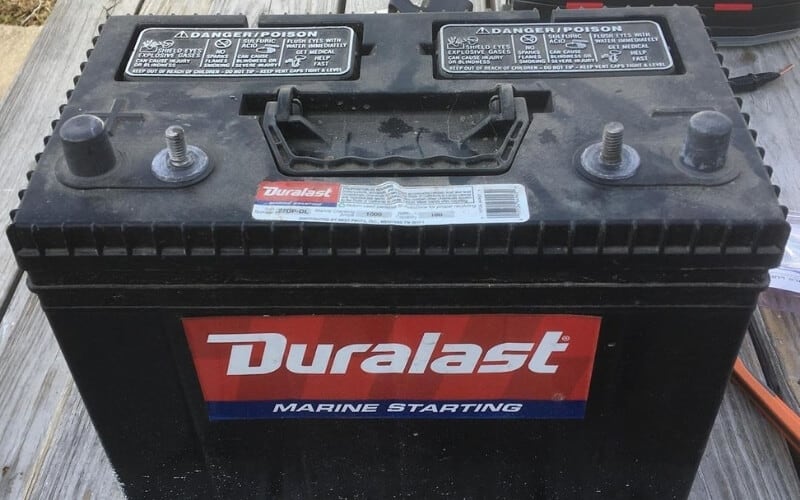
Why Do I Need A Battery For My Travel Trailer?
There are a healthy collection of reasons why you should always have a battery secured and wired into your travel trailer. Here is a quick list of those reasons:
-
Power for taillights, brake lights, and dash accessories
-
Power for electrical appliances that require 12-volt DC power
-
Power for other appliances (through the use of an AC converter)
-
Converting shore current AC back to DC at campgrounds
-
Storing power from a solar panel installation
-
Power for smoke detectors, carbon monoxide sensors, and other safety equipment
As you can see, travel trailer batteries are important to a number of critical functions on your travel trailer.
So, now that we’ve established the fact that you absolutely need a battery for your travel trailer, let’s move on to address how to choose the right battery for your specific trailer.
What Kind of Battery Do I Need For My Travel Trailer?
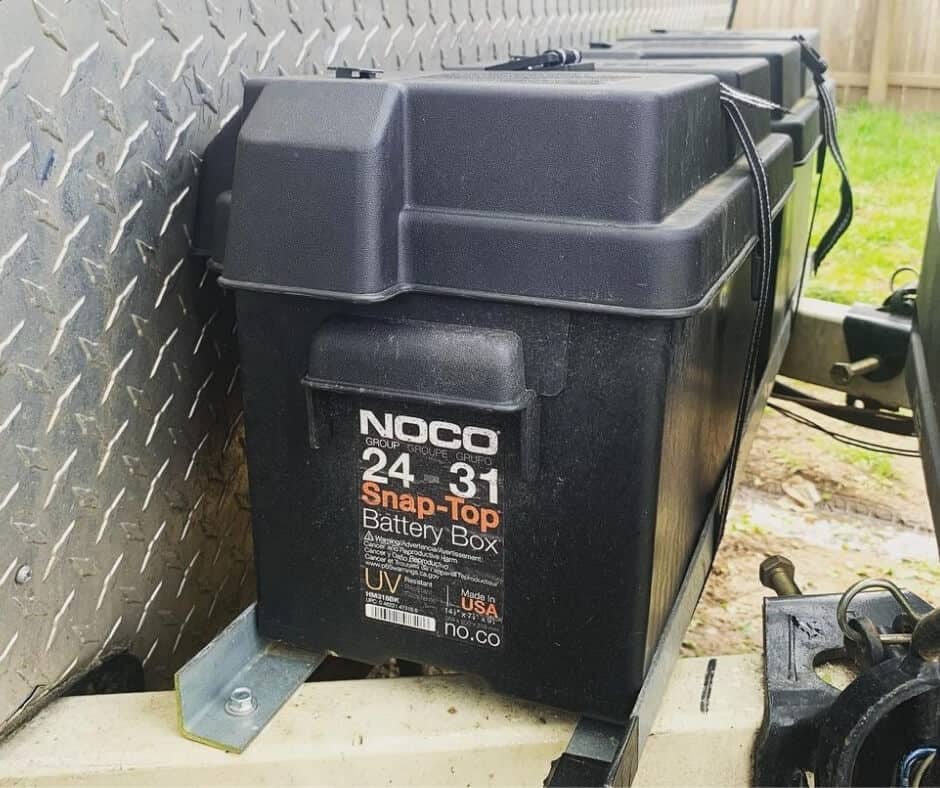
When you head into your local auto parts or RV parts store, you’ll probably find a section with a wall full of batteries that essentially all look the same.
But this can be a classic case of judging the book by its cover (battery by its shell?) because there are actually many different types of batteries and they are all designed for different vehicles.
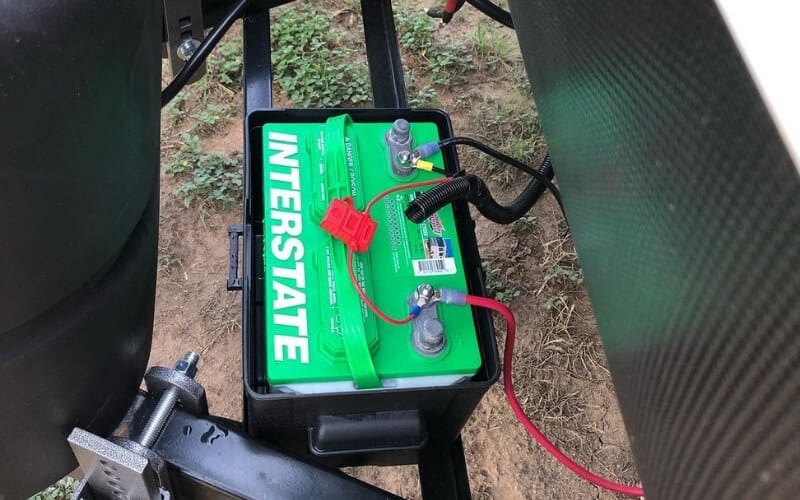
In general, almost all travel trailers, 5th wheels, and RVs require deep-cycle batteries. These are the same batteries that some other equipment relies on, such as boats, golf cart, forklifts, and more.
They are the preferred battery type for travel trailer use because they boast an increased recharge frequency and longer lifespan than other battery types.
Travel trailers rely on deep-cycle, lead-acid batteries and these batteries are built to supply continuous power for long periods.
This is what makes them one of the more reliable types of batteries for use in travel trailers and other recreational vehicles.
When it comes to discharge, lead-acid batteries can continue to function effectively until they are about 80% discharged.
However, discharging your battery to this extent regularly will significantly reduce the battery’s lifespan.
For that reason, many lead-acid battery manufacturers recommend avoiding discharging your battery past 45% if you want to optimize the lifespan of your battery.
Types of Deep Cycle Batteries
While there are other types of batteries that aren’t labeled as ‘deep cycle’, travel trailer owners should stick to this type of battery to supply power for their rigs.
But under that heading, there are actually two types of batteries that you’ll need to choose from. So, let’s define these types and discuss a few of their advantages and disadvantages.
Flooded Deep Cycle Batteries
This is the more conventional type of deep cycle battery. They are usually more affordable than their sealed counterparts, but they can require more maintenance over the entire life of the battery. This type of battery also tends to corrode faster than its competition.
With flooded deep cycle batteries, you’ll be responsible for monitoring the water level inside the battery and refilling it when it drops below a certain level.
These batteries can only handle being discharged up to 50%, which also means that you’ll be required to clean and recharge this type of battery more often than a sealed deep cycle battery.
Sealed Deep Cycle Batteries
This type of battery generally comes with a higher price tag than a flooded battery.
But they also require less regular maintenance and they generally have a longer lifespan.
There are actually two types of sealed deep cycle batteries that you’ll be able to choose from.
Absorbed Glass-Mat (AGM) Batteries
This type of sealed battery can be charged up to five times faster than a conventional flooded battery and can also handle being discharged up to 80% without experiencing a significant loss in overall lifespan.
While this type of sealed battery is also very adept at withstanding cold temperatures, AGM batteries can be susceptible to overcharging.
When overcharged, they can sustain irreparable damage that will ultimately require you to replace the entire battery.
Gel Batteries
Like AGM batteries, sealed gel batteries also require much less regular care than conventional flooded batteries.
Gel batteries are also adept at handling extreme temperatures at both ends of the spectrum and can withstand excess vibrations without being damaged.
This last point makes these batteries great for off-grid RVers and those that want to tow their travel trailers on rougher dirt roads to more remote locations.
That being said, we wouldn’t recommend this type of battery for inexperienced travel trailer owners because they charge very slowly and they also come with a higher risk of damage than other types of batteries for travel trailers.
What Size Battery Do I Need For My Travel Trailer?
Now that you know a little more about the type of batteries you can select for your travel trailer’s electrical needs, it’s time to consider battery size.
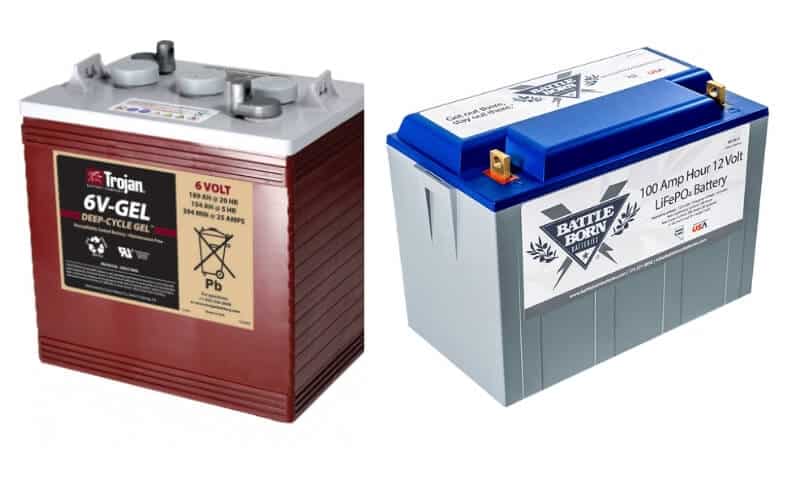
But there are mainly just two battery sizes for you to choose from: 6-volt batteries versus 12-volt batteries.
6-Volt Batteries
Although they are obviously smaller than 12-volt batteries, six-volts are actually a great choice for off-grid living or remote camping.
These batteries have more space between their storage cells, which translates to thicker plates and, therefore, increased lifespan.
Six-volt batteries can also sustain deeper discharges and supply a higher amperage output, which are two more reasons they are great for dry camping or boondocking.
In many cases, travel trailer owners that like to explore more remote destinations will opt to install two six-volt batteries instead of one 12-volt alternative.
12-Volt Batteries
If you’re largely going to be traveling from campground to campground (and even occasionally staying in a truck stop or Wal-Mart parking lot), there’s really no reason you’ll need anything other than a 12-volt battery.
These batteries are actually a hybrid between a deep cycle battery and a starting battery.
When used in parallel with another 12-volt battery (which is a common travel trailer and RV installation), these batteries will only discharge to the level of the weakest cell.
This will mean less ability to withstand deep discharges and also a reduced lifespan.
How Many Batteries Do I Need For My Travel Trailer?
The answer to this question will depend on whether you choose six-volt or 12-volt batteries.
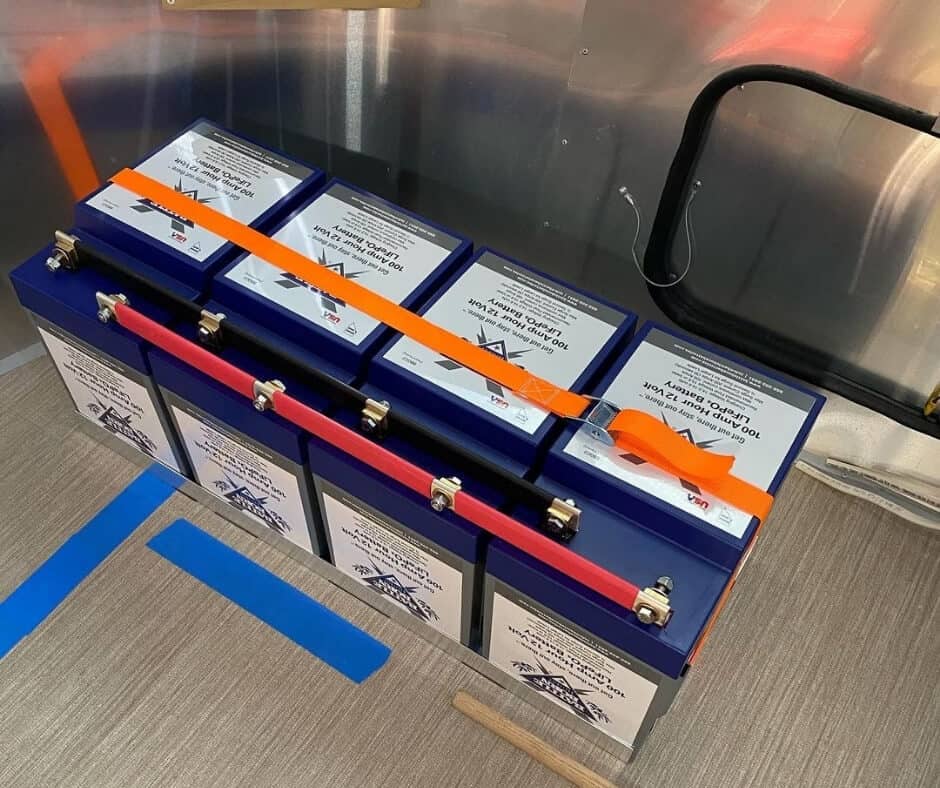
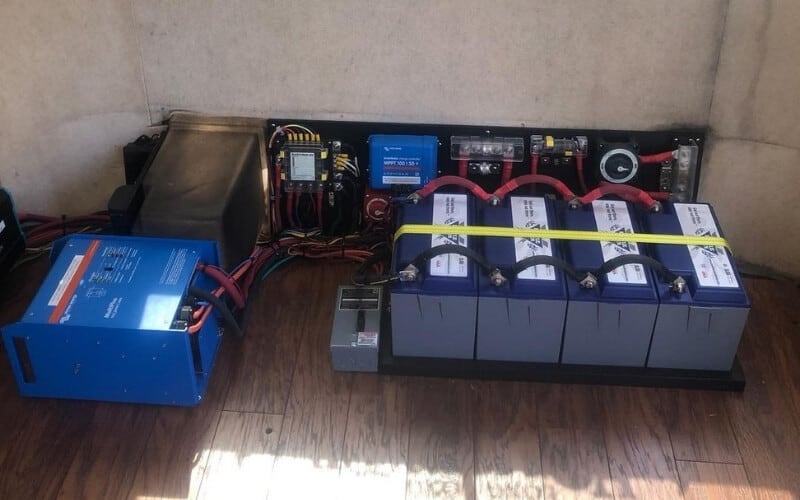
If you choose to install six-volt batteries in your travel trailer, you’ll need to purchase 4-6 six-volt batteries and install them in a series to obtain maximum amperage.
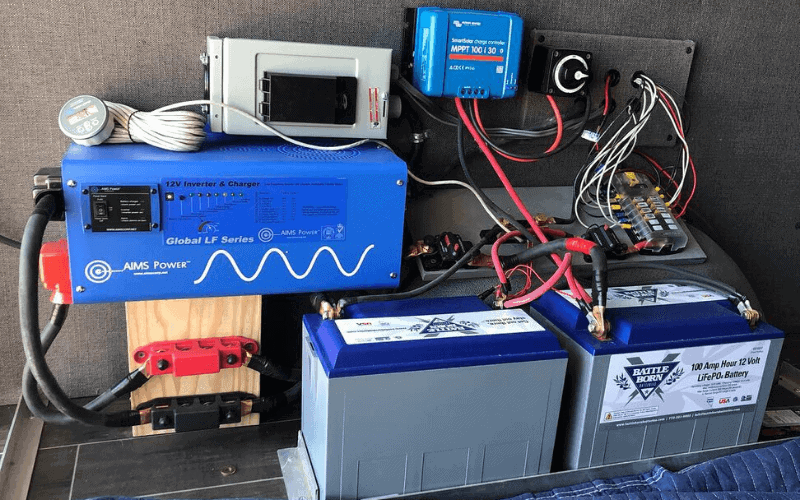
If you choose the 12-volt alternative, you’ll still need to purchase two 12-volt batteries to accommodate your trailer’s electrical needs.
These batteries will need to be installed in a parallel configuration to achieve optimal amperage output.
Please keep in mind that these are standard recommendations based on the most common battery configurations you’ll find on travel trailers these days.
If you have installed a collection of solar panels on top of your trailer, for example, you may consider installing additional batteries to increase your ability to store additional power for longer boondocking trips.
Tips For Replacing The Battery In Your Travel Trailer
If your battery has reached the end of its long lifespan, it’s time to find and install a comparable replacement.
While the tips above will help you identify and select the right type, size, and number of batteries you need for your travel trailer, here are a few additional pieces of advice to help you replace your battery properly.
Come One, Come All
Because travel trailer batteries are designed to be installed in a series or in a parallel configuration, you’ll need to replace all of your batteries if you find that one or more no longer holds a charge.
Replacing just one battery in a series or a parallel configuration can actually ruin the rest of the batteries in that setup.
From a practical standpoint, it simply makes sense to replace all batteries at once so that all of your batteries are the same age.
It also means that you don’t have to perform this type of maintenance and replacement at different times.
Once you go through the process of removing one battery in order to replace it, it simply makes sense to replace all of them at once.
Safety First
Before you start touching any of the hardware or components holding your batteries in place, it’s important that you consider your own safety.
We recommend wearing safety goggles and rubber gloves to prevent getting sulfuric acid on your hands or in your eyes.
Power Down
Next, you’ll need to turn off the main battery disconnect switch if your trailer is equipped with one.
If it’s not, you should power down all individual breakers and switches before opening the battery hatch and handling your battery.
When you do open the battery hatch, be sure to check to make sure your battery hasn’t spilled (flooded batteries only).
If you do notice any spills, corrosion, or external damage to your battery, please seek professional assistance before continuing this process.
Remove Old Batteries
If everything looks as it should once you remove your battery hatch, it’s time to disconnect the electrical cables on your battery. Remove the negative (black) cable first to avoid shortages or blown fuses.
Then, you can loosen wing nuts or bolts that are holding your battery in place. You may need to use a socket wrench or pliers for this step, depending on how tight those nuts or bolts are secured in place.
Finally, remove the positive (red) cable and make sure it does not touch the negative cable when you set it down.
Also, never touch the terminals on the positive and negative cables with your hands, as this can cause a painful (and potentially lethal) electric shock.
Now that the terminals are detached and the nuts/bolts are loosened, you can remove the battery and find an approved recycling facility in your area where you can dispose of it.
If you have a flooded deep cycle battery, be careful to keep it level and avoid spilling its contents as you remove it.
Also, keep in mind that this process will need to be repeated for all of the batteries in your travel trailer’s particular battery configuration.
Clean Connections
Before you put new batteries back into place, you should take this opportunity to clean off the terminals and remove any dirt and debris from the battery storage area.
Try to avoid using any water during this cleaning process. It’s best to simply scrub the terminals with a dry brush that has medium to stiff bristles.
To remove dust, dirt, and debris from the holding area, simply wipe it out or use one of the best RV air compressors to blow the area clean.
Install New Batteries
Now you can place your new batteries into the holding area and begin by connecting the positive (red) cable.
Now, gently tighten the wing nuts or bolts that secure your batteries into place, but don’t crank them down as tight as possible just yet.
Then, attach the negative (black) cable and secure the nuts/bolts down the rest of the way.
Confirm Secure Installation
Your final step will be to confirm the success of your new battery installation.
You can use a multimeter to check the voltage at the battery terminals or you can turn on the main battery disconnect switch (or individual breakers) to check that all of your appliances, lights, dash accessories, and other critical electrical components are functioning properly.
Conclusion
Travel trailers simply can’t function to their optimal potential without a quality deep cycle battery.
Of course, the type, size, and even number of batteries you may need will depend largely on the size of your trailer and its appliances, as well as your personal power preferences.
We hope that you’ve learned a lot about the requirements and considerations for replacing the battery in your travel trailer today.
And, as always, we wish you nothing but the best of luck on your upcoming trailer travels and outdoor adventures!


![4 Best Solar Generator For RV: Reviews in [currentyear] 9 6 Best Portable Solar Generator For Rv_ Reviews 2020](https://www.rvingknowhow.com/wp-content/uploads/2019/11/6-Best-Portable-Solar-Generator-For-Rv_-Reviews-2020.jpg)
1 Comment
Ronald Gorham
1 year agoYou truly don’t need a battery in a travel trailer if you are plugged in to shore power. The only reason you would need a battery is for the breakaway switch to operate when you tow the trailer somewhere. The converter will provide all the DC power that is needed from the shore AC power and would also provide AC power for the 120 receptacles, microwave, air conditioner etc. The only other thing the battery is handy for is operating the refrigerator on LP gas if the power goes out. Many times I disconnect the battery because the converter chargers will overcharge the battery and I use a quality charger to float charge the battery and reconnect the battery if we are going to leave the camper for a period of time and the battery will back up the refrigerator when it auto shifts to LP gas mode. So in most cases the house battery is not needed at all.