The refrigerator in your RV sometimes has to work harder to maintain a consistent temperature than the fridge in your house.
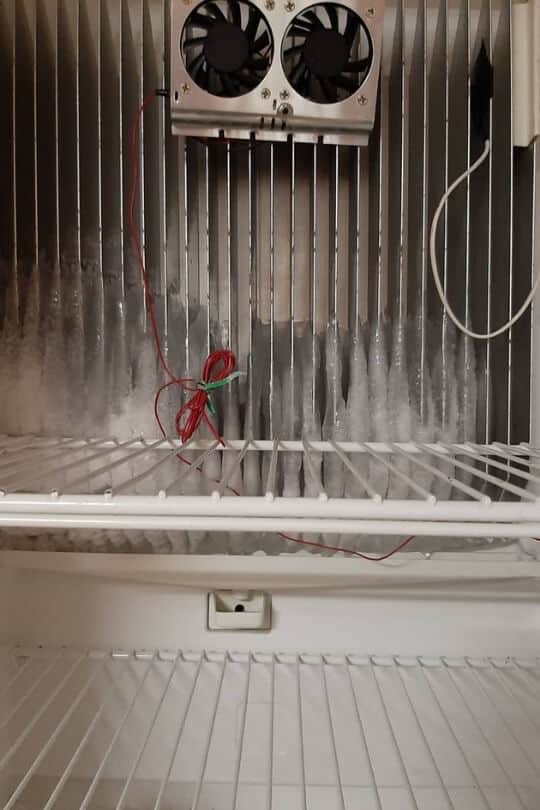
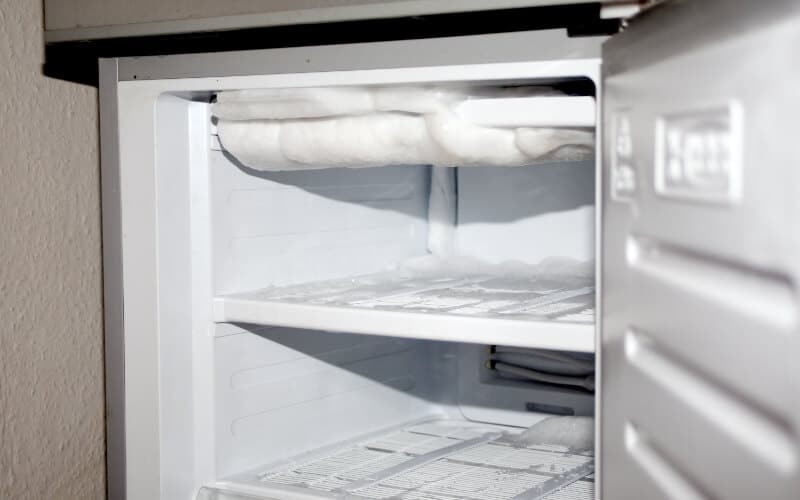
Because RVs typically move around and experience a lot of different environments, their refrigerators can sometimes sweat or the back wall can completely ice over.
When your refrigerator ices over and then that ice melts, you can wind up with a puddle of water in the bottom.
Then you’ll open your refrigerator door and wonder why you’re feeling water dripping down onto your feet.
While you want your refrigerator to keep your perishable food cold, you need to know how to prevent your refrigerator from icing over.
For many RVers, this can feel like a constant battle, but there are several techniques and strategies that you can use to prevent your RV refrigerator from icing over.
So, is it possible to prevent your RV refrigerator from icing over?
Yes! But there are several things that could be wrong with your refrigerator that could be responsible for it icing over. You could have a faulty gasket around the entire edge of the refrigerator door that’s preventing it from sealing completely. Or the thermistor inside of your refrigerator could be mispositioned.
These are two of the most common causes of ice buildup in your RV refrigerator.
Each has different solutions and each requires different testing methods to determine where the problem is really arising from.
But identifying the problem is really the first step to finding the right solution and preventing your RV refrigerator from icing over.
So let’s begin by discussing a few methods for testing what could be causing the accumulation of ice in your fridge.
How To Troubleshoot Freezing RV Refrigerator Issues
There are two main tests you can do to troubleshoot your RV refrigerator. These tests will help you identify which of the major two causes of ice accumulation that you need to fix.
So let’s explain these tests so that you can use them to identify what’s causing your fridge to ice over.
The Dollar Bill Test
You should use this test if you’re concerned that the seal around the edges of your refrigerator door has been compromised.
To perform it, all you’ll need is a dollar bill and your refrigerator door. Starting from the upper left corner, place the bill between the door and the seal and then close the door.
Then try to remove the bill. If your seal is intact, you should feel slight resistance or drag as you’re tugging on the bill.
If the bill slides out with little to no resistance, that’s a tell-tale sign that it’s time to replace your refrigerator gasket.
When you’re performing the dollar bill test, make sure that you’re systematic about checking the entirety of the gasket all the way around your refrigerator door.
Otherwise, you may miss a small section that is damaged or leaky. And that could be all it takes to cause your refrigerator to ice over.
Testing Your Thermistor
If you perform the dollar bill test and you don’t find any locations where it seems that your gasket is compromised, there could also be an issue with the thermistor in your fridge.
The thermistor is the device that determines the cold setting on your refrigerator’s thermostat.
If it’s mispositioned, this could result in frost or ice accumulating on the fins towards the back of your refrigerator.
In order to test your thermistor, you’ll need to start by contacting the manufacturer of your refrigerator to determine the exact location of the thermistor in your fridge.
But before you do this, there’s a simple test you can do to see if the temperature you’ve set your fridge to is actually the temperature inside.
Place a separate thermometer in a glass of water and place the glass on the shelf towards the center of your refrigerator.
Leave it there for at least 24 hours before assessing the reading on the thermometer. If, for example, you’ve set your refrigerator to approximately 35 degrees, but that separate thermometer is reading closer to 32 degrees after 24 hours, it’s a good sign that your thermistor could be mispositioned.
If your refrigerator fails this thermometer test, remove the thermistor and place it in a glass of ice water with a thermometer for five minutes.
Now, remove the cover from your fridge’s control board and unplug your thermistor. Find your handy multimeter and check the resistance across the two wires on your thermistor.
Your ideal reading (measured on the ohm scale) will vary depending on the manufacturer of our RV refrigerator.
For many Dometic refrigerators, for example, the reading should be between 7,000 and 10,000 ohms. But many Norcold refrigerators should read between 30,000 and 32,000 ohms.
Consult your refrigerator’s manufacturer to see what is a normal ohm reading for your fridge’s thermistor.
But if yours falls way above or below that typical range, it’s a good sign that your thermistor needs to be replaced entirely.
Also if you want to consistently monitor the inside temperature of the refrigerator in your mobile without opening the door time by time, use this wireless SensorPush Wireless Temperature Smart Sensor

Tips For Preventing An RV Refrigerator From Icing Over?
In addition to faulty parts of the need for refrigerator maintenance, there could be other user errors that cause your fridge to ice over.
So here are a few additional tips to help you prevent ice from accumulating in your RV refrigerator.
Pack It Right
Because some RV refrigerators are much smaller than residential units, we can have the tendency to pack them full to the brim with our perishable foods.
But all refrigerators require consistent airflow in order to work efficiently.
So, if you’ve packed your RV refrigerator too tightly and there isn’t adequate airflow throughout, this could be a primary cause of ice accumulating on the fins or the back wall.
Be sure to leave enough room for air to circulate throughout the refrigerator cabinet and also avoid using wide shelves or trays that can block convection movement from top-to-bottom in the refrigerator.
Make Sure Your RV Is Level
Most RV refrigerators only work efficiently if your RV is as close to level as possible when you’re parked.
That’s where your RV’s built-in leveling jacks will come in handy, but if your rig doesn’t come with leveling jacks built-in, you’ll need to find chocks or some other sort of manual jacks to make sure your RV is level wherever your park.
The more level you can get, the more efficiently your refrigerator will work. And when it’s working efficiently, that significantly reduces the likelihood of ice accumulating inside.
But the good news is that most RV refrigerators still work relatively well if they are off level by as much as six degrees front-to-back and three degrees side-to-side.
Park Thoughtfully
One of the reasons that RV refrigerators have to work harder than residential models is because most RVs are much less insulated than your typical residence.
This means that warm exterior temperatures can heat up one side of your RV and cause it to think it needs to overproduce to stay cold.
This is a very common cause for RV refrigerators icing over if you park with the wall that the fridge is located on facing the sun.
That wall will then warm up excessively and make it much more difficult for your refrigerator to function efficiently.
So, if you park thoughtfully every time you arrive at a campground, your refrigerator will be much less likely to ice over.
Always try to park so that the side of your RV that the fridge is located on is facing away from the part of the sky where the sun is predominantly located during the day.
This will create a situation in which one side of your RV essentially shades the other from direct sunlight.
Know What You Want Before Opening
I remember being told this all the time when I was a kid. “Don’t just stand there with the refrigerator door open,” my Dad would say. “Either grab what you want or close the door and think about it for a second.” And the same is true for RV refrigerators!
Try to avoid “shelf-shopping” whenever you can because that’s going to allow your fridge’s much-needed cool air to escape.
In response, your refrigerator will begin working overtime to try to compensate for that loss of cool air.
When you open and close your refrigerator door frequently, it greatly increases the chance of the back of the fridge icing over.
So, you can help to prevent this by having a plan before you open your refrigerator door.
Knowing what you want and keeping your fridge organized so that you know exactly where those items are will certainly help you prevent your RV refrigerator from icing over.
Restock Cold Products
When you buy certain items from the grocery store, you’ll sometimes have the option of buying refrigerated or warm products.
This includes items like beer, soda, and other beverages. And, believe it or not, buying the refrigerated versions of these items can help you maintain a more consistent, cool temperature in your RV refrigerator.
When it comes to liquids, especially, your RV refrigerator will need to use a lot of energy to cool down the liquid’s temperature.
This, again, will cause your refrigerator to strain to cool down and can increase the likelihood of the fins or back wall icing over.
If you always restock your fridge with liquids that have been refrigerated, however, it makes it much easier for your fridge to maintain its desired temperature.
And it will also reduce its need to strain and overcompensate by icing over.
Conclusion
The bottom line is that an icy RV refrigerator is working too hard and it’s probably also causing some of your food to spoil faster than it should.
Both of those things can wind up costing you more money than you should really be spending to live comfortably in your RV.
So you should have plenty of incentive to prevent your RV refrigerator from icing over, and we hope that the tips we’ve provided today will help you do so.
As always, we wish you the safest of RV adventures and, in this case, we’d like to salute functional RV refrigerators everywhere!


