Your RV power converter may be one of the most underrated components of your RV, but it’s also one of the most essential. Often hidden away in cabinetry or under a seat, an RV power converter is responsible for converting the AC power from an external source, such as a campground hookup or generator, into DC voltage that powers your 12-volt camper appliances and charges your batteries.
If you’re experiencing issues with dimming or flickering lights, loss of use of electrical outlets or 12-volt powered items like your refrigerator, or your battery isn’t charging or can’t hold a charge; it’s likely that your RV power converter is faulty or isn’t working properly.
Before concluding that your converter needs to be replaced, it’s important to check for common, easy-to-fix issues that could be causing the problem.
If you suspect a faulty RV converter, the first step is to put it to the test. Check the AC voltage reading to ensure it falls within the acceptable range of 110 to 130 volts. Then, verify that your battery maintains a consistent charge between 12.3 and 12.9 volts. If either of these readings falls outside the optimal range, it could indicate a problem with the converter that needs to be addressed.
If you’re unsure whether your RV converter is faulty, don’t worry. With a little bit of knowledge and troubleshooting, you can quickly and easily address any issues and get them fixed as soon as possible.
What Does A RV Converter Do?
When you use the onboard generator, or you connect your RV to an outside electrical source the converter reduces the 120 Volt AC current into 12 Volt DC.
This is the common type of current used to power most RV accessories and appliances and accessories in the RV.
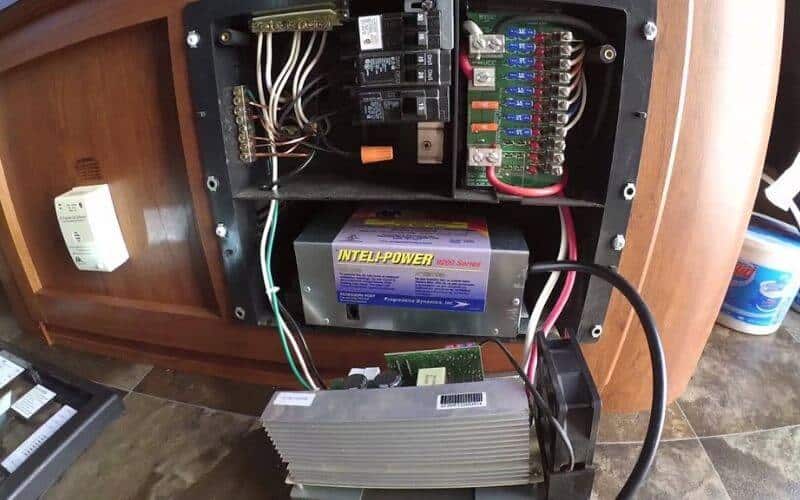
It essentially prevents the RV’s battery from being drained when you are connected to another source of power.
If the converter has a problem, the onboard batteries will be the only source of power. If they are drained, you wouldn’t be able to charge many of the accessories you rely on.
How Do I Know If My RV Converter Is Bad?
1: Converter Seems To Drain The Battery
For the onboard batteries to work properly, and supply DC current, they need to maintain a consistent charge. When the converter has a problem, it makes it hard for the batteries to maintain a constant charge.
Signs Of A Problem Like This Can Include Things Such As:
- The cooling fan isn’t working properly
- Internal vents aren’t operating as they should
- Interior lights dim shortly after being turned on
- Abnormal warning lights flickering on and off at the dashboard
If one of your RV’s onboard batteries can’t hold its own charge, it can start to draw power from an otherwise good battery.
This can eventually lead to other batteries in the system going bad, which would require you to replace more than just the initial bad battery.
The best way to catch a problem like this before it turns into a major issue is to periodically test each individual battery.
How Do I Test My RV’s Onboard Batteries?
Testing your batteries is relatively easy. It’s the sort of thing you can do on a slow day at camp, and certainly something you should be doing periodically when you aren’t traveling.
It’s best to test a battery 6 to 12 hours after it was fully charged. This will give you the most accurate reading of whether or not it is indeed holding a consistent charge.
Step One: Disconnect Your RV From Any Outside Power Sources.
If your RV has an onboard battery monitoring system, you can use it to give you a basic idea of the electrical system’s performance.
However, most of these systems measure all the RV’s batteries as a conglomerate and won’t help you very much to spot a dead a dying battery.
Step Two: Disconnect Each Battery From Its Partners.
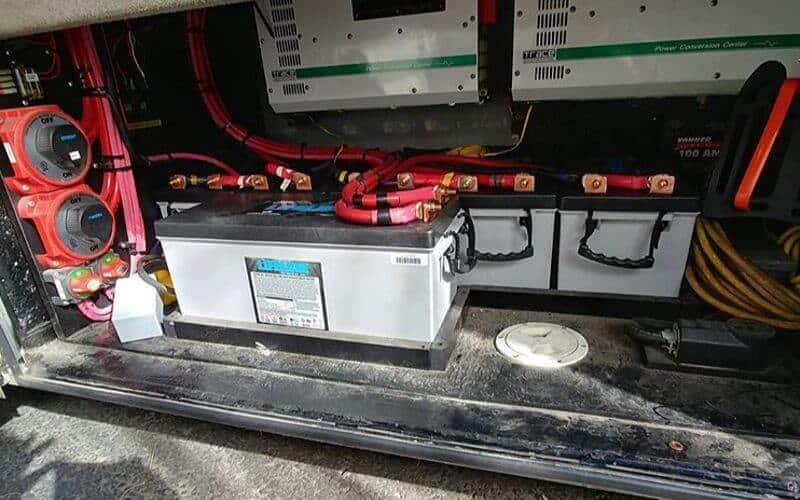
If it’s your first time doing this, make a note of whether they are connected in series or parallel. Most RV batteries are connected in parallel, meaning that each positive terminal is connected to the next positive terminal, and negative to negative.
If you don’t disconnect the batteries from each other it will be hard to spot any potential charging issues.
Step Three: Let The Batteries Sit For 20 To 30 Minutes.
This lets them stabilize their charge and will give you a more accurate reading.
Step Four: Connect A Multimeter To Each Battery, Testing Them One At A Time.
A battery that has a fault or the internal components have started to degrade won’t be able to maintain a constant charge.
How Do I Use A Multi-Meter Correctly?
A multimeter is designed to test a wide range of DC and AC voltage. It can also be set up to measure resistance as well as tell you if a circuit is open.
You want to set the dial to measure 12 Volt DC. You will then carefully connect the black lead of the meter to the black terminal on the battery. Next, connect the red lead to the red terminal.
A battery that is in good condition and is maintaining a consistent charge should read between 12.5 to 12.7 volts. If the battery reads anything less than 12.5 Volts, it is a sign that it isn’t holding a charge or needs to be charged.
Can I Test The AC Voltage Range?
An abnormal voltage range at the 110 AC entry or at in the breaker box can also be a sign of a bad converter. The multimeter needs to be set to measure standard 110 AC.
When you test the entry point you should see a range between 108 and 130 volts. If the reading is higher or lower than this range, it may be a sign that the onboard converter has a problem.
To test the breaker box for a fault, you will need to set the multimeter again to measure 12 Volt DC. You should get a range between 11 to 13 volts.
This will help you understand where the problem might be. To help you further dial in any components that need to be replaced, wires that have a short, or breakers that need to be replaced.
2: Could The Problem Be A Malfunctioning Cooling Fan?
Most RV converters have an internal cooling fan. It’s intended to keep the RV converter from overheating when it reaches a preset temperature range.
When it’s connected to a 110 AC power source it will run intermittently to help keep the converter from overheating.
If the voltage at the 110 Volt entry point has a problem, the fan might not work at all. At the same time, it’s possible for the cooling fan itself to simply breakdown or wear out from frequent use.
Unfortunately, when this happens, the unmanaged heat could start to damage components in the converter or other parts of the RV’s electrical system which can causes RV converter not to work properly.
How Can I Test The RV’s Converter’s Cooling Fan?
You can test the converter’s cooling fan voltage. To do this you’ll need to connect the multimeter at the entry point to the converter.
If it doesn’t produce a reading, it might be that the fan itself died, and the converter might not be affected.
It is also possible that the 110V line has a problem, or that the thermostat or thermal sensor which regulates the cooling fan has a fault of its own.
You can test each one by supplying them with a current that is separate from the main 110V line.
If they operate correctly, then you know it’s the line. If they don’t, then you will likely need to replace the thermal sensor, fan, or the entire converter itself.
Can I Replace A Cooling Fan Or Thermal Sensor Myself?
The short answer here is that yes if you are particularly handy, and you have the right tool it is possible to replace a malfunctioning cooling fan or thermal sensor.
However, the bigger challenge is often finding the correct replacement parts in a reasonable amount of time.
If you are having a problem while you’re on the road, it might take multiple days to find the replacement parts and have them shipped to you.
This might prove to be too much of an inconvenience, especially if your onboard batteries aren’t perfect.
If you are on the road when you notice the problem I would recommend going to a professional shop and having them handle the replacement.
Even then, it might be a bit of a delay. I once spent two days learning a lot about Cheyenne, Wyoming while the shop waiting for the necessary parts to arrive.
In a situation where you caught the problem before you hit the road, and you have the time to find the right parts and install it, then you might just be able to save some money.
What Causes An RV Converter To Fail?
There are a lot of things that can cause or contribute to the failure of an RV converter. Sometimes it’s a matter of simple wear and tears over time causing one or more components to fail.
When this happens, it’s often best to simply remove the old converter, and install a replacement. This is also a good time to upgrade any other wires and components in the RV’s electrical system.
The following is a list of possible problem areas and potential ways to fix them.
3: A Problem With The Circuit Board Or Circuit Breakers
Sometimes a breaker itself can have a fault, that can affect the converter. Just keep in mind that accessing them does require a patient and meticulous approach.
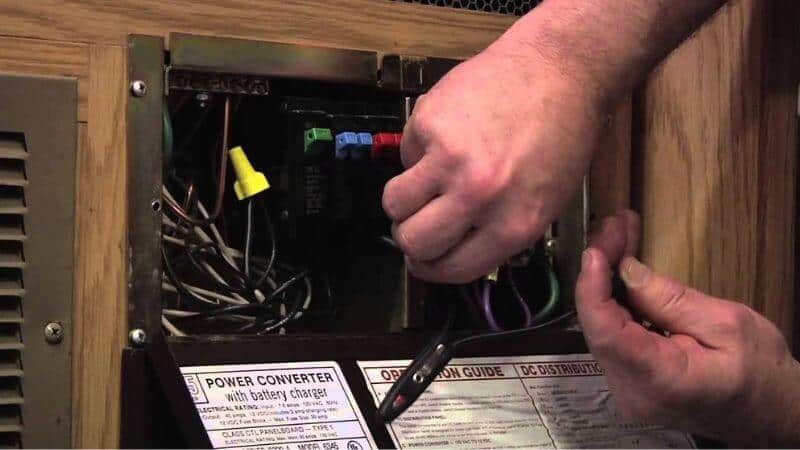
The first thing you need to do is open the circuit breaker panel. Then you can open each of the circuit breakers beginning with the primary input breaker.
Give each one a careful look. Check for any signs of physical degradation and make sure that they still work.
If you are convinced that the breakers are fine, you should then close them in reverse order, making sure that the primary input breaker is the last one.
At that point, you can disconnect the 110 AC power from the pedestal and remove its independent electrical panel.
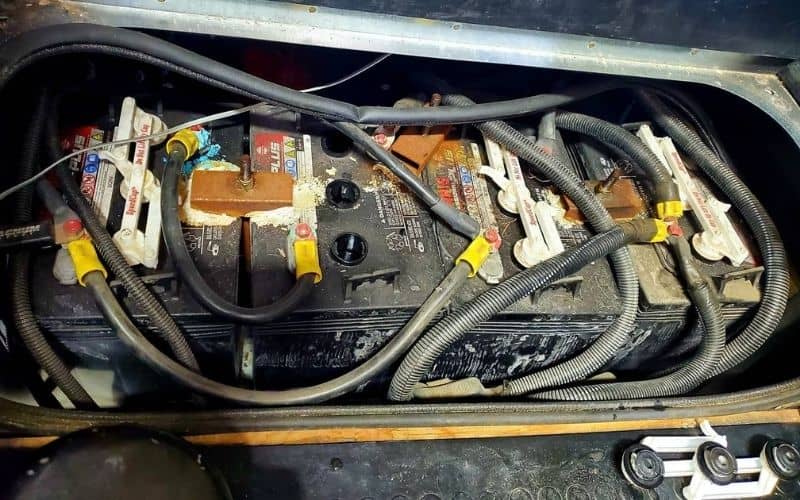
Take a close look at the backside. Sometimes acid can accumulate on a connector tab or on one of the wire terminals.
If you see any signs of corrosion you can try to clean it up by mixing 12 ounces of water with 1 teaspoon of baking soda.
Then lightly scrub this improvise cleaning solution on the affected area with a soft-bristled toothbrush.
After you’ve cleaned it as best you can, you should through dry the area by blotting it with a clean paper towel. Then give it a good 7 to 10 minutes to completely air dry.
At that point, you can reassemble the panel and test it again. It’s worth noting that sometimes acid accumulation and corrosion can be so bad that even the best cleaning measures simply won’t be enough to save it.
4: Could It Be A Problem With The Resistors Or Diodes?
Some RV power converters use old fashioned resistors and diodes. This is even more likely to be the case with an older unit.
These small components are designed to help control the 12V DC voltage of the electrical system and the onboard batteries.
Resistors essentially impede the passage of current in a circuit board or other electronic component.
Sometimes something as simple as a faulty or burned out resistor can be the root cause that prevents the batteries from being able to hold a constant charge.
With most RV converters, the resistors are relatively easy to get at. Yet there are a few that require you to disassemble the converter box.
With these, you need to make sure that no other electrical components on the circuit board are damaged in the disassembly process.
Diodes differ from resistors in that they allow the flow of electricity to flow in only one direction. At the same time, they also prevent current flowing in the other direction. This can make diodes a little bit tricky to test.
Before testing one, you need to make sure that you understand which direction current is intended to flow. If you get a reading, then it means the diode is operating correctly.
If you don’t get a reading testing the positive lead on either side of a diode, then it likely means that the specific diode has burned out or has some other inherent fault.
One sign of a major problem is white acidic residue on the power converter near the diode.
In most of these cases, the damage to the diode and the surrounding circuit board components is usually so severe, that you will need to replace the entire RV converter.
If you find a bad resistor or diode, it might be possible to replace it yourself. However, this really is the sort of thing that should be handled by a professional with knowledge of electrical circuits
5: Could It Be A Problem With A Fuse?
A fuse is essentially a small electric device that is rated to handle a maximum level of current.
When too much current, from something like a power surge or a short circuit occurs, the small metal component inside the fuse burns out. This prevents excess current from damaging more sensitive components.
It is more of a protective measure meant to keep more vulnerable components from being damaged.
Sometimes an older fuse can suffer from basic metal degradation or even be affected by ambient heat. This could cause the fuse to burn out prematurely.
Manufacturers design most fuses to be replaceable. Most have their amp rating on the back of the case of some other part of the fuse.
If you do find a burned-out fuse in your converter or some other electric component you might be able to change it yourself.
This calls for using a fuse puller, or perhaps needle-nose pliers. Just be careful not to grip the fuse too tightly, or crush it, as this could leave pieces of it behind.
You should always replace a burned-out fuse with a new one of the same amp rating. If you don’t have one on hand and you are in an urgent situation, you might be able to get by using one with a lower amp rating.
However, you should never use one with a higher amp rating, as this is likely to damage other more sensitive and expensive components in your RV’s electrical system.
Double Check Your Accessories
One or more accessories that die on their own at the same time, can sometimes lead you to believe that it’s a problem with the RV’s converter.
Double-check to make sure that it isn’t a wire, fuse, breaker or other component causing an accessory to fail before you start poking around with your converter.
6: Could It Be A Problem With The 110 Power Source?
In some scenarios, it’s a problem with the 110 Volt entry point, outlet, connection, or power source, that is mimicking signs of a failed power converter in your RV.
Check all these components, to see if anything is loose, or appears burned out. Sometimes a fault at the power post supplying the electricity can lead to intermittent current. This can cause internal lights to dim.
If you need to test the reliability of the power source, you could try taking a 110V appliance, like a microwave, or even a plug-in household lamp and connect it to the power pole.
If it doesn’t behave normally, it might be a problem in the power supply.
This is even more likely to be an issue in older campgrounds or places where the power posts are not fully sheltered. Even something like a leaky outlet cover can cause a short in an outlet after a simple rainstorm.
Proper Maintenance And Preparation Are Key
Your RV is a major investment. Taking the time to double-check all systems, including the electrical system before you head out your next adventure is time well spent.
This includes getting it ready for travel every spring, taking care of the motor, checking the batteries and appliances, as well as making sure that every part of the power converter is working correctly.
Even if you took your time to tick every box on your spring checklist, I still recommend giving your RV a thorough once over before leaving on a new trip.
Sometimes replacement parts can take a while to come in. Professional repair shops that specialize in RVs can also be overbooked during peak season.
If something does need more attention than you can give it, you might end up on an inconvenient waiting list.
When Should I Take The Problem To A Professional Repair Shop?
If you are particularly handy, or you really know your way around an RV’s mechanical systems, chances are you can handle many simple things yourself.
Things like testing a battery, and replacing a faulty one double-checking fuses and breakers, is something pretty much everyone can do.
When you start getting into things like faulty circuit boards, wire shorts and burned out components, it’s often best to turn to a professional to make sure the problem is properly diagnosed and repaired.


8 Comments
joe
4 years agowhat happens if the converter is hooked up backwards
Aaron Richardson
4 years agoThe converter will only charge the batteries when the RV is plugged into 120 volt electricity or when the RV’s generator is running.
Larry
2 years agoDo you mean by backwards that the 12V leads are reversed?
My battery is charged fine but if I turn the converter off I have no 12v at all.
So if the shore power is disconnected I have no power whatsoever even though the battery is fully charged
Traveler70
3 years agoIf the converter is bad, and now the battery is bad, can we put in a new battery and use our trailer until the new converter arrives?
Todd
3 years agoI replaced my converter with a used one and two new batteries and it still over heats
DC
2 years agoSo, I have an RV with an almost identical looking converter and panel as in the picture in the “how to tell if your converter is bad”. The fan never comes on as far as I can tell and at times the lights will get brighter and then go back to normal after a few seconds.
This RV is permanently on a campground and is always plugged in. If I replace the converter since I dont need the battery charging function so much, does it matter which one I use.
Nancy
2 years agoMy aux batteries show fully charged but nothing works off the aux batteries. I have no power at all unless I am on shore power. Converter?
MaXX
10 months agoFactory LED lights start going dim, bright, dim, bright when plugged into shore power, they’re fine on battery only – dead converter?