An RV or a motorhome with a bathroom or kitchen facility typically has two tanks. One that stores freshwater, and one that stores black or “Gray Water.” Each of these tanks has its own special sensor or meter to let you know how much liquid there is inside.
When your RV’s black water tank sensor is damaged or working improperly it can certainly be frustrating. If the tanks are nearly full, it can even be worrisome!
So how can you know for sure how much black water there is in the tank? And how to clean RV black water tank sensors to address a faulty sensor?
When it comes to a corroded or dirty sensor, you might be able to clean it yourself. However, there can be some complications along the way of cleaning RV holding tank sensors.
What’s In A Black Water Tank?
Gray water or black water can have a lot of things in it that can gum up the sensor or cause malfunctions.
This tank essentially contains all the used water that goes down the drain. It includes:
This means that the so-called “Gray Water” in the tank can have a lot of soap, grease, body soil, and food particles.
Any of these substances can leave hard to remove residue on the sides of the tank and on the sensor itself.
If the problem is bad enough, it could cause the black water tank sensor to fail or send a misreading.
Periodically purging your black water tank and cleaning it will help reduce chances of a sensor malfunction.
Many RV parks will have these facilities available. If you are new to your RV, you might want to seek out someone with more experience, or perhaps a professional service that can shed some light on how to perform proper maintenance.
How Does A Black Water Tank Sensor Work?
The sensor inside a black water tank looks like little more than small metal nubs that are attached to the sides of the tank with small screws or fasteners.
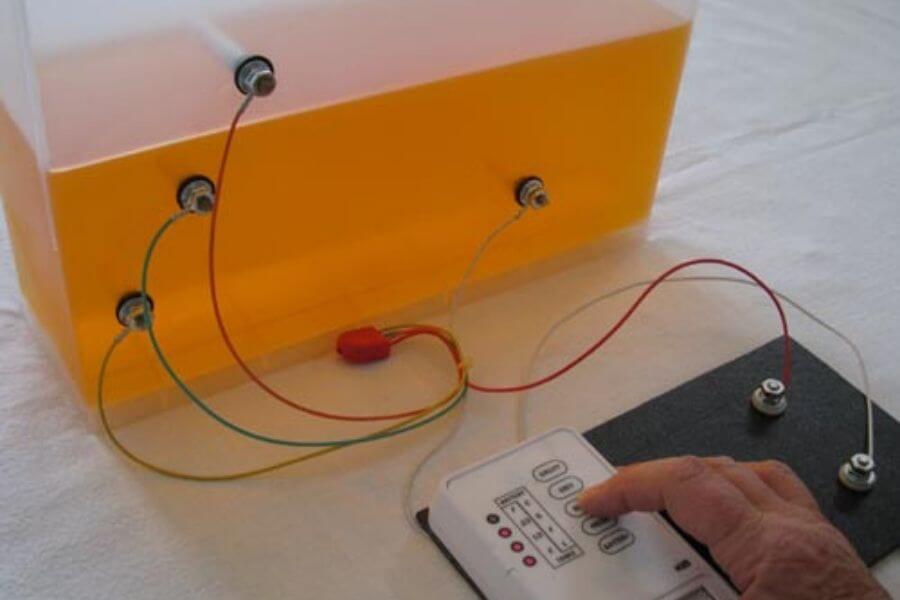
The design is simplistic. When the fluid level rises high enough the water conducts and small charge, which essentially completes the circuit, and trips the colored lights on the indicator panel.
Most RV manufacturers place multiple sensors at different heights. They turn on as the tank fills to let you know when it’s at a third, half, three-quarters, or nearly full.
Why Black Water Tank Sensor Not Working?
Sometimes wet physical debris can get caught on the sensors inside the tank, which completes the circuit, and ultimately causing a false reading.
This is even more likely to happen if you are going up or down a steep grade, or perhaps taking a sharp turn.
If you notice a light turn on when you’re going up or downhill, and it stays on, you might have some wet debris gumming up some of the sensors.
This is even more likely to be an issue if you notice something like a half-full sensor turn on, but the sensor below it does not.
Toilet Paper Can Be A Problem
There are some people who are very particular about the brand of toilet paper they use in their home. However, it’s hard to carry these personal preferences into your RV bathroom.
You see when you flush your toilet at home, the material and the toilet paper moves through the lines to the municipal sewer or a rural septic tank.
The toilet paper then gradually breaks down over time. In an RV black water tank, ordinary toilet paper can cling to the sensors, cause clogs and other complications.
To reduce the chances of this happening, you need to buy toilet paper that is specifically rated for RVs.
Manufacturers specifically design the fibrous blend to break down quickly to prevent the problems caused by ordinary toilet paper. Particularly, getting caught on the tank sensors.
Cleaning Your RV Black Water Tank In 3 Easy Steps
Flushing and purging with clean, freshwater is more of a maintenance procedure. If you have an older RV, or the tank has gone a little too long without a good purge, you should really consider giving it a deep cleaning.
There are a few different ways you can do this. The one that’s right for you is a little bit of a matter of personal preference.
Option Number One: Dishwashing Detergent With Ice Cubes
This is a convenient option if you are on the go and need to give your black water tank a thorough cleaning. In this method, you don’t want to use liquid soap, as it will cause foam and bubbles.
Option Number Two: Use A Tank Cleaning Wand
This is probably the most straight and direct way to clean your RV’s black water tank. You need to buy a special attachment, which costs less than $20 online.
The wand attachment is specifically designed to spray water with relative pressure from side to side.
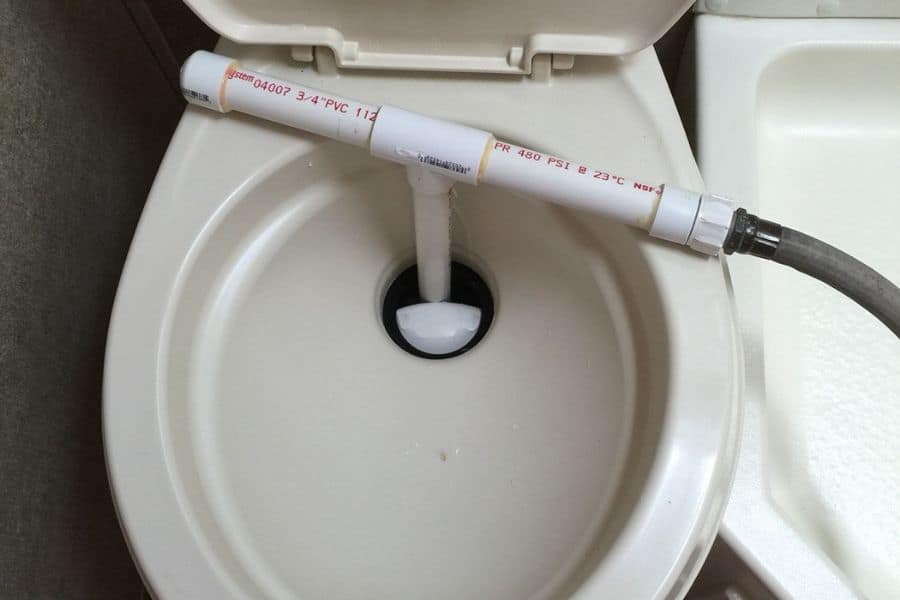
When you pull the wand out of the toilet, remember to wear gloves, eye protection, and keep your mouth closed.
It has a knack for spraying out little drips of water right after being in a bacteria-laden tank.
Option Number Three: Use Water Mixed With Chlorine Bleach
This option is a little controversial, in that heavy concentrations of bleach are known to damage certain rubber plumbing parts.
So, it’s not something you should be cavalier with. Yet chlorine does a great job of disinfecting the black water tank, killing bacteria and leaving behind a pleasant clean odor.
This will eliminate any remaining bleach in the tank after its done killing the germs and freshing the odors.
How Often Do I Need To Flush My Black Water Tank?
Sometimes even the most well-maintained black water tank, with RV toilet paper in it will still have a sensor malfunction.
The best way to prevent these frustrating faulty sensor readings is to routinely flush your black water tank and to use a good tank treatment.
There are some people who like to flush their RV’s black water tanks almost every time they dump.
How Do I Flush My RV’s Black Water Tank?
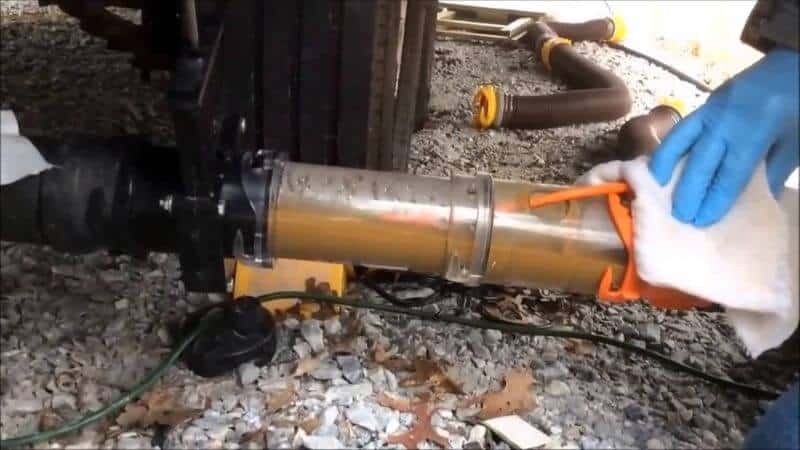
Flushing your RV’s black water tank is relatively easy. You can usually do this at an RV park that has water hookups and dump services.
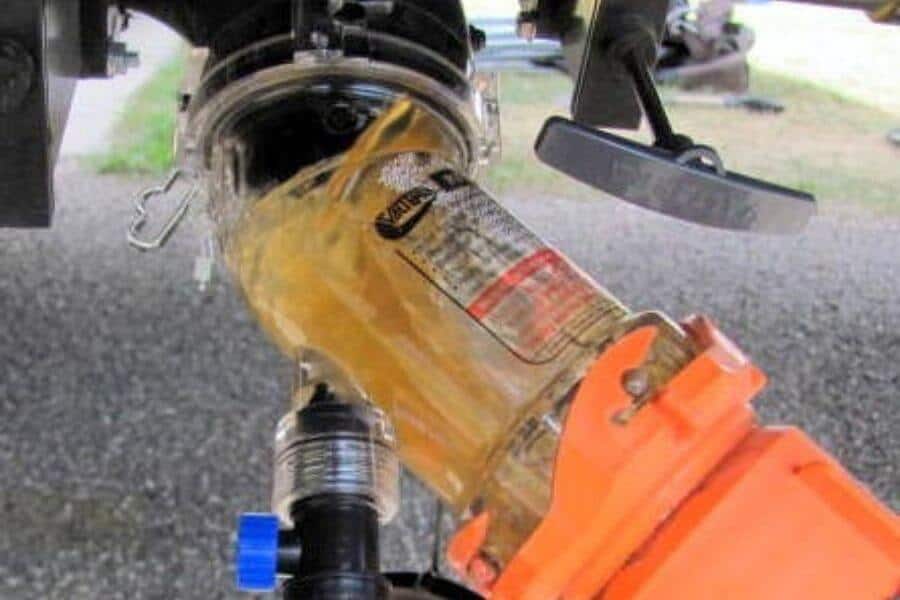
If the water doesn’t drain clear, or the tank sensor isn’t giving you an accurate reading, you may need to refill the tank and dump it again.
There was one time when my friend and I drained and flushed his RV tank three times, and the sensor was still acting like there was something stuck on it.
In a moment of desperate improvisation, we filled the tank to what we assumed was around halfway, then we drove around the back roads surrounding Cheyenne, Wyoming for half an hour. It ended up working, but it wasn’t perhaps the best idea.
In this case, the tank had been poorly maintained. If you are flushing your black water tank after every other drain, it will greatly reduce your chances of having something get stuck on the sensors.
How Do I Fill My Black Water Tank With Fresh Water?
This is certainly easier at an RV park or at home where you have freshwater hookups regularly available.
You simply let the toilet run or dump buckets of water down the drain. If you are at home, a simple garden hose poured down the shower drain will fill it in a hurry.
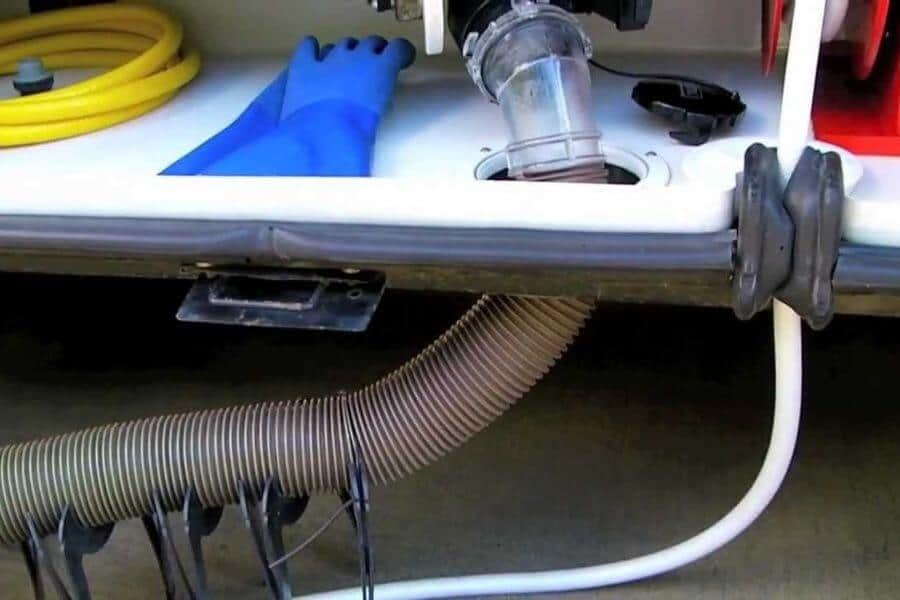
A more convenient option is to buy a special sewer elbow with a water hose attachment.
This allows you to full the black water tank from outside, without having to pass a garden hose through the window.
Just keep a dedicated garbage bag, or an old plastic comforter case to store the sewer elbow when you take it out.
The thing has a real knack of sticking little streaks of somewhat foul residue on it from time to time.
In Conclusion
There’s nothing like routine maintenance to help prevent problems when you are on the road.
Taking the time to clean out your black water tank before you leave on a trip reduces the chances of settled sludge from causing a problem.
When you are at an RV park on your adventure, taking the extra time to flush out your black water tank after every dump/drain, will go a long way toward helping things flow smoothly.



4 Comments
Don woodard
3 years agoWhat is wrong if it is drained and still reads the minimal amount on the black water tank? if I open the valve and take off the drain cap to let it air out it reads empty and as soon as I close the valve and replace the cap it reads minimal again. Keep in mind that nothing comes out, no water, no sewage, no nothing when cap is removed and valve is open.
Aaron Richardson
3 years agoIt is most likely due to wet debris stuck on a sensor knob.
Jim Plankl
2 years agoFirst off putting chlorine in any tank will deteriorate the rubber seals and kill any bacteria that develops when the tank gets solids in it.
2nd if you put a hose in the shower drain it will only fill up the gray water tank. The gray water tank and black water tank are two separate tanks and not connected together except at the discharge side with a valve for each tank.
Lakin Zoe
11 months agoEasiest way is soaking your holding tanks with dishwasher detergent. The holding tank sensors will dictate how much water you should add, however, you fill not more than half of the tanks.