The most common causes of RV furnaces not igniting include a faulty igniter, clogged burner assembly, low propane pressure, or thermostat issues. So when faced with this problem, first check the propane supply, then inspect the burner assembly for obstructions, examine the igniter, and confirm thermostat settings or batteries. But, in some cases, there’s more than meets the eye.
The issue of RV furnaces not igniting is a popular topic in our RV community. RVers who are even mechanically inclined would tell us they tried some troubleshooting but to no avail and had to resort to taking it to a technician.
If you are currently faced with this problem, chances are you’ve done what the average RV owner would do—start the heater several times to force any potential air in the lines out. If that didn’t bring any luck, this article is for you.
Immediate Steps To Take
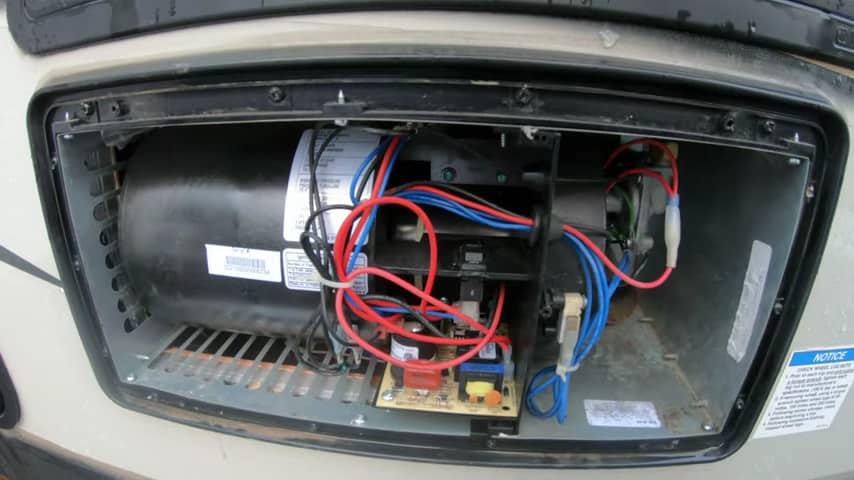
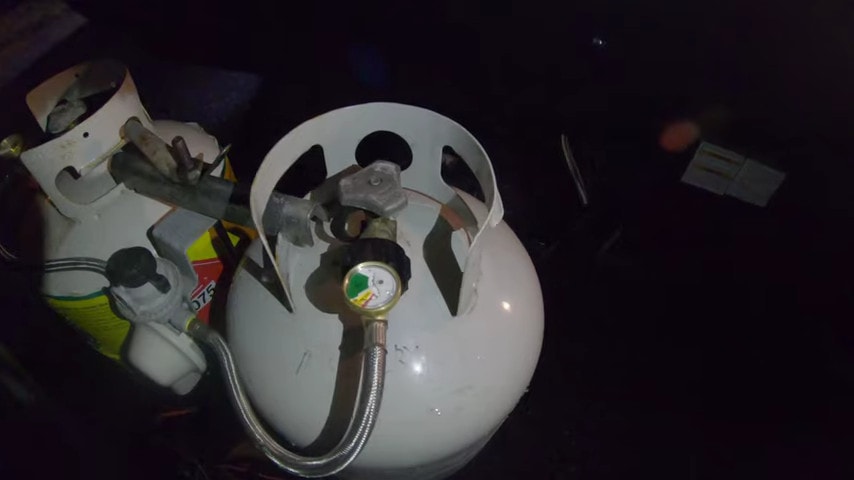
The first thing you want to do is check the propane supply and ensure the gas valve is open. As simple as it sounds, this was the leading culprit in many RV owner’s cases that we’ve helped solve in the past.
Next, inspect for obstructions in the furnace exhaust and intake vents. Confirm that the RV thermostat is set to a temperature higher than the current RV interior.
Check the furnace fuse and reset it if necessary. Examine the battery voltage and charge if low. Ensure there are no air pockets in the propane lines by cycling the stove burners.
However, just like any mechanical problem in RVs, the easiest way to fix furnace issues is first to quit guessing and identify the cause.
Common Causes of RV Furnace Ignition Problems
A few different things can prevent an RV furnace from igniting correctly or cause it to work intermittently.
Some common causes of a propane furnace failure include the following as illustration in the table below:
| Possible Causes | How it Prevents Furnace From Igniting |
| Problems with the propane tanks | If the propane tank is empty or the valve is closed, there won’t be a fuel source for the furnace. |
| Problems with the propane line | A blockage or leak in the propane line may hinder the gas flow to the furnace. Factors like visible damage, leaks, or obstructions could be the culprit in this regard. |
| Simple electrical problems | A fuse may be blown, or a wire may be faulty, which can prevent the electrical component from functioning correctly. |
| Problems with airflow | A clogged air filter, blocked vents, or a bad blower motor can cause the furnace to overheat and shut down. |
| Issues with the thermostat | A faulty thermostat may not signal the furnace to ignite or may provide incorrect temperature readings. The thermostat may not be set correctly, or its batteries are not charged, thus not communicating effectively with the furnace. |
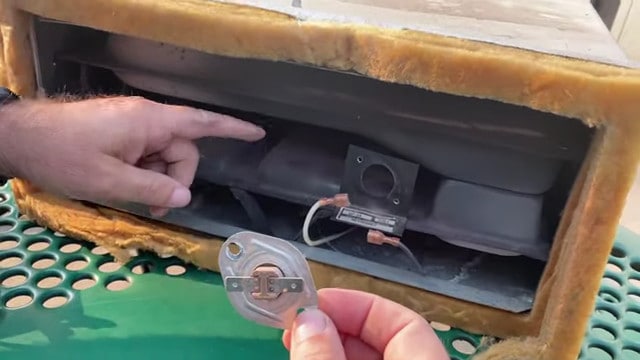
| A burned-out thermocouple and pilot light | The thermocouple senses the pilot light’s presence. If it’s malfunctioning or the pilot light is out, the gas supply will be shut, preventing ignition. |
The rest of this article will walk you through a step-by-step troubleshooting guide for the problems mentioned above. You will also learn further steps to take if the repairs don’t work.
But before you do anything, you have to take some precautions for your safety and to prevent further damage.
Safety First: Precautions Before Troubleshooting
Safety is critical when working on any heating system. Before embarking on the troubleshooting steps for your RV furnace, which I’m about to show you, follow these precautions:
- Turn off the gas supply power down the furnace: Locate the main gas supply valve and turn it off. This ensures that no gas is flowing to the stove during your troubleshooting; disconnect the power supply to the furnace.
- Allow time for cooling and ventilation: Let the furnace cool down before attempting any work. The heating elements and internal components can be boiling and may cause burns. If you’ve been using the stove recently, there may be residual combustion gases—open windows and doors to allow fresh air in and any potential gasses to dissipate.
- Safety gear: Wear safety glasses and gloves, if possible, to protect yourself from any sharp edges or potential debris.
- Remember the Emergency Shut-off: Identify the emergency shut-off switch for the furnace. This switch should be easily accessible, allowing you to turn off the furnace in case of an emergency quickly.
RV Furnace Not Igniting: Step-by-Step Troubleshooting Guide
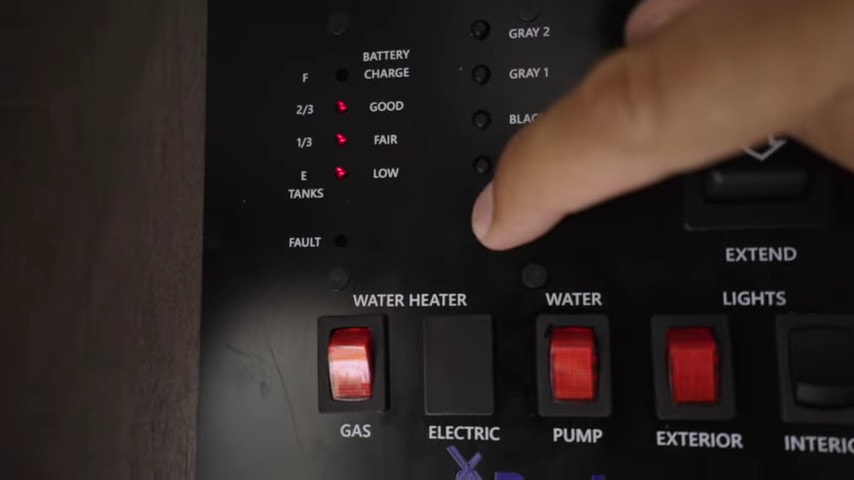
From the simple, most common solutions to the relatively complicated fixes, here is how you can solve the problem of RV furnace not igniting:
Step 1: Diagnosing A Problem With The Propane Tank Gas Lines
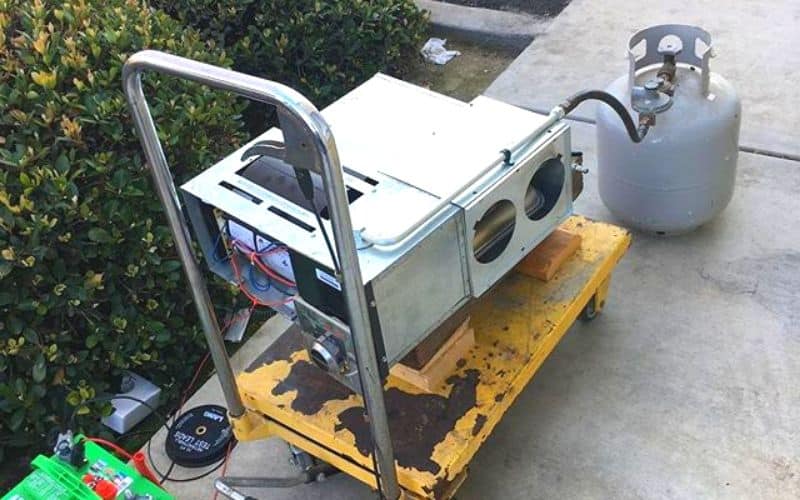
Diagnosing a failure with your propane tanks or gas lines starts with assessing if any gas is available.
You can do this by turning on the internal propane range, setting a two-way refrigerator to propane, or igniting any other appliance that runs off the same gas line.
If it works, then you can rest assured that it’s not the propane tank or the lines.
If you find no evidence of gas being available in the system, you should inspect the system, starting with the external tank.
Step 2: Addressing A Problem With A Propane Tank Or Gas Lines
It’s not unheard of for a propane coupler to come loose in cold weather as the metal contracts. Take a moment to check them all to make sure they are sufficiently tight.
If there were a leak in an internal line running through the RV, you would notice the telltale smell of rotten eggs.
If the leak is outside on the mainline, it might be harder to detect with just your sense of smell. Run a bare hand along the line, feeling for any cracks or damaged areas.
Make sure to check where the propane line enters the camper body. Sometimes, gaskets here can wear on a hose, causing a minor leak.
In a pinch, you can wrap a small leak with a copious amount of duct tape. If it works, it might get you through the night, but it’s not going to be a permanent fix.
Step 3: Minor Electrical Problems Can Cause causes ignition failure
The igniter on most RV propane furnaces needs at least 10.5 Volts to fire correctly.
If one or two of your onboard batteries have run desperately low or have been compromised, there might not be sufficient spark to ignite the system or operate the thermostat.
Sometimes, it’s simply a matter of a circuit breaker tripping. So, check the panel to make sure all the breakers for the furnace and thermostat are in the “On” position.
Fixing Electrical Failure In The Propane System
- Try switching over to a backup battery that can produce more than 10 Volts.
- In a moment of desperation, you might be able to use the 12 Volt battery from the motorhome or tow vehicle, but this is a “Last Ditch” sort of thing.
- The last thing you want is to be stuck in the woods with a dead vehicle battery as well.
You can watch this video to see how these steps for fixing electrical failure in the propane system were demonstrated:
Step 4: A Wiring Problem Could Prevent Electricity From Igniting The Furnace
If the onboard batteries show that they are delivering sufficient power to the system, you should check to see if the problem is related to damaged or loose wire. This requires a meticulous approach while following wires.
It should start at the furnace itself. Double-check all of its connections and wires.
Sometimes, the vibration of driving can rattle a wire loose or cause a connector to fall out.
It’s also possible for a wire to become overloaded and short ou or for the protective coating to be damaged.
Step 5: Dealing With A Low Or Dead Onboard Battery
A quick check with a multimeter will tell you how many volts are being delivered to the furnace. If it’s less than 10 Volts, then the problem is likely one of your onboard batteries.
Without sufficient power isn’t being delivered to the RV thermostat or the furnace, it won’t be able to ignite, and the fan might run slowly or not at all.
Try switching over to a backup battery that can produce more than 10 Volts.
This video shows further demonstration on how to go about it:
In a moment of desperation, you might be able to use the 12 Volt battery from the motorhome or tow vehicle, but this is a “Last Ditch” sort of thing.
The last thing you want is to be stuck in the woods with a dead vehicle battery as well.
Step 6: Battery Corrosion Can Interrupt Service
Take a close look at the battery terminals and the connectors. As time goes on, electrolytic corrosion can cause a white, gray, or even greenish material to build up on a terminal.
Left unchecked, it can prevent power from being delivered to the furnace system. Sometimes, a simple cleaning is all that’s needed to reestablish an effective connection.
Cleaning Corroded Battery Terminals:
- Create a slurry mixture of baking soda and water.
- Carefully disconnected the connections and wires from the corroded terminal.
- Apply the baking soda slurry to an old toothbrush and carefully scrub away the oxidized material.
- Use a clean paper towel to wipe off the baking soda thoroughly.
- Reconnect the wires to the terminal, and check to make sure power is being delivered to the RV’s internal lights, the thermostat, and the furnace.
Step 7: A Wiring Problem Could Prevent Electricity From Igniting The Furnace
If the onboard batteries show that they are delivering sufficient power to the system, you should check to see if the problem is related to damaged or loose wire. This requires a meticulous approach while following wires.
It should start at the furnace itself. Double-check all of its connections and wires. Sometimes, the vibration of driving can rattle a wire loose or cause a connector to fall out.
It’s also possible for a wire to become overloaded and short out or the protective coat to be damaged.
Step 8: A Damaged Wire Cause A Furnace Not To Ignite
If this doesn’t improve the situation, you should then check for any loose wires or connections between the battery and the furnace ignition system.
Sometimes, something as simple as corrosion on a battery terminal can prevent the necessary power from being delivered effectively.
If a wire or connection is loose, you will need to tighten it or clip, strip, and secure it with a wire nut.
A damaged wire might need to be patched, spliced, or maybe even replaced altogether.
Suppose the terminals on the battery are corroded. In that case, cleaning them with a mix of water and baking soda and scrubbing with an old toothbrush might improve the connection enough to deliver the necessary power.
Replacing a damaged section of wire:
- Use a wire cutter to snip out the damaged area.
- Carefully strip back an inch of protective coating on the two exposed areas of wire.
- Take a new place of wire that is a similar or thicker gauge and strip the protective layer by an inch on each end.
- Braid the exposed ends of the wire together. You can then solder them and wrap them with electrical tape or twist them securely in a small wire nut.
Step 9: Check And Tighten Any Loose Wires On The Thermostat
If you have a digital display panel on your thermostat and it is blinking or giving wildly inaccurate numbers, it might be due to a loose wire.
To check this, you need to remove it from the wall carefully. Check all the connections.
Some are held on by tiny screws that can come loose and just need to be tightened again.
Step 10: Checking And Replacing Internal Thermostat Batteries
In service RV, the thermostat isn’t directly connected to the onboard 12-volt batteries. These units often run on AA or AAA batteries.
In many of these cases, you will see the display screen blinking, refusing to acknowledge the press of a button, or even giving you a blank screen.
In a case like this, you might need to replace the batteries simply. While you are at it, check for corrosion on the connections.
Then, turn the thermostat on and give it a minute or two to reset its internal program.
Here’s a video demonstrating these procedures:
If it is indeed a simple low-battery power problem, the thermostat should act normally, and the furnace should fire again.
Common Mistakes to Avoid During Troubleshooting

The most common mistake that we’ve observed many RV owners make when confronted with an RV furnace not igniting is assuming what the problem is as opposed to actually diagnosing it.
Making assumptions about the problem may lead to ineffective or unnecessary repairs. You first have to diagnose the cause.
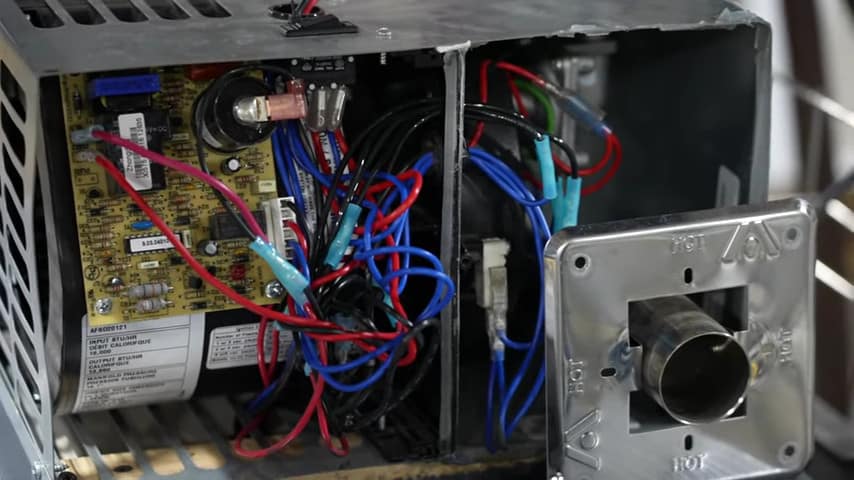
In a recent case where we fixed a 2005 Mallard, all the owner had to do eventually was disconnect the control board, check pins, clean out some dust, and put it back together, and it worked.
Apart from assumptions, here are some other mistakes you should avoid:
- Ignoring safety procedures: Overlooking safety precautions may result in accidents, especially when dealing with gas appliances.
- Rushing the process: Hasty troubleshooting may lead to overlooking critical details or misjudging the root cause of the problem.
- Neglecting power supply: Forgetting to disconnect power can pose electrical hazards during repairs.
- Not documenting changes: As you troubleshoot, take note of things you’ve done that didn’t work, as well as the shifts you made, especially while disassembling items.
Advanced Troubleshooting: When Simple Fixes Don’t Work
The RV thermostat is essentially the “brain” of the heating and cooling system. While they are meant to last for a long time, it’s not unusual for one to burn out or have a component fail.
In a lot of these cases, the sensor inside it dies, and you will need to replace the entire unit. Simple repair won’t work in this case.
However, there are times when something like a loose wire or a dead battery can cause the thermostat to fail.
When this happens, the message to ignite the furnace isn’t sent, and the safety systems in the stove don’t deliver any gas.
We have seen how to diagnose this in the previous section. If that doesn’t solve the thermostat issue, then it’s beyond DIY intervention.
When to Call a Professional: Recognizing Your Limits
The golden rule is that if you lack expertise in electrical systems, it’s best to seek professional assistance.
However, even when you’re confident in your DIY repair capabilities, the problem may be more significant than you assume. A solid way to tell of this is when these troubleshooting efforts don’t resolve the issue, or it recurs.
In such a case, you reach out to a technician.
Also, consulting a professional ensures warranty validity and prevents voiding due to DIY repairs or attempts.
Preventive Maintenance Tips to Avoid Future RV Furnance Issues

To ensure your RV furnace doesn’t give you ignition issues in the future, we strongly recommend you bleed the propane gas lines before you start on your every drive, especially when you’ve allowed the rig to sit idle for a few months.
Apart from that, do the following checks:
- Keep dust out of the duct vents, intake and exhaust valves
- Clean battery terminals in thermostats
- Check connections and wires periodically
- Dry out a heavy-duty vacuum
Doing these will not automatically make the RV furnace immune to issues, but it drastically reduces the chance of it happening.
For a more robust routine check plan for your RV, you can take advantage of our ultimate checklist guide compiled by RVers on our team for RV owners like you.

2 Comments
Andrew Pollard
4 years agoThank you for writing this. From now on maybe I can fix furnace by myself without the assistance of an electrician.
Walter E. Bennett
2 years agoThere are a variety of problems that can cause your furnace to produce loud noises. Types of noises such as scraping, banging, whistling, and popping may be a sign of a loose part, cracked heat exchanger, or dirty gas burners. Modern gas furnaces are much safer than electric space heaters, and furnaces are built to high safety standards. Although it is possible for a gas furnace to catch fire or explode, it is rare. If this happens, the furnace will usually shut down – just as it was designed.