Most RVs are well-known for having less-than-stellar insulation. This means they have trouble retaining heat in the winter but also heat up very quickly in the summer.
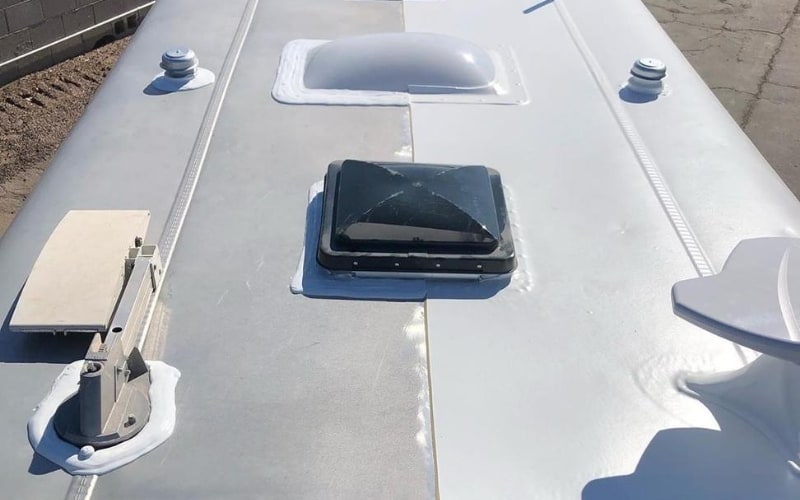
And in some cases, the RV vent fans are your only way to promote better air circulation through the living area of your rig.
One problem that’s common amongst older RVs is that vent roof vent fans either break or they become super noisy.
Not only can this be purely annoying from a day-to-day living standpoint, but it can also make your RV pretty uncomfortable to live in.
If you need to replace or upgrade the roof vent fans in your RV, it’s time to start researching the best RV vent fan options on the market.
But before you go poking around without a plan, you should know that there’s quite a bit of variety out there.
That’s why we’ve done the work to bring you six excellent options for the best RV vent fan your motorhome, travel trailer, 5th wheel, or camper.
We’ve also highlighted the most important factors you MUST consider before buying a new model. So let’s get into it!
6 Best RV Roof vent fans To Eliminate Moisture and Odors
We’re going, to be honest, narrowing down the field wasn’t easy. But these six options are the best on the market today.
Pay close attention to what we liked and didn’t like about each vent fan.
Then you can use those pros and cons when reading through our Buying Guide to find out how to compare these roof vent fans and select the best option for your RV.
Here are our top 6 picks for the best RV roof vent fans on the market :
1. Best Overall: Maxx Air 00-07500K Deluxe with Remote
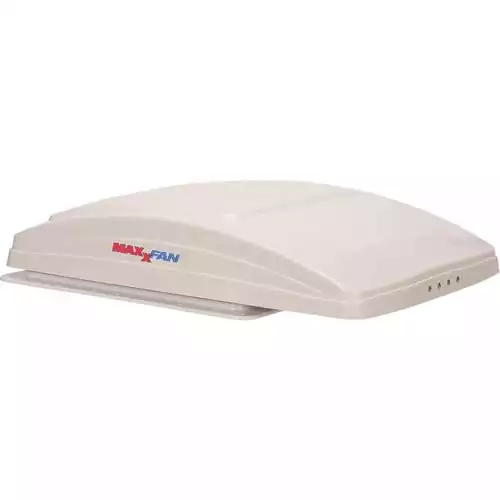
If you’re looking for the best overall RV vent fan, you can’t go wrong with the Maxx Air 00-7500K MaxxFan Deluxe.
It’s packed with a variety of useful features and it’s designed to fit all standard 14” x 14” RV roof openings.
This fan has a smoke-colored lid that actually provides a rain shield over the fan itself that’s bigger than the 14” x 14” opening in your RV roof.
The fan blade itself is 12 inches long and it includes a ten-speed motor for optimal airflow control.
It comes with a remote that allows you to dial in the fan speed, thermostat settings, airflow, and exhaust functions.
Oh, and yes, this camper roof vent comes with a built-in thermostat to help you better control the temperature inside your RV.
The lid on this fan opens with an electrical motor and includes twin arms for better resilience in high winds.
It boasts a 900 CFM rating and comes with all necessary mounting screws and hardware for easy installation.
Things We Like
Things We Don’t Like
2. Best For Quiet Operation: Fan-Tastic 3-Speed Manual RV Roof Vent Fan
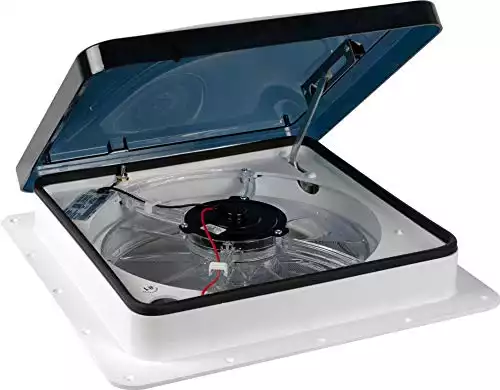
If you’re tired of the annoying noise that your old RV vent fan is making, you’ll love the quiet operation of the Fan-Tastic Vent 1200 Series.
This Fan-Tastic Vent 1200 Series is one of the quietest RV vent fans on the market and it features a powerful 12-inch fan blade to remove warm and air moisture from the cabin of your RV.
It fits all standard 14” x 14” RV roof openings and features a white base that will blend right into the roof of your RV.
The vent cover, however, is a smoke color that’s more resistant to UV damage over the life of the vent.
The 1200 Series rv roof vent features a 12-volt fan motor that can be adjusted to three speeds: high, low, and medium.
This not only allows you to optimize the amount of airflow the van is aiding, but it also reduces overall electricity consumption if you don’t necessarily need to operate the fan on high all the time.
The lid features a manual operation and also protects the roof opening from rain when it’s completely closed.
Additionally, there are a total of ten blades on this camper roof vent, which help to maximize airflow and provide more efficient performance.
Things We Like
Things We Don’t Like
3. Best For Maximum Speed Control: Maxxair 0007000K RV vent fan With Remote
If having maximum control over the speed of your fan’s blades is your priority, the Maxx Air 0007000K MaxxFan Deluxe will be one of the best RV roof vents for you.
This fan offers a total of ten speeds and it also includes an exhaust fan for those mornings when you forget to take the bread out of the toaster in time.
This rv exhaust fan model has a maximum CFM rating of 900 and it includes a lid that opens and closes using its remote control.
The fan can continue to run even if the lid is closed, which gives you maximum versatility to keep promoting airflow even if it’s raining and you don’t want to open the vent cover.
It also includes a built-in thermostat that can be customized to your ideal settings.
This allows you to better regulate the temperature inside your RV without constantly having to adjust (and re-adjust) your fan’s mode of operation.
It fits all standard 14” x 14” RV roof openings and the lid opens and closes using two arms for better protection against high winds when it’s open.
This fan also features a 12-inch, 10-blade fan with sealed ball bearings for a smoother, quieter operation.
Things We Like
Things We Don’t Like
4. With Reversible Air Flow Control: Fan-Tastic 801250 1250 RV vent fan
If you want an RV roof vent exhaust fan that can be adjusted to bring fresh air in or push stale air out, the Fan-Tastic Vent 801250 1250 Series includes a reversible airflow control that gives you just that ability.
It also includes a self-sealing vent cover that prevents drafts or moisture leaks.
The 1250 Series RV exhaust fan includes a 10-blade fan that promotes better air circulation than fans with fewer blades.
It can also be customized to three different speeds (high, medium, or low) to give you more control over air movement and energy consumption.
This vent fan fits all standard 14” x 14” RV roof openings and it comes with all necessary hardware to complete the full installation (minus the roof sealant you’ll need to put around it to ensure your roof is watertight again).
This roof vent also includes a built-in thermostat for better environmental control.
This feature helps you regulate the temperature inside your RV according to your personal preferences.
It also reduces the number of times you’ll have to manually adjust the fan’s settings.
Things We Like
Things We Don’t Like
5. Best Budget-Friendly: HENG’S 14″RV Roof Vent Kit with 12 Volt fan
Those of you that need a quick RV vent fan replacement on a tight budget should look no further than the Heng’s 14” Roof Vent Kit #71112-A.
It fits all standard 14” x 14” RV roof vent openings and comes with all the necessary screws and hardware for a complete installation, including butyl tape to reseal the edges of the fan once it’s in place.
This last point is a huge selling point for this vent kit because it means that you won’t have to purchase any additional roof sealant or seam tape to make sure your roof is still watertight after putting your new roof vent fan in.
The fan itself has six-inch blades and runs on a standard 12-volt motor.
There’s a fine mesh screen under the fan to prevent large debris from coming in throughout the opening when the vent cover is open.
The galvanized steel roof flange on this vent fan provides a really strong and secure finish for the fan to be installed on your roof.
And the vent cover itself comes in white color to blend in naturally with the color of your roof.
Things We Like
Things We Don’t Like
6. Best For High Performance: Livpow 3 speed Universal rV Roof vent Fan
And lastly, those of you searching for a new Universal RV vent that performs comparably to the absolute best models, but doesn’t cost as much, should look into the Livpow 3-Speed vent fan.
It has a maximum CFM rating of 950 on its high setting, but it can also be used on a lower setting if you’re interested in conserving energy or RV battery charge.
This vent fan fits all standard 14” x 14” RV roof vent openings and it’s compatible with RV roofs that are anywhere between two inches and 9.75 inches thick.
It’s a three-speed fan that also operates quietly so that you can leave it on at night without it keeping you awake if you’re a light sleeper.
This van uses a standard 12-volt motor and the vent cover is operated manually when you want to open or close it.
The smoke-colored lid also helps to reduce the amount of UV light that enters your RV through the roof vents, which can reduce UV degradation on your rugs, wood floor, linoleum, and countertops.
All of the other speed settings on this fan are also controlled manually and the fan itself features ten blades for better air circulation.
It also comes with all the screws needed for the installation and you’ll only need to worry about connecting a total of two wires to make the electrical work for this fan.
Things We Like
Things We Don’t Like
How To Choose The Best RV Roof Vent Fan?
So now that you’ve found out more about what we like and don’t like about these six RV vent fans, it’s time to learn how to choose the absolute best one for your rig.
In this Buying Guide, we’ll cover how to compare the features and specifications of select fan models in order to make the best choice possible.
Size of Your RV Roof Vent
The first thing you’ll need to check on is whether a certain vent fan will fit in the openings that they’re designed for.
These openings are a fairly standard size (14” x 14”) on most RVs, but you should always double-check that your rig doesn’t have non-standard vent openings.
You could, of course, cut a larger opening if you’re set on a fan that’s a little larger than the openings currently on your RV.
But this requires a lot more time, energy, and careful customization. So we only recommend it for RV owners that have experience with custom fabrication.
But aside from the square dimensions of the vent openings, these fan models are also designed for roofs of different thicknesses.
For example, RVs with air conditioning vents in the roof will typically have thicker roofs (also known as a “drop ceiling) than rigs that only have vents in the A/C units themselves.
This means that you also need to measure the thickness of your vent openings before making a purchase.
This will help you avoid having to return an incorrectly-sized fan or having to start down the road of a custom fan installation.
Speed Control
Most fans allow you to control their speed depending on your preference. Some models have three speeds and the most expensive ones have up to ten speeds.
Speed control is one of the features of vent fans that really comes down to personal preference and how you’ll mainly be using your fan.
For our money, a ten-speed vent fan sounds nice, but we’re not sure you’re really going to need ‘setting 4’ for the slightest difference it provides when compared to ‘setting 2’ on a three-speed fan.
So be aware of how much speed control you really need and whether you’re willing to pay for that extra control in the form of a higher-priced fan.
CFM Rating
CFM stands for ‘cubic feet per minute’. But when it comes to RV vent fans, this metric is used to refer to the amount of air per minute that a fan can move or remove.
As you might be able to predict, a fan with a higher CFM rating will be able to remove heat and moisture from your RV at a higher rate.
That being said, vent fans with a higher CFM rating tend to be more expensive.
This means that you’ll need to balance your need for adequate heat and moisture removal with the need to keep your fan purchase within your budget.
As a general rule-of-thumb, we recommend a vent fan with a minimum CFM rating of 900 if you have a larger (30+ feet) class A RV, travel trailer, or 5th wheel.
However, if you have a smaller RV, camper van, or cab-over camper, a fan with a lower CFM rating will still perform well and will also help you save a little money.
Required Amperage
You’ll also need to check the amperage that a given fan requires to make sure that your RV’s current electrical setup is capable of supplying sufficient power to your new fan.
And additionally, a fan’s amperage draw will have an impact on how much power your RV uses as a whole.
A fan that requires a higher amperage will ultimately cost you more money if your RV is plugged into the grid.
And if you’re running your fan from the power supplied by your RV battery, a fan with a higher amperage draw is going to deplete your battery more quickly in an off-grid situation.
On average, most RV vent fans draw about three amps on their highest settings. But there is certainly variation amongst the higher and lower-priced models.
As you might guess, a fan with a higher CFM rating (i.e. a more powerful fan) will also draw a higher amperage when running.
Going for a fan with an amperage draw close to three amps will allow you to find a nice balance between performance and cost savings.
But if you have a larger RV, trailer, or 5th wheel (or if you live in a particularly hot climate), you might want something with a little more power and, as a result, a higher amperage draw.
On the flip side, RVers with smaller rigs can get away with a fan that has a lower amperage draw because they have less interior space in their camper.
This makes it easier for folks with camper vans, cab-over campers, or smaller Class C RVs to save money on their annual electrical costs.
Ease of Installation
If you choose a replacement RV vent fan that has the exact same dimensions as your existing model, the installation process should be a piece of cake.
You should simply need to remove screws, unhook a few electrical leads, and take your old vent fan out of the opening. From there, you can simply reverse the process to install your new vent fan.
But while some of the best RV vent fans come with all the necessary hardware you’ll need for a complete installation, this isn’t always the case.
So if the model you choose doesn’t come with any of the requisite hardware, the installation process might be a little more difficult.
Additionally, installing an RV vent fan means temporarily compromising the watertight seal of your RV’s roof.
If there’s seam tape or roof sealant around the edges of your existing vent fan, you’ll need to remove that in order to get your old fan out.
And (you guessed it!), that means you’ll also have to reseal around the edges of your new fan once it’s screwed in place and the wires are connected properly.
So if you’re looking for a vent fan that comes with everything you need for a complete installation, you’ll need to find a model that also comes with some sort of roof sealant or seam tape so you can make sure your RV’s roof is still watertight after your new vent fan is secured in place.
Method of Lid Opening
There are two basic methods used to open the lids on an RV vent fan: manual and automatic.
Choosing between the two is largely a matter of personal preference, but your choice will ultimately impact the total cost of your new RV vent fan.
On average, fans with an automatic lid opening feature are going to cost more than fans that require you to open the lid manually.
Fans with automatic lids may also require additional electrical installation to make sure they operate according to their advertised functionality.
Fans with manual lids simply have a small crank knob that you can turn to open the lid.
These knobs aren’t hard to operate and also give you maximum control to open the lid as much (or as little) as you desire.
For these reasons, our experience tells us that lids that open automatically are more of a pure luxury than an absolute necessity when choosing an RV vent fan.
Frequency of Use
The extent to which you’ll be using an RV vent fan on a regular basis will dictate whether you should opt for a budget-friendly model or one that’s a little more expensive.
If you’re a part-time RVer, for example, it doesn’t make sense to purchase a high-end fan if you only use your rig a handful of times every year.
On the other hand, a higher-quality model can offer a lot of benefits for full-time RVers, especially if you live in a hot climate for most of the year.
If you’re always struggling to keep your rig cool or simply circulate air to combat the buildup of humidity, you’re going to want a higher-end fan with higher-quality performance.
Extra Features
The basic purpose of an RV vent fan is to remove heat and moisture from the cabin of your RV.
And they should also help with air circulation or venting smoke out of your rig if you burnt the breakfast potatoes again.
But some of the fancier models come with extra features that can be quite useful.
Some examples of these extra features include remote control operation, built-in thermostats, and electric motors to open and close the lids.
While we wouldn’t consider any of these features “essential”, they can make your life easier and your living space more comfortable.
As you’re choosing the right RV vent fan for your needs, you’ll need to consider just how important these extra features are to you.
While useful, choosing a vent fan with these extra features will almost always lead to paying for a higher-priced fan when it’s time to check out.
Price
And speaking of price, most of us have to factor our bottom line into the equation before we pull the trigger on buying a new vent fan.
The good news is that a quality RV vent fan can be purchased for anywhere between $60 and $200.
While the higher-end models could cost more than that, they also tend to last longer and come with a bunch of extra features.
At the end of the day, you should also remember to factor in the cost of roof sealant and any additional hardware you’ll need to install your new vent fan.
This will help you calculate your total expenses for the project and make sure you stick to your budget.
So, Which Is The Best RV Roof Vent Fans in 2020?
We chose the Maxx Air 00-7500K MaxxFan Deluxe as the best overall RV vent fan because it fits all standard 14” x 14” RV roof openings and comes with a remote control that allows you to dial in fan speed, exhaust function, and other settings.
It also includes a twin-armed vent cover that’s much more resilient to heavy wind gusts.
But if you simply need a budget-friendly option to make a quick replacement, you won’t go wrong with the Heng’s 14” Roof Vent Kit.
Frequently Asked Questions
These roof vents are far from the most complicated pieces of technology in your RV.
But there are definitely important steps you can take to make sure you install them correctly and maintain them properly.
So let’s answer the most frequently asked questions about RV vent fans to help you use and maintain them in the recommended manner.
How to install an RV vent fan?
The exact method for installing an RV vent fan will depend on the model you choose.
We highly recommend following the instructions that come in the manual for your specific vent fan in order to complete an accurate installation.
Fortunately, most RV vent fans come with all the necessary mounting hardware and screws that you’ll need for an easy installation.
If they don’t, however, you’ll need to factor in the cost of that extra hardware when comparing different models.
But what most vent fan manufacturers don’t tell you is that a proper installation will require the removal of any existing roof sealant or seam tape around your old vent fan just to get it out of the way so you can install a new one.
Most RV vent fans have some sort of roof sealant or seam tape around their edges to prevent water from leaking inside your RV (or into the roofing and causing dry rot!).
If your roof vent doesn’t have this type of sealing around it, you should be a little nervous and you might use this opportunity to check on the integrity of your RV’s roof, in general.
But if all is as it should be, you’ll need to peel seam tape or slice through roof sealant in order to get your vent fan off.
In some cases, this tape or sealant may be covering the screws that are holding your vent fan in place.
So you’ll need to expose those screws in order to remove your old fan before you even consider installing your new one.
And then, once you’re confident that you’ve followed the installation instructions carefully and your new vent fan is securely installed, you’ll need to reseal its edges to make sure your roof is still watertight.
But before you do this you should double-check to make sure electrical connections are secure.
Cycle through all of the fan speeds and thermostat settings to make sure everything works as it should before starting the process of resealing the edges of your new vent fan.
Otherwise, you’ll end up wasting seam tape or roof sealant if you have to remove it to further tinker with the electrical wiring of your vent fan.
Unfortunately, there aren’t many (if any) RV vent fan models out there that come with roof sealant.
This will be necessary to reseal your roof once you remove the old fan and put a new one in.
So make sure you do some research on the best RV roof sealant as well.
And if you do get confused or lost during the installation process, many of these popular models have installation videos that you can find online.
So don’t hesitate to search for YouTube videos that will help you install your particular vent fan model successfully!
How can I replace an RV vent fan cover?
RV vent fan covers are one of the components that are most likely to sustain damage over the life of your rig.
They are the most exposed to UV rays hitting the top of your RV and they can also become damaged by any projectiles falling on your rig.
As a result, you may find yourself having to replace the fan cover, even if you (hopefully!) don’t have to replace the fan itself.
So let’s discuss a few tips for replacing an RV vent fan cover properly!
Tip 1: Find The Right Replacement Cover
We recommend always going straight back to the same manufacturer that made your RV vent fan.
While there are other (and often cheaper) replacement covers available out there, the only way to ensure compatibility is to purchase a replacement made by the same company that manufactured your original vent fan.
If, for some reason, you can’t find a replacement cover from the manufacturer of your vent fan, just make sure the cover you purchase matches the size of your existing fan.
Most standard covers measure 14” x 14”, but there is some variation out there. So just be sure you get the right size cover for your replacement.
Tip 2: Park Your Rig in the Shade
Replacing your vent fan cover will require spending a bit of time on the roof of your RV.
So if you don’t want to bake in the direct sunlight while you’re removing your old cover and installing the new one, we recommend parking your RV on a level spot in the shade before starting the removal and replacement processes.
Tip 3: Get Up Onto The Roof
Starting from the top of your RV will make the replacement process easier. So if your RV has a ladder on the back, climb up safely and make sure you bring all the necessary tools and equipment with you the first time around.
This will minimize the number of times you need to go up and down the ladder to complete the replacement.
If you don’t have a ladder on your rig, you’ll need to safely position a freestanding ladder so that you can get access to your RV’s roof.
A ladder with spikes that allow you to secure it in the ground is best if you’re doing this job by yourself.
But if you don’t have one of those ladders, we recommend finding a helper that can hold the ladder stable while you climb up.
Tip 4: Remove Your Old Cover
Most vent fan covers are held in place by a small pin that’s located on the cover’s hinge. Removing that pin is the first step to removing your old cover.
From there, you’ll need to locate the tabs on the edges of your roof vent that are holding the cover in place.
These tabs will need to be straightened so that they are no longer holding the cover in place. It should then be easy to lift the old cover off.
Tip 5: Install Your New Cover
After removing your new cover from its packaging (and being careful not to let any trash blow away!), you’ll start your installation by lining up the tabs on your vent with the slots in your new cover.
Place the cover down so that the tabs go through the cover’s slots and then close the tabs so that they’re holding the new cover in place.
Next, you’ll simply need to insert the pin (or pins) back into the hinge and tighten them to complete your new cover installation!
Can I use my new RV vent fan in all types of weather?
Yes! Most RV vent fans are weather-resistant and designed to work in all conditions. Some, however, require the fan cover to be opened before the fan itself will power up.
Because of this, you simply might not want to operate your vent fan when it’s raining outside because you may have some water getting inside of your rig.
Additionally, you’ll always need to be careful about opening the cover on your vent fan during high winds.
In the worst cases, large wind gusts can rip the cover off of your roof vent and leave you with (essentially!) a large hole in your roof.
This is also why your vent covers should always be closed before you drive your RV to a new destination.
Should I get an RV vent fan insulator?
If you live in your RV full-time, yes! But even if you only use your rig part-time, a vent fan insulator will help keep your RV cool in the summer and warmer in the winter.
These insulators are very affordable and super easy to install in your vent openings. Camco is one brand that we’d recommend if you’re looking into getting insulators for your RV vents.
What are the best RV vent fan brands?
All of the vent fans on our list are made by reputable brands that are trusted in the RV, travel trailer, and 5th wheel industry.
But if you want to know our top three choices for the best RV vent fan brands, we’d recommend Maxx Air, Fan-Tastic Vents, and Heng’s.
Conclusion
If you’re anything like me and you tend to get distracted when you’re cooking breakfast potatoes, then you need an RV vent fan that works.
Otherwise, you’ll be stuck with waving around a piece of cardboard or your cutting board to try to get the smoke out of your rig!
We don’t want you to have to go through that misery, so we recommend getting the best RV vent fan that’s compatible with your rig.
Not only will it help you remove smoke from your rig after your most recent cooking blunder, but it will also promote air circulation to keep your rig cooler during the summer months!

