Renewable energy alternatives are already popular for many new homes and green construction projects.
For RV owners, installing a solar panel on your RV roof is a great way to reduce your energy costs and increase your ability to live off-the-grid.
But can solar power really generate enough wattage to power large appliances like your RV air conditioner?
So can you power an RV air conditioner with solar? Yes, It is definitely possible to power even the largest RV air conditioning unit with solar power, but you’ll need to design your installation based on the size of your A/C unit and how much starting and running wattage it requires. These two factors, along with the size of the panels you install, will dictate how many panels you need to effectively use solar power for RV air conditioner power supply.
For example, many RV air conditioning units require somewhere between 1,700 and 3,500 starting watts and 600 to 1,500 running watts.
The exact wattage needs of your A/C unit, as well as the size of the solar panels you want to install, will dictate how many panels you need for a useful solar installation.
So how can you properly set up your rig to use solar power for your RV air conditioner and other appliances?
In this article, I’m going to explain the intricacies of setting up a solar power installation for an RV air conditioner.
I’ll also cover how solar panels work for an RV, how to choose panel size, and some frequently asked questions about solar power for RVs.
But first, let’s briefly talk about the pros and cons of solar energy!
RV Solar Power Pros and Cons
Solar energy is often touted as a “unending power source,” the reality of harnessing solar power is still a bit complicated.
Since you’re here researching solar power for your RV, I’m assuming you already know a bit about the topic.
So I want to use this section to simply provide a few important advantages and disadvantages of solar energy.
The Pros of solar panels for RV
The biggest advantage of solar energy is renewability. Every day, the sun is going to rise, even if it’s cloudy and your installation isn’t able to function at optimal efficiency.
Putting the question of whether or not there are clouds in the sky to the side, the biggest benefit of solar energy is that it’s 100% renewable.
Another benefit of solar energy is decreased reliance on the electric grid. For most RVers, the ability to plug in (or not) often dictates our travel itineraries.
Even when it’s not operating at 100% efficiency, solar energy can reduce your overall electricity costs and give you more freedom to explore remote locations.
Solar energy can also be used for a variety of applications. While we’re focusing on using solar power for RV air conditioners in this article, solar energy can also be used for heating and other electrical applications.
Lastly, solar energy also requires very little maintenance. Once you have your panels installed and wiring run correctly, you’ll probably only need to worry about cleaning your panels off three or four times a year to keep them operating efficiently.
The Cons of Solar Energy
The most glaring disadvantage of solar energy is the initial setup cost. It’s not necessarily cheap to acquire solar panels to begin your RV solar power installation.
Then you’ll need batteries, wiring, an inverter, any necessary hardware to secure your panels properly to your RV’s roof.
Solar energy is also very dependent on, you guessed it, cloud cover. Panels need direct sunlight to operate at peak efficiency.
Weather doesn’t always cooperate and it sometimes can be difficult to find a place to park that will give your panels direct sun exposure.
Battery storage can be expensive and inefficient. Hooking batteries up to your solar panels allows you to charge them up while the sun is out so that you can use that energy for your appliances at night.
Unfortunately, large-capacity batteries can be quite expensive.
Although the technology is rapidly improving efficient solar panels still require quite a bit of space.
Depending on the size of your RV and your power needs, your panel installation might end up taking up most of your existing roof space.
How Solar Panels Work for an RV
To understand how solar panels can work for an RV air conditioner (or other appliances), we have to first understand the various parts of a proper solar installation.
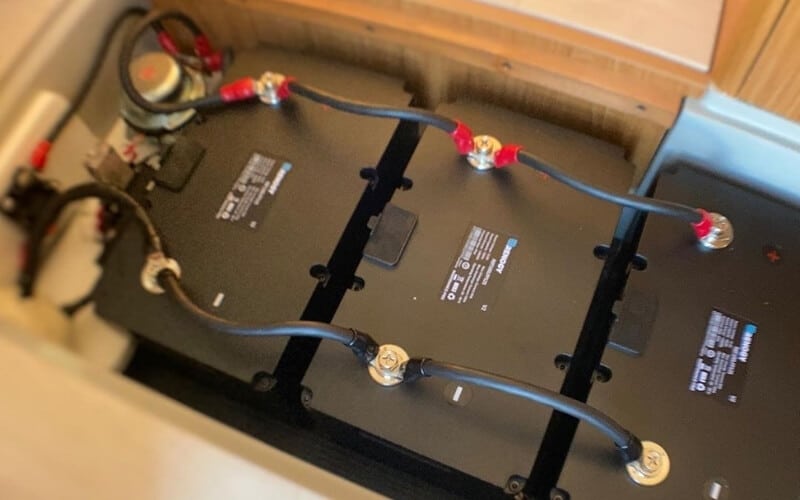
At minimum, you have the solar panels themselves and a collection of batteries (often known as a ‘battery bank’) that provides power directly to all of your RV’s 12-volt DC electronics.
In order to power any 120-volt AC electronics, like your air conditioner, you’ll need to install an inverter as well. In short, the panels collect solar energy and charge up your battery bank.
The battery bank supplies electricity directly to 12-volt DC electronics and indirectly, through an inverter, to 120-volt AC electronics.
From a more technical standpoint, the function of a solar panel is actually to allow particles of light to free electrons from atoms.
In doing so, panels supply a flow of electricity into the battery bank to which they are connected.
That electricity is now stored in your batteries, but the amount of electricity you can store depends, at least somewhat, on the size of your batteries.
The electrical panel on every RV has an AC side and a DC side. Common batteries used in solar installations are able to supply power directly to the DC side of your RV’s electrical panel without the need for any conversion.
Getting power to the AC side of your RV’s electrical panel, however, does require a conversion.
This means you’ll need to wire in an inverter between your battery bank and the AC side of your electrical panel if you want to use solar power for an RV air conditioner.
All in all, the installation process isn’t overly complex, as long you understand the flow of energy from panel to battery to DC or through inverter to AC.
But the question of whether or not you can use solar power for RV air conditioner power supply really comes down to the size of the components (panels, batteries, inverter) that you select.
How to Power an RV Air Conditioner with Solar
In order to provide enough power for an RV air conditioner, you’ll need to understand how much electricity the unit on your specific RV requires.
Then it becomes a matter of selecting the right size panels, batteries, and inverter to meet those electrical needs.
1: Choosing The Size Of Your Solar Components To Power An RV Air Conditioner
For starters, you’ll need to know how many amps your air conditioner pulls during operation. Many RVs come with a standard air conditioning unit with a 13,500 BTU rating.
There are, however, certain RVs with larger A/C units rated much higher.
For the purposes of the calculations throughout the remainder of this section, we’re going to use averages for a 13,500 BTU air conditioning unit.
If your RV’s electrical panel has an LED display that tells you how many amps you’re pulling, figuring out your draw might be as simple as turning on your A/C unit and reading the display.
However, this could also be a great opportunity to employ an RV surge protector with an LED display if your rig’s electrical panel doesn’t have a built-in LED monitor.
Once you know how many amps your air conditioning pulls at different settings, you’ll have a few figures to work with as you determine the size of the various components you’ll need for your solar energy installation.
2: Figure out how many solar panels you need To Run Your RV AC
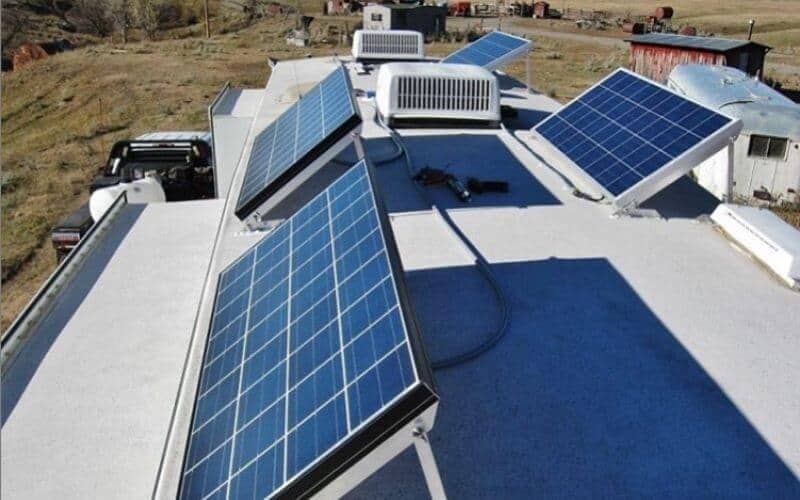
In addition to the amperage drawn by your air conditioner, you should also think about how many hours a day you intend on running your A/C unit.
Running your A/C for four hours a day, for example, will draw 600 Ah per day from your batteries.
If we assume that you’re parked near a hill where you only receive five hours of direct sunlight over the course of the day, then your solar panels will need to generate 120 amps for those full five hours every day in order to adequately recharge your batteries.
So, How many solar panels do You need to run an RV air conditioner? In order to keep this level of operation up for that 13,500 BTU A/C unit in your RV, you’d need to install a minimum of 1,728 watts of solar panels (120 amps x 14.4 volts = 1,728 watts).
This calculation assumes that you really do receive direct sunlight for that full five hours every day and that you’re not running any other appliances besides your air conditioning unit.
3: Sizing RV battery bank
Now we get to the actual storage of electricity. This involves a little less complex calculation, but it’s still an important part of sizing up your solar installation.
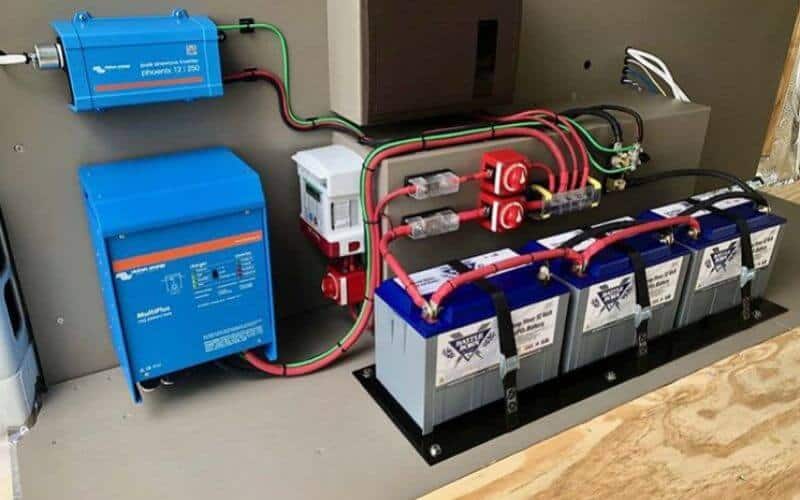
With this A/C unit that draws 150 amps, we’re going to need an extra 150 Ah of capacity for every hour that you plan to run your A/C at night or simply when the sun isn’t shining directly on your panels.
I know that I’ve liked to run my A/C for an hour before I go to bed so that I’m more comfortable trying to fall asleep.
But that requires an extra 150 Ah of battery capacity that I might not have with my current setup.
The capacity of your battery bank will determine how long you can continue to operate your RV conditioner on cloudy days or in the evenings.
Using my above example, if my current capacity is 500 Ah, I’d have to boost that up to closer to 650 Ah if I wished to run my A/C for that hour before climbing into bed.
Calculating your minimum Ah capacity requires an understanding of several factors. First, you’ll have to determine your average electrical usage per day (measured in Watt hours).
Next, you’ll need to decide how many days of backup battery capacity you want to have on hand in case of emergency, or simply if you’re into off-grid RV travel.
Then, you’ll need to analyze the average depth of discharge for your current battery bank. And finally, you’ll need to determine the average temperature your batteries will be exposed to wherever you’re living or traveling.
Here is a great table that provides an example of how to calculate minimum Ah capacity for a battery bank:
4: Connect the Inverter to The RV Solar Power System
The last essential piece of your solar installation is the DC-to-AC inverter. The size of your inverter will largely depend on the starting wattage of your air conditioning unit.
Most 13,500 BTU air conditioners have a starting wattage between 2800 and 3000 watts. However, you don’t want to necessarily max out your inverter every time you start up your A/C.
So, you’ll most likely want an RV inverter between 3500 and 4000 watts. Of course, this number will be higher if you have a larger air conditioning unit that requires a higher starting wattage.
Running wattage, on the other hand, is usually less than starting wattage for all RV appliances, including your A/C unit.
That being said, be careful to look at starting wattage over running wattage when determining how large of an inverter to incorporate into your solar installation.
While it’s possible to use a smaller inverter along with a soft start to reduce starting wattage, the safest way to design your installation is to use an inverter that’s rated for 700 to 1200 watts higher than the starting wattage of your RV air conditioning unit.
How To Install Solar Panels On Your RV
When mounting solar panels on the roof of your RV, the method of installation will depend on whether you’ve chosen rigid or flexible panels.
Rigid panels require screws for secure mounting while certain flexible panels can use an adhesive material to affix to your roof.
If you do go the flexible panel route, make sure the material of your roof membrane is suited to the adhesive material you’re using to secure panels.
Step 1: Layout Your Panels
Start by laying out your panels where you envision mounting them.
Make sure nearby vents or air conditioning units aren’t going to cast shade on the panels where you intend to mount them, as this will compromise the efficiency of your installation.
It also makes sense to mount your panels as close to your battery bank as possible to avoid using excess wiring.
Step 2: Secure Mounting Hardware
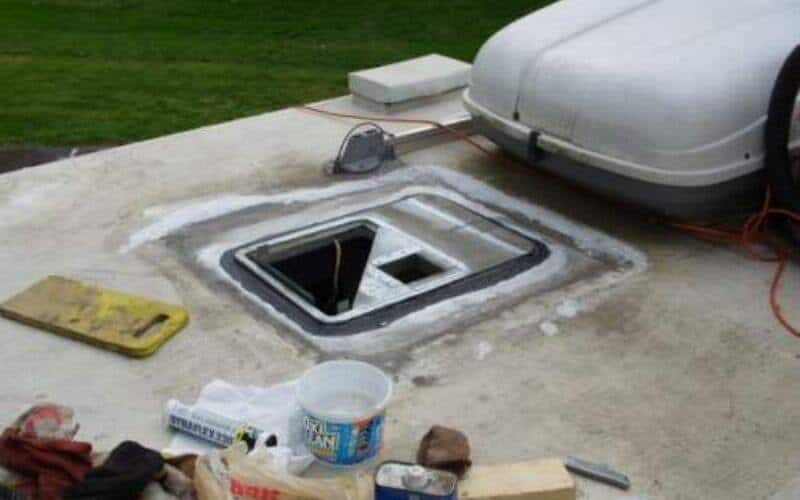
Next, secure the mounting hardware to your roof, being careful to apply an appropriate sealant under the hardware so that you maintain your roof’s watertight seal.
Make sure the sealant you choose is compatible with your roof membrane. You can always check with your RV manufacturer if you’re not sure.
Step 3: Attach Panels to Mounting Hardware
The next step is to screw the panels themselves into the mounting hardware.
Be careful to aim for the frame of the panel so that you avoid screwing directly through the panel itself.
Doing this will reduce the effectiveness of the entire panel.
Step 4: Run Wiring To Battery Bank
Once your panels are securely in place, it’s time to run wiring down into the RV and to your battery bank.
Three places that are commonly used to run wires down into the body of the RV are the refrigerator vent, a plumbing pipe, or simply by drilling a new hole in your desired location.
With all approaches, make sure you take appropriate steps to weatherproof all areas where changes have been made once wiring is run.
Step 5: Connect Battery Bank to Electrical Panel (and Inverter!)
Finally, you’ll need to connect wiring to your battery bank and then run additional wiring to your RV’s electrical panel, or through an inverter before tying into the AC side of your panel.
Throughout the wiring process, it’s a healthy practice to use a multimeter to check wire polarity and mark wires appropriately for future reference.
This will help you troubleshoot any issues that arise down the road and reduce the likelihood of failures on your initial tests.
It should be noted that messing around with electricity is no laughing matter. If you don’t have electrical experience, I recommend seeking professional assistance in this stage of your solar installation.
Is the Cost And Hassle Worth it?
This is a tough question to answer because everyone assigns different values to the pros and cons of solar energy that I outlined above.
Solar energy, however, is definitely a long term investment and it requires running the numbers on your current electrical costs, costs of a solar installation, and lifetime savings over the life of your RV.
If you have a smaller RV with limited roof space, it probably doesn’t make much sense to invest in solar power because the number of panels you’ll need to obtain an efficient operation will be too numerous to fit on your roof.
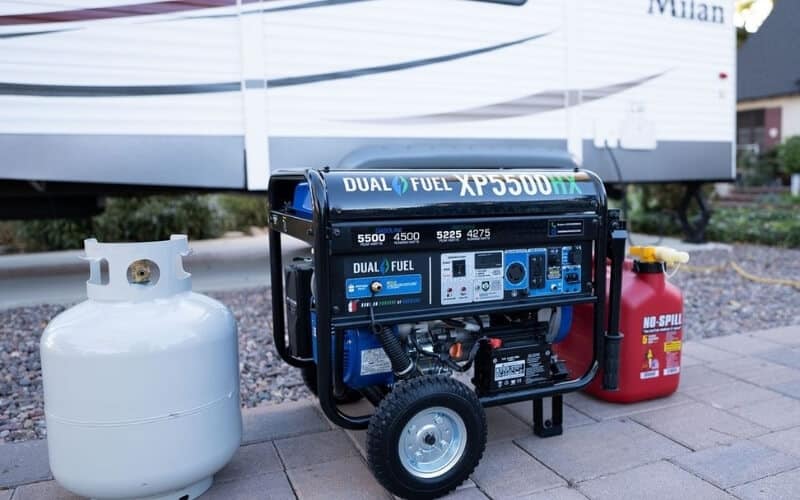
For off-grid RV living, however, a solar panel installation can help you avoid burning through gallons of fuel running your generator all night or finding your batteries completely depleted when you finally decide to “re-enter” civilization.
Even full-time RVers who wind up spending a ton on electrical energy costs can benefit from a small solar installation that reduces their overall energy consumption from the grid.
But if you only take your RV out for a handful of trips every year, you’ll probably find that the initial investment into a solar installation isn’t really going to bring a healthy ROI over the life of your RV.
Frequently Asked Questions
While I hope you’ve already learned a lot about using solar power for RV air conditioner applications, I’m sure there are a few more helpful hints I can provide.
So I’ll use this section to answer some frequently asked questions about solar power and solar installations.
Is there a simple formula for calculating RV solar power needs?
Relatively simple! But you must start by understanding the electrical system size of your RV in kilowatts (kW).
From there, multiply that number by 1,000 to get your system size in watts (there are 1,000 watts in 1 kilowatt).
Then, decide on the wattage capacity of the solar panels you intend to install. Finally, divide the first number by the second to get your solar power needs. For reference:
A 30 amp RV plug supplies a maximum of 3,600 watts (3.6 kW).
A 50 amp RV plug supplies a maximum of 12,000 watts (12 kW).
RV System Size: 3.6 kW
Wattage Per Panel: 300 watts
Panels Needed: (3.6 x 1000) / 300 = 12
What kind of wattage will I need to run my RV air conditioner?
This depends on the size of your A/C unit, but here are some common wattage ratings for different units:
-
7,000 BTU A/C = 1,700 starting watts and 600 running watts
-
10,000 BTU A/C = 2,000 starting watts and 700 running watts
-
13,500 BTU A/C = 2,750 starting watts and 1,250 running watts
-
15,000 BTU A/C = 3,500 starting watts and 1,500 running watts
What are BTUs?
BTU stands for ‘British Thermal Units’. It’s a unit used to measure thermal energy but, more specifically, it represents the amount of energy needed to raise one pound of water by one degree (Fahrenheit) at sea level.
In heating and air conditioning applications, this measurement signals how many BTUs per hour the unit can add or remove from the air.
Conclusion
From where I’m standing, clean, renewable energy is the wave of the future.
For RVers in particular, I believe that investing in solar energy from the outset can save you considerable money over the life of your RV.
For example, you’d probably be shocked if I told you how much I paid just in electric costs to heat my RV for a winter in the mountains.
We get great sun exposure here too, so we would’ve saved ourselves quite a chunk of change if we had installed solar on the roof to at least reduce the amount of electricity we were pulling from the grid.
Solar technology continues to improve, so keep an eye out for updates in this department and best of luck installing your RV solar setup!


1 Comment
JBrown
3 years agoSkip the batteries and buy a hotspot mini split. Direct PV input, no grid or inverter needed.