One of the best parts about having an RV is the opportunity to enjoy an outdoor living space fully. The awning on your RV is an essential part of that outdoor space.
The awning can protect you and your gear from the rain and, more often, give you some much-needed relief from the sun.
If you’ve camped anywhere with your RV and utilized the awning, then you know full well that the awning picks up a lot of dirt and grime.
Maybe you’ve travelled through the Adirondacks and after parking under trees for a week, your awning is left covered in sticky sap stains.
Or even worse, mold and mildew have grown from extended use in a humid climate. That’s why proper upkeep and maintenance should be a primary concern for all RV owners.
Now, we know that we want to keep our RV in tip-top shape, so that means knowing how to clean your awning correctly and how often to clean your awning. Ideally, awning cleaning should become a regular part of your RV care regimen.
Follow these 7 simple steps to clean your RV or camper awning:
- Hose both sides of your awning RV awning off
- Prepare your cleaning solution
- Spray awning cleaner on the underside
- Apply cleaning solution on the top of the awning with brush
- Gently Scrub the fabric at any mold or mildew stains
- Rinse the both sides of awning with your hose
- Let awning dry completely
Now that you know the process but listing them out like this comes off a little vague. But don’t worry! we go into great detail about this cleaning process in the rest of this article.
Keep reading and I’ll break down the steps of the process and offer up some professional tips and tricks to quickly and efficiently clean your RV awning. I’ll also answer a few other questions that might be rattling inside your mind.
why you should clean your RV awning
Before I jump in to give you our “how-to” guide to cleaning your RV awning, let’s talk about why it is crucial to keep your awning clean. Like anything, with time and use, your awning can degrade.
However, there are protective measures you can take that will lengthen the lifespan of the awning.
Consistent cleaning is one of the most accessible and most affordable ways to keep your awning at its best.
When we talk about cleaning, we don’t just mean dusting the awning off. We want to get a deep clean that rids the materials of dirt, grime, and protect it from the potential of mold or mildew.
While bird poop and dirt can be an issue, the bigger culprit of awning degradation is mold and mildew so avoiding those are a priority.
Mold and mildew can usually be prevented by doing one thing: never rolling up your awning when it is wet.
This isn’t always possible, especially if you are on a specific travel schedule. Plus, there are always those instances when you think the awning has dried out completely, but there was a bit of damp material left.
Whether or not you have mold or mildew, it is recommended that you clean your RV awning at least once per year.
Most RVers do this while winterizing their RV. If you are a full-time RVer, I personally recommend a quick clean every couple of months and then a deep clean once a year.
Now, let’s talk about proper cleaning methods.
How to Clean Your RV Awning: Step by Step
There are a few ways to clean off your awning effectively. We will provide information and steps for two different cleaning methods below.
There is a lot of overlap in the process for both cleaning options, so they will be listed together.
Materials Needed
The good news is that cleaning your RV awning doesn’t take all that long, and you don’t need a lot of materials to get the job done.
Here’s what you need:
-
Water Hose
-
Cleaning Solution
-
Spray Bottle
-
Optional: Stiff-bristled brush (acrylic awning) or a soft-bristled brush (vinyl awning)
1: Hose Both Sides Of Your Awning RV Awning Off
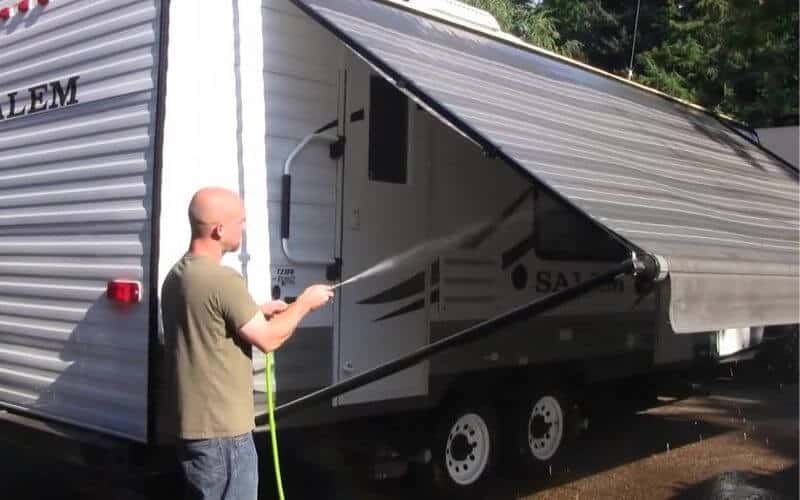
The first thing that you need to do is set up your awning. Once the awning is appropriately set up, you’ll need to get your water hose.
Hose the awning off entirely before doing anything else. This will clean any loose debris and prep the material for the cleaning solution.
You should spray both the top and the underside of the awning material. If you regularly use your RV and the awning or are a full-time RVer, hosing the awning off is an easy way to keep it clean.
You should do this once or twice a month and then deep clean once a year. If you are doing this “quick clean” make sure that the awning is thoroughly dry before closing it.
2: Prepare your cleaning solution
For the cleaning solution, you can choose to purchase a specialty cleaner for awnings. If you don’t feel like doing that, you can easily make your own.
Optional Homemade Cleaning Solutions:
- Dish soap is a popular cleaner for awnings as it is soft and an item most people have on hand. Dawn dish soap does particularly well, but any dish soap will work.
- Simple Green
- Hydrogen Peroxide
- Pinesol
- Car Soap
Best Cleaners for Tree Sap:
- Isopropyl Alcohol (works best)
- Clorox Clean-Up Spray
- Peanut Butter
- Formula 409
- Turpentine
How to make a cleaning solution
- Make sure spray bottle is clean and rinsed or use a bucket if using a brush
- Mix two parts cleaning agent with eight parts water
Some people will choose to use a bleach solution when cleaning their RV awning. This is not recommended unless you have a particular stain or hard to kill mold.
Try to use the bleach solution in an isolated area, not across the entire awning. Prolonged and frequent use of bleach will lessen the life of the awning and cause it to deteriorate faster.
You should also avoid using oil-based cleaning agents, anything causatic, and anything abrasive. All of these types of solutions can cause more harm than good.
If you’re unsure about the cleaner that you’ve chosen, test it on a small area of fabric to see how the awning reacts. If it discolors the awning or leaves residue behind, avoid using that substance.
3: Spray Awning Cleaner On The Underside
Be sure that your awning is correctly stabilized for the next few steps, especially if you are cleaning with a brush.
The easiest way to clean underside of your camper awning is to spray the underside with the cleaning solution.
If you do not have a spray bottle, you can use a brush to dip it in the solution and spread the solution across the material.
If you are using a brush, make sure the bristle type is appropriate for the awning materials.
Acrylic awnings should be cleaned using a stiff-bristled brush, and vinyl awnings should be cleaned using a soft-bristled brush.
Whichever way you choose to apply the cleaning solution, be sure the fabric is completely saturated.
4: Roll It Up or use Brush To Apply Cleaning Solution On The Top
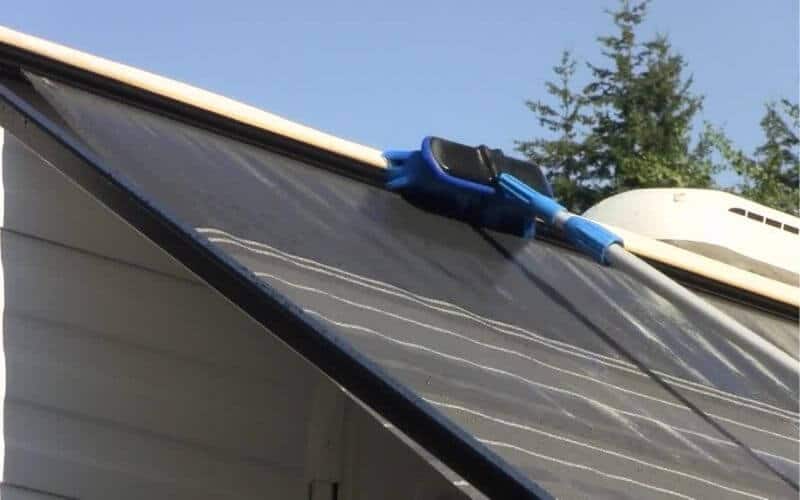
For the next step, personally, I think it is much easier to simply roll the awning up and let the solution sit. Plan to let the solution sit on the awning for about one hour.
During that time, the cleaning solution will have had time to soak and penetrate both the top and the bottom parts of the material.
If you prefer, you can also use a long-handled brush to apply the cleaning solution to the top of the awning.
When you clean the awning this way, you will only really be able to let the solution sit for about five minutes, or it will dry.
Rolling the awning up and letting the cleaning solution sit on the fabric for longer will give the material a deeper clean. Plus, it is a lot easier than trying to reach all corners of the top of the awning with a brush.
5: Rinse The Both Sides Of Awning With Your Hose
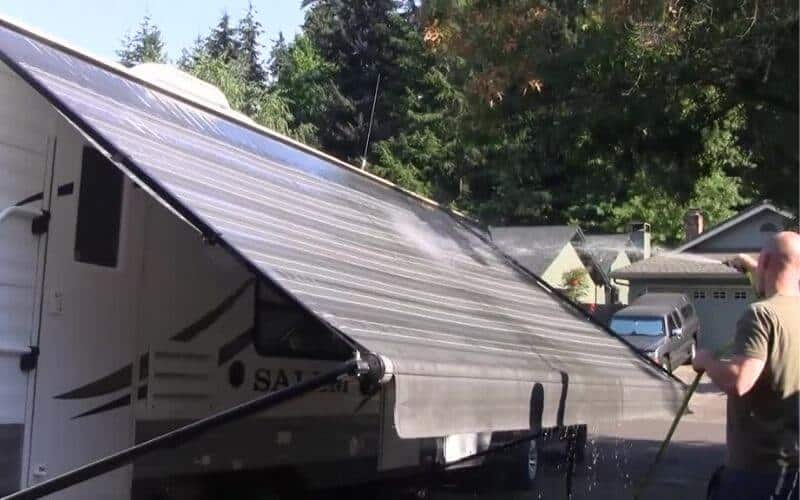
After you’ve let the solution sit for the appropriate time according to your chosen cleaning method, now it is time to hose the awning off.
If you chose the roll-up technique, then you’ll need to unroll the awning and then spray it down.
Either way, be sure that you spray both the top and the underside or the awning materials. You want to make sure that you can wash away the cleaning solution completely.
If there are pesky stains or mold spots that aren’t coming off easily, then scrub these with your brush and spray again.
6: Let your RV Awning Dry Completely
The final step is one of the most important ones. The camper awning needs time to fully dry before you roll it back up.
If you roll it up when it is even slightly damp, all your hard work will go to waste as you’ve created the perfect environment for your awning to grow mold and mildew.
If you can, let your awning dry in a sunny area. The sun will further enforce the killing of mildew, and it can help speed up the drying process.
Also, keep in mind that if you live in a humid climate, it may take longer for the awning to dry.
If the top is dry, but there are areas underneath that at taking too long, you can always point a fan at the bottom of the awning to help it dry faster.
Does Awning Material Change How You Clean?
There are three different types of materials that your RV awning can be: vinyl, acrylic, or a general heavy-duty fabric.
The most common materials are acrylic or vinyl so we will focus on those.
How you clean your awning can be influenced by the type of material your awning is made from, but when it comes down to the bare bones of it, it is basically the same process.
Cleaning Vinyl vs. Acrylic Fabric
Acrylic awning fabrics will be a bit more challenging to clean than vinyl. This is because the acrylic fabric is a woven material, so dirt and other things can hide between the threads.
Since it is a woven fabric, it will also often come with a waterproof finish. Most other heavy-duty fabrics that some RV companies use will be similar to acrylic material.
Most waterproof finishes or coatings will not last forever, and they will end up coming off. When you are cleaning the awning, be sure not to scrub too aggressively, or you could wear this coating off much faster. You can reapply protective and waterproof sprays after you’re done cleaning as well.
The vinyl material will be easier to clean because it isn’t a porous surface. Vinyl awnings are also much more resistant to mold and mildew, but they still need to be cleaned because they’re not mildew proof.
When you are cleaning vinyl, you likely won’t have to let the cleaning solution sit as long as you would on acrylic.
The spray, roll, sit, and spray method is ideal for acrylic materials because you can avoid using a brush.
If you don’t want the process to take so long, and you have a vinyl awning, you can always use a brush instead of rolling up the awning.
Should I pressure wash my RV awning?
We also get a lot of questions about if you should pressure wash your awning.
You can use pressure washer to clean your RV awning, but I don’t recommend it. The high pressure can easily damage your awning material and do more harm than good. If you decide to try it, monitor the progress often to be sure that you aren’t damaging the awning materials.
How Often Should You Clean Your RV Awning?
As a general rule, you should plan on cleaning your RV awning at least once a year. Most RV owners choose to do this when they winterize their RV and put it into storage. You can also clean it after you’ve taken it out, and you are prepping it for the camping season.
If you are a full-time RVer or use your RV year-round, then you should stick to the “clean it if it looks dirty” method.
As stated earlier, you can keep your awning relatively clean by merely hosing it off with water every so often. Then, every couple of months, do a deep clean as described in this article.
How Else Can I Protect My RV Awning?
If you are cleaning your RV awning as a way to help it last longer, there is more that you can do to further protect it.
There are plenty of protective sprays and coatings that you can apply to your awning to help protect the material from water, mold, and UV rays.
Generally, after you clean your awning and you have let it fully dry, that is the best time to apply any kind of protective coating.
The cleaner the fabric is when you use the coating, the better it will adhere to the materials.
You should plan to do this every time you do a deep clean. So, at a minimum, apply protective coatings once a year.



2 Comments
Brennen Thomas
2 years agoSometimes when the awning is rolled up, it creases and collects some water and moisture which may have caused mold to form. It happened quite often and it bothered me a lot. Your measurement catches my attention. I will use these to remove mold and barn stains from the trailer cover. A friend of mine also showed me how to clean quickly and effectively with Magic Eraser.
I will try these remedies.
Jack Ducan
1 year agoIt’s too expensive when using cleaner but it can be highly achieved effectively. It can even restore its shine and color.