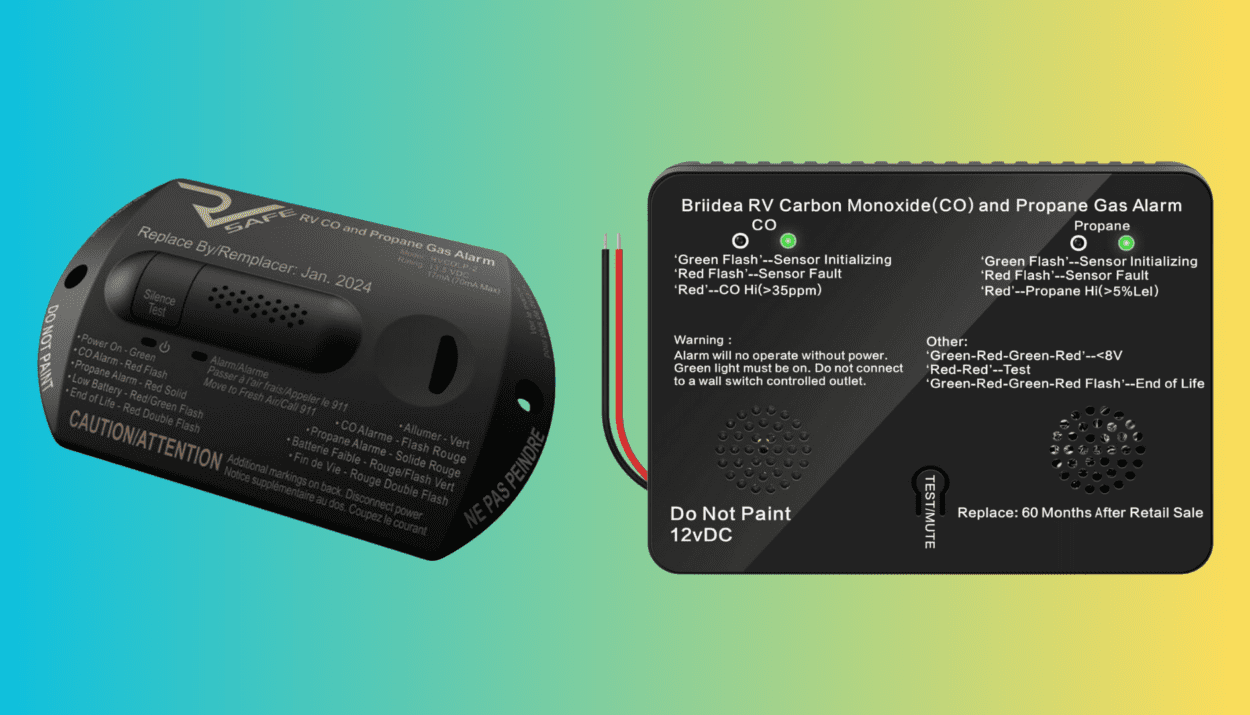
The battery-changing process is pretty straightforward. Find the battery compartment and remove the cover to access the old batteries. After inserting the new batteries in the proper direction, replace the cover and test the detector to ensure the fresh batteries are working.
In this article, I’ll walk through a step-by-step process to replace the batteries in most RV carbon monoxide and propane detectors. You’ll learn some tips and tricks I’ve picked up over the years to make the process quick and easy.
Checking If The RV Carbon Monoxide Detector Is Working
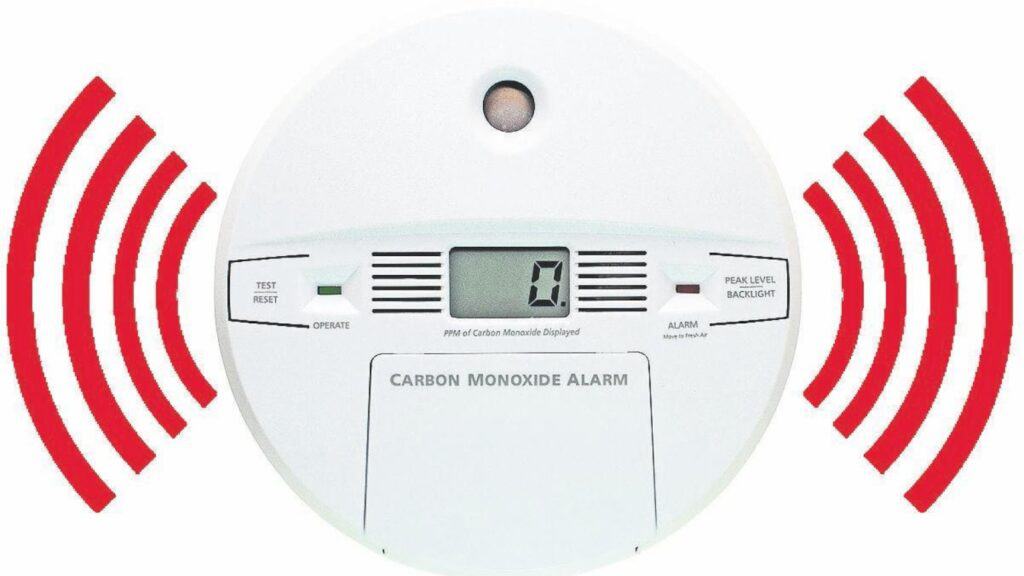
RV carbon monoxide detectors have a “Test” button on the front panel that you must push to check if the detector is functioning. Press and hold the test button for between 5 and 15 seconds until the alarm makes a loud beeping sound or you see some flashes. This will verify that everything is working correctly.
I advise testing detectors once a month during camping season to confirm the batteries and alarm are in good shape. Testing before each trip gives you peace of mind. While testing, inspect your detector for any signs of wear or damage.
If the detector is not working, you must either replace the batteries or buy new ones. On the other hand, if the detector keeps beeping, read here to know why.
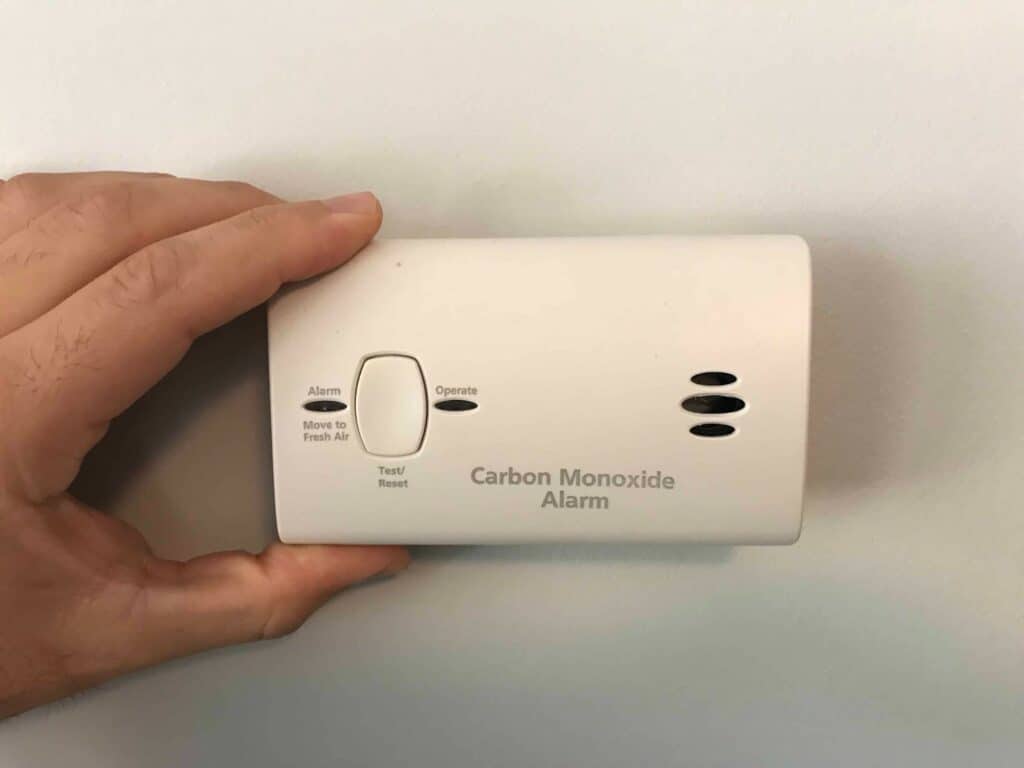
See the Test/Reset Button on the left side of the RV Carbon Monoxide Detector (Image credit: https://prudentreviews.com/)
When To Replace The Battery In The RV Carbon Monoxide Detector
As RVers, we rely on our trusty carbon monoxide detectors to alert us of any dangerous gas buildup. But these devices need power. A few clear signs indicate the carbon monoxide detector battery needs replacement.
- Intermittent beeping, like a single beep every minute: This distinct one-beep-per-minute is programmed into many CO detector models to indicate the batteries are running low.
- Continuous beeping: Some models will emit a constant, uninterrupted beep when battery power is low rather than intermittent beeps.
- Chirping sounds specifically signaling low battery: Some detectors use a unique chirping noise, different from the alarm sound, to warn the batteries are getting depleted.
- Flashing light or beeping end-of-life warning indicating time to replace entire detector: Higher-end detectors will have visual and audio warnings letting you know when the whole unit needs to be replaced, usually after 5-7 years.
- Routine maintenance: Replace batteries in all carbon monoxide detectors every six months or a year as standard practice, even if they seem to work fine.
- Replace the entire carbon monoxide detector every 5-7 years: CO detectors have a limited operational lifespan. Most manufacturers recommend replacing them with a new unit after this period.
Source
When To Replace The Batteries In RV Propane Detectors
The RV’s 12-volt electrical system powers most RV propane alarms, while others are battery-operated. Here are some signs that indicate it’s time to replace the propane detector battery:
- Random false alarms: The battery is probably low if the alarm is going off for no reason.
- End-of-life beeping: Some models have a unique beep signaling the battery is depleted.
- Power loss causes alarms: Low RV batteries can cause the propane detector to malfunction and alarm.
- More frequent false alarms: Detectors often get overly sensitive and prone to false alarms when the battery dies.

Propane RV detector – Battery operated. Notice the layout is similar to an RV Carbon Monoxide detector (Image credit: Amazon.com)
To keep your propane detector working properly, replace its battery once a year as routine maintenance. Mark your calendar so you remember to swap in a fresh battery annually.
Changing The Battery In The RV CO And Propane Detectors In Ten Easy Steps
Follow these steps when performing the carbon monoxide detector battery replacement. Note that these steps also work the same for battery-operated RV propane detectors since the layout of both detectors is mostly similar. The method of replacing RV propane detectors wired into the RV system differs, and I will cover it afterward in this article. You should:
- Locate the battery compartment on the back or side of the detector. You’ll likely need to take the unit down from the wall/ceiling mount to access the battery compartment properly.
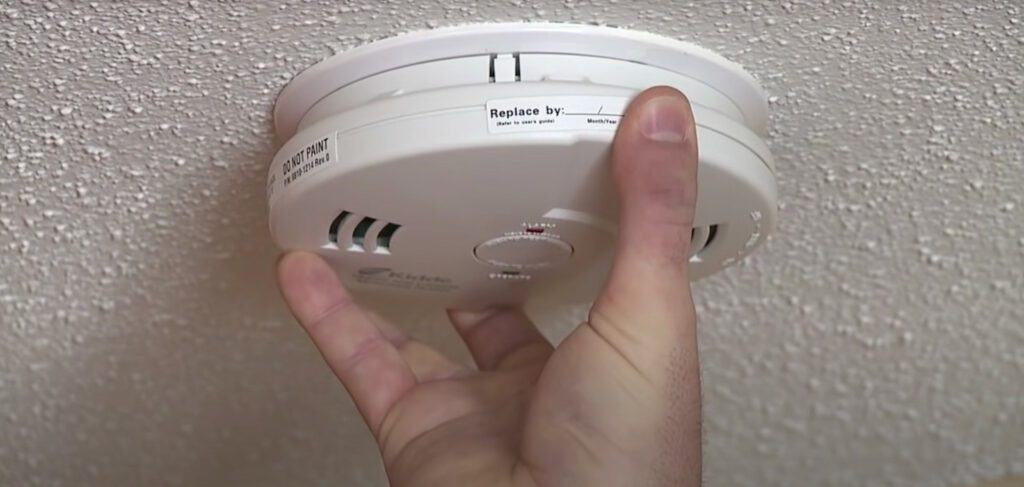
Reach out for the ceiling and remove the detector by turning it counterclockwise. If it has wires, disengage them. Source
- Remove the battery cover by unscrewing any screws or disengaging any snap-on clips. Set the cover aside carefully.
- Remove the old batteries one at a time, making note of the positive/negative orientation. Discard the used batteries properly according to local regulations. Never simply throw batteries in the trash.
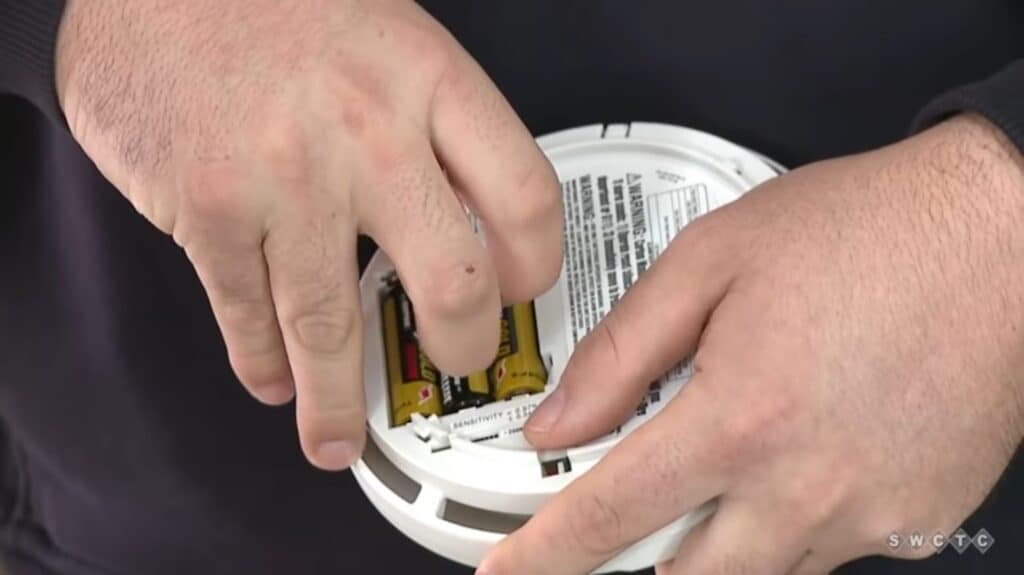
Removing the batteries from the RV CO detector: Source
- Refer to the manufacturer’s manual to identify the necessary replacement battery types. Typically, 9V or AA batteries are required.
- Insert the new batteries following the marked positive/negative polarity. Double-check that each battery is facing the proper direction.
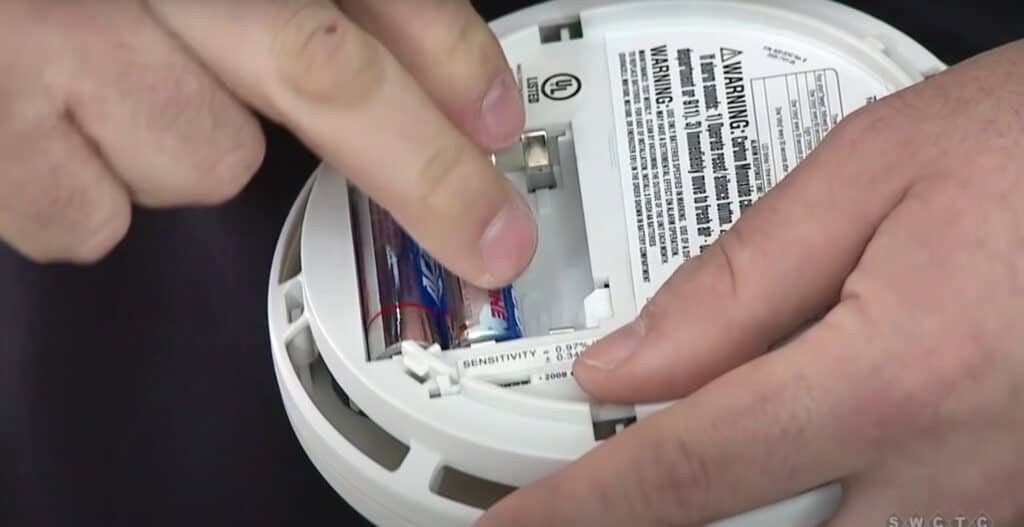
Inserting the new batteries: Source
- Replace the battery cover, re-inserting any screws or snapping clips back into place. Fully secure the cover back in its place.
- Remount the detector securely onto the original ceiling/wall bracket (if needed).
- Press the “Test” button for 5-10 seconds until the loud alarm sounds, confirming it works.
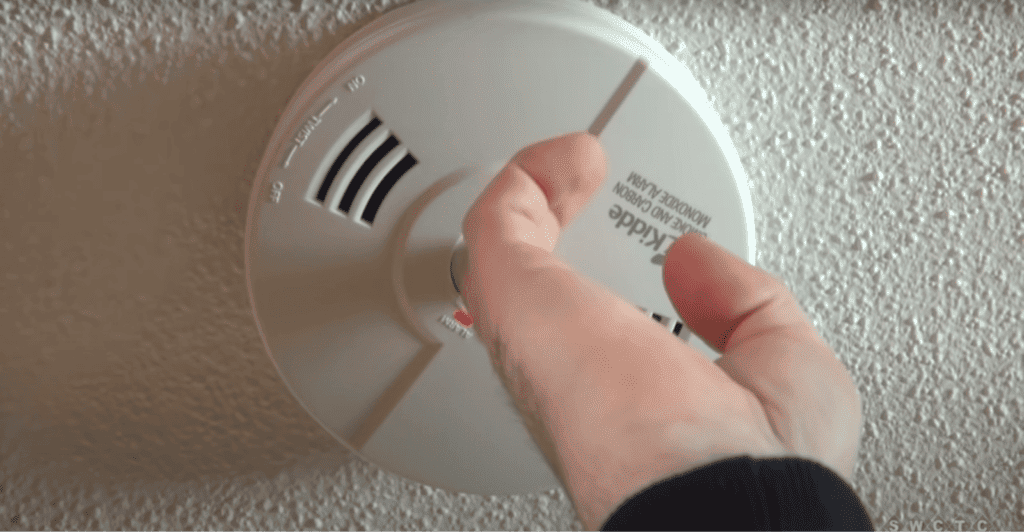
- If no alarm sounds, you might have improperly installed the batteries. Remove, check orientation and re-insert batteries.
- Test again until successful. If it fails, you’ll likely need to replace the entire detector.
Regularly maintaining these life-saving devices gives you peace of mind that you’ll be alerted to dangerous CO gas leaks! This video from the YouTube channel Guardian Protection will help you through the process:
<iframe width=”560″ height=”315″ src=”https://www.youtube.com/embed/m95LnZTRzY4?si=OVNwusc_MfOhtUPp” title=”YouTube video player” frameborder=”0″ allow=”accelerometer; autoplay; clipboard-write; encrypted-media; gyroscope; picture-in-picture; web-share” allowfullscreen></iframe>
Changing The RV Propane Detector:
Replacing your RV’s propane alarm is a crucial yet easy DIY task. Follow these steps closely when replacing your propane alarm fitted into your RV:
- Turn off the propane valve on the exterior tank. This cuts off the gas supply to prevent accidental leaks during replacement.
- Locate the existing propane detector, usually installed low on a wall or ceiling. Note its exact positioning.
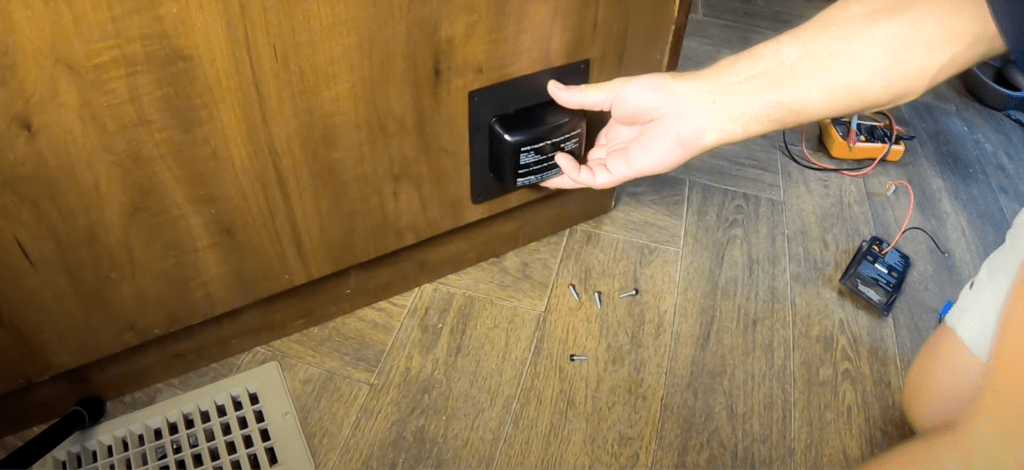
- Remove the detector from the mounting plate by unscrewing any fastening screws with a screwdriver or releasing plastic snap clips.
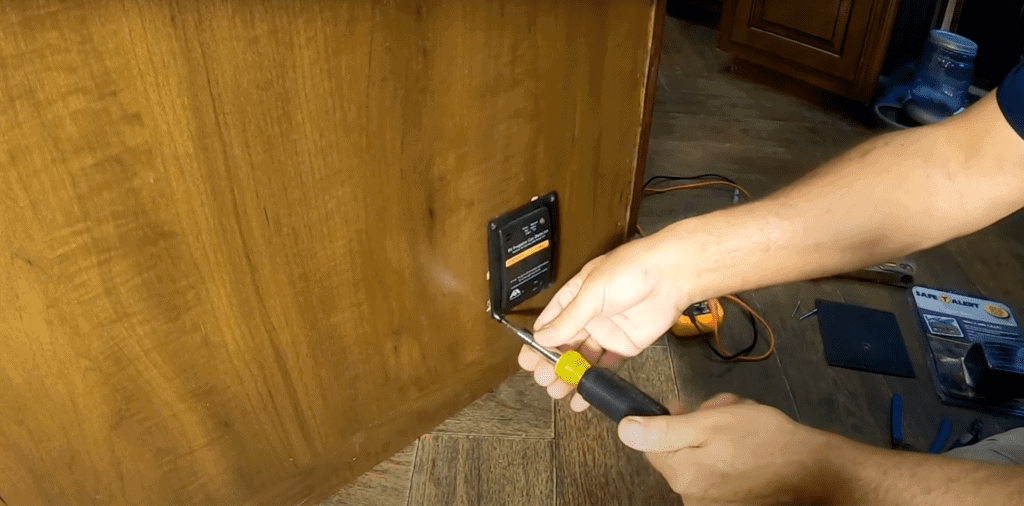
- If wired directly, disconnect the power wires from the terminals on the back of the detector. Make a note of which wire connects to each terminal. If powered by a plug, simply unplug the propane alarm.
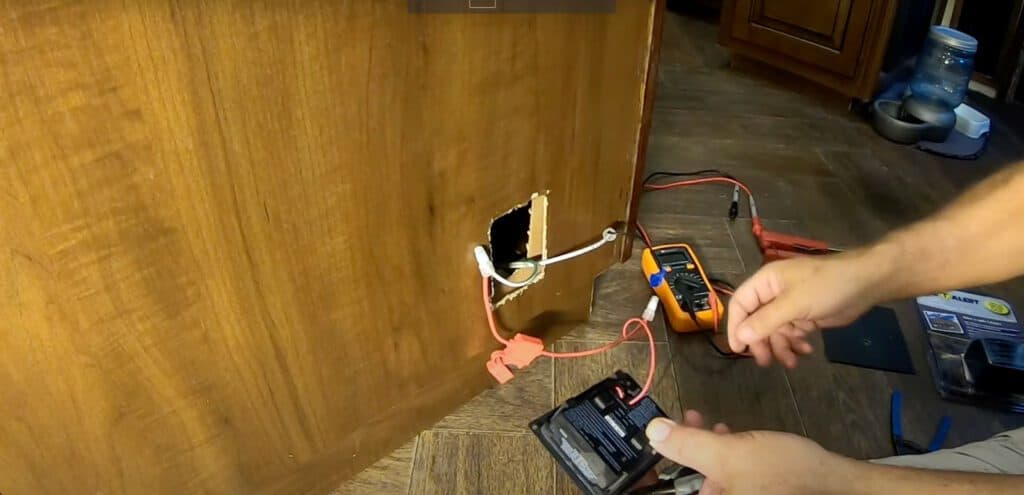
- Connect the wires to the matching terminals on the new propane detector, following your notes on the wiring order. Secure any wire nuts tightly or plug in the connector.
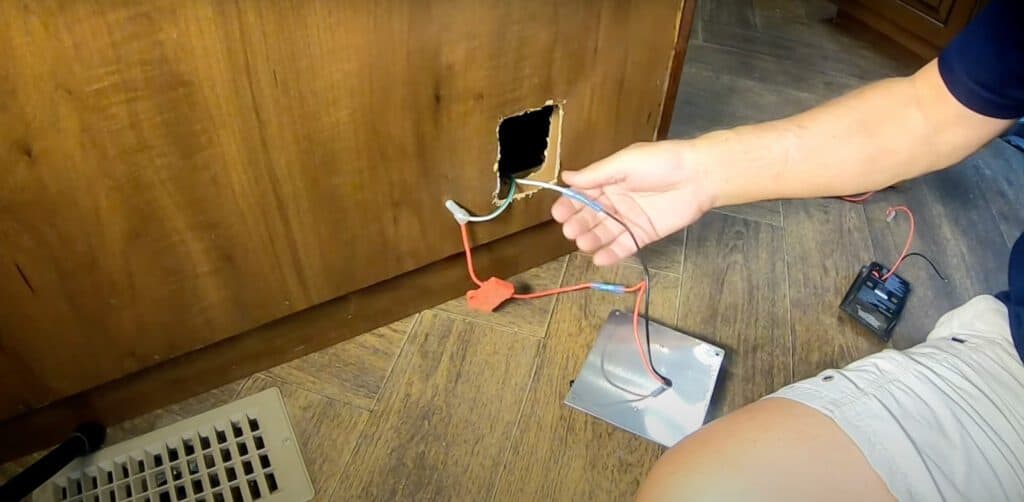
- Mount the new detector in the same location using the original screws or snap clips to affix it. This position has been carefully selected for optimal leakage detection.
- Turn the propane tank valve back on slowly.
- Press and hold the “Test” button for 5 seconds to trigger the audible alarm of the new detector, confirming it works properly.
- Refer to the included manufacturer instructions for your specific detector model for any differences or additional steps in the replacement process.
- For optimal safety, replace your RV’s propane alarm every five years or as issues arise.
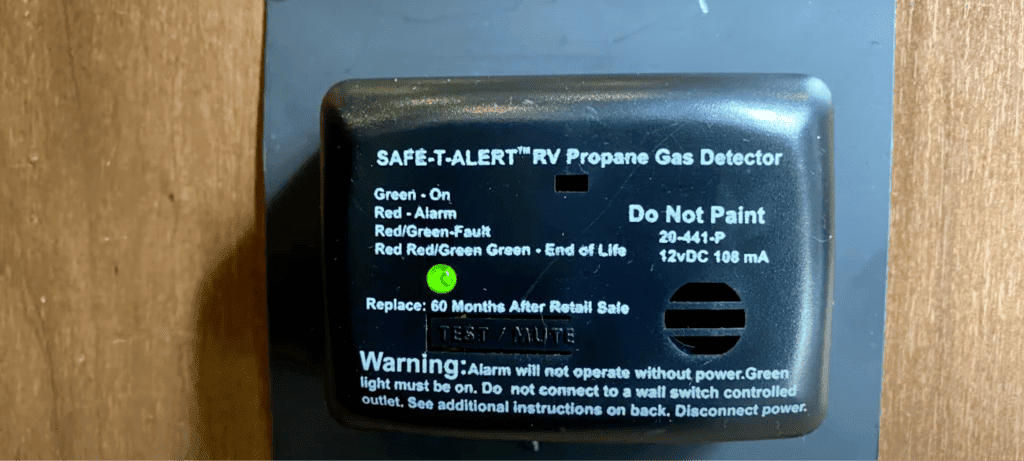
This video from the YouTube channel I Love RV Life presents the process:
Testing The Propane Alarm
Once you’ve replaced the propane detector, it’s time to test whether it is functioning. It’s also critical to periodically test your RV’s propane leak detector to ensure it can keep you safe. Here are a few methods:
- Propane gas test – Turn off appliances and propane in the tank. Activate the detector, then waft a small amount of propane near it from a torch or lighter. The alarm should sound within seconds if it is working normally. Have adequate ventilation, and don’t test near open flames.
- Push the “Test” button – Nearly all propane alarms have a test button to trigger the audible alarm manually. Press and hold the button for 5+ seconds to activate it.
- Indicator lights and sounds – Consult the manufacturer’s guidelines to understand the meaning of any colored indicator lights, audible beeps, or display codes. These clues can reveal normal or faulty operations.
Conclusion
In this article, I provided clear step-by-step instructions to easily swap out batteries and replace these critical safety devices. Consult your owner’s manual for any specifics on your particular detector models. Taking the time to follow the proper maintenance procedures gives you confidence that your detectors will alert you to dangerous gas leaks.
RVing is all about freedom and adventure, but also comes with responsibility. Taking preventative safety measures allows you to relax and enjoy all your journeys, whether weekend getaways or extended tours across the country. Take care of your CO and propane detectors, and they’ll take care of you. Safe travels!
FAQs
How do I replace the batteries in my RV carbon monoxide detector?
First, locate the battery compartment, typically on the back or side of the unit. Remove the cover by unscrewing any screws or disengaging plastic clips. Take out the old batteries and dispose of them properly, noting which end was positive and negative. Refer to the owner’s manual for the right replacement battery types, often 9V or AA. Insert the new batteries according to the polarity symbols, double-checking they face the correct direction. Replace the battery cover and secure it. Test the detector to verify the fresh batteries work by holding the test button until it alarms.
How often should I replace the batteries in my RV carbon monoxide detector?
Most manufacturers recommend an annual battery replacement to keep the detector functioning properly. You can also use a biannual battery replacement for added comfort and security. Mark it on your calendar to swap in a fresh set around the same time each year. Even if the existing batteries seem fine, their performance can decline with time.
How often should I replace my RV propane detector?
Safety experts universally recommend replacing your RV propane gas detector every 5-7 years. After this period, their sensitivity and accuracy substantially decline, even if the unit still seems to work normally.
How do I replace my RV propane detector?
Start by shutting off the tank valve propane supply to prevent gas leaks. Locate the existing detector mounted on the wall or ceiling and detach it from the mounting plate by removing screws or releasing clips. Disconnect the wiring, noting which wire connects to each terminal. Attach the wires to the matching terminals on the new detector unit. Mount the replacement propane alarm in the exact location using the original hardware. Slowly turn the propane back on and test for leaks with soapy water around the connections. Press the test button to verify the alarm sounds.
How do I check if my RV propane detector is working?
Turn off all propane appliances and release a small amount of propane near the detector from a lighter or torch. If working normally, the alarm should sound within seconds. Inspect any indicator lights or listen for sounds that signal proper functioning per the manufacturer’s guidelines. Nearly all models also have a test button that triggers the alarm if the detector functions fine.

