To remove a Dometic RV refrigerator, you first have to access the rear of the fridge from the outside, disconnect the propane supply line, DC, and AC power, and remove screws at the back and front that hold the fridge in place. With all these done, you can carefully slide the refrigerator out of its enclosure and lift it out of the RV.
Removing your refrigerator from its compartment can look intimidating. But in reality, it’s a simple process. I first attempted this to make the refrigerator on my 2009 Airstream 27FB trailer more efficient by installing fans behind it. It was not as difficult as many people assume it to be.
I have created this article to walk you through a step-by-step process of removing your RV fridge. As a bonus, I will throw in relevant cautions that I learned – some in the hard way – during the process so you don’t make those mistakes. So I encourage you to read to the end.
Things You Should Do Before Removing The Refrigerator
The major goal of this process is to remove the refrigerator from its current sitting area, which allows you to run wires from the roof, through the back of the fridge, and down to the lower parts of the RV.
Also, remember that the refrigerator is supplied with AC power, DC power, and propane gas. So, all these need to be disconnected before pulling out the appliance.
Before we jump into any of these procedures, ensure the following:
- Remove every item inside the refrigerator to prevent your food from being spoiled.
- Remove all the sofa cushions around the fridge area and put them on the other end of the RV or trailer. You need clear space to get this done. You also don’t want to cause damage to the leather on those cushions.
Removing RV Refrigerator: Step-by-step Guide

There are only six screws you need to take out to remove the refrigerator. Two are in the fridge’s bottom, two are on the top, hidden behind the control panel, and two are outside the RV’s refrigerator vent. Follow these steps:
1. Unplug The AC Power To The Fridge
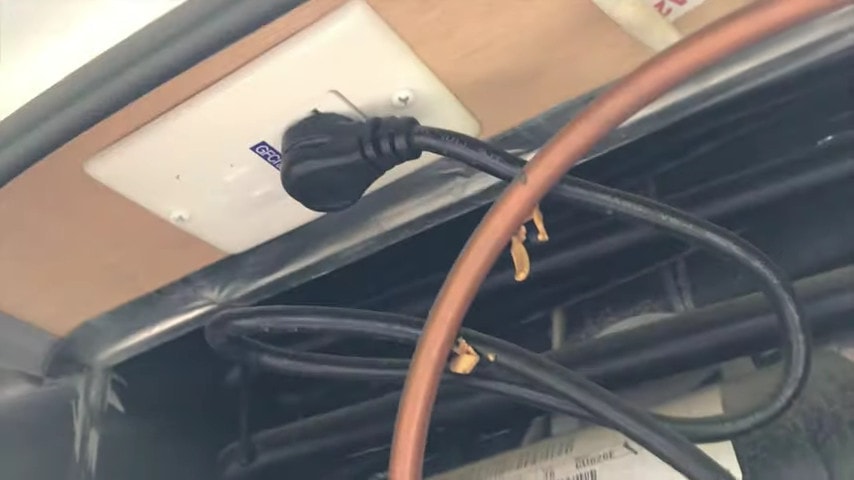
The first step is to access the refrigerator vent outside of the RV. Refrigerators in RVs usually run on AC household power or off propane gas. But when running on propane, they also need 12-volt power from your batteries. So, these are the three connections to remove when you open the vent.
In my 27FB trailer, I could easily identify the AC outlet at the top of the vent compartment, which is usually the case for most RVs. So, all you have to do is unplug the outlet.
With that out of the way, you no longer need to worry about turning off the circuit for AC power.
2. Remove The Fuse For 12-volt DC Power
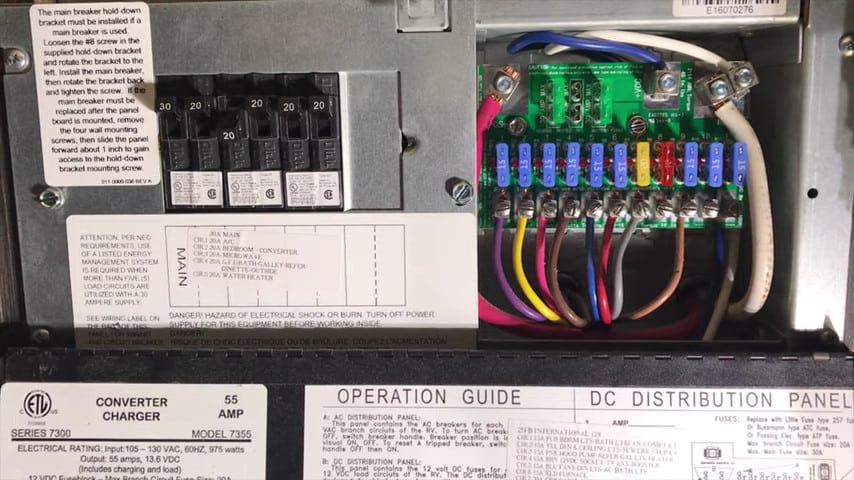
The next step is to kill off the power that goes into the refrigerator. In the compartment, you’ll see the circuit breaker. On the left of this panel, you have Shore power — the AC household power you no longer need to turn off since you’ve unplugged the outlet in the previous step.
The focus here is the 12-volt panel, which contains up to nine circuits. Fortunately, a sticker usually spells out what each of these circuits does so you can go through the list.
The information on the sticker shows that my refrigerator is circuit 3 (CIRCUIT 3 HOOD-PUMP REFER…). So, I had to locate circuit number 3 and pull out the fuse.
Pro Tip:
- When counting your circuits, start from the left to the right.
- Pulling out the fuse for the circuit that supplies power to the refrigerator can sometimes require a wiggle to come off.
3. Disconnect DC Power Wires For The Batteries
Now, to the DC power for the batteries. You will see two wires connected to the power termination block – usually one with a red positive and the other white for a negative.
It is usually a flathead screw that secures the DC power wires into the power termination block, so you need the flathead screwdriver for that.
Remember to cover the wires with black tape once removed.
Pro Tip:
- Your RV may have a wiring diagram sticker attached to the casing so you can confirm if you’re dealing with the right wires.
- Due to the limited space and clearance in the refrigerator vent, it can be helpful to use your phone’s camera as a scope for better visibility when looking into the screws that secure the DC power wires connection.
4. Disconnect Propane From The Refrigerator
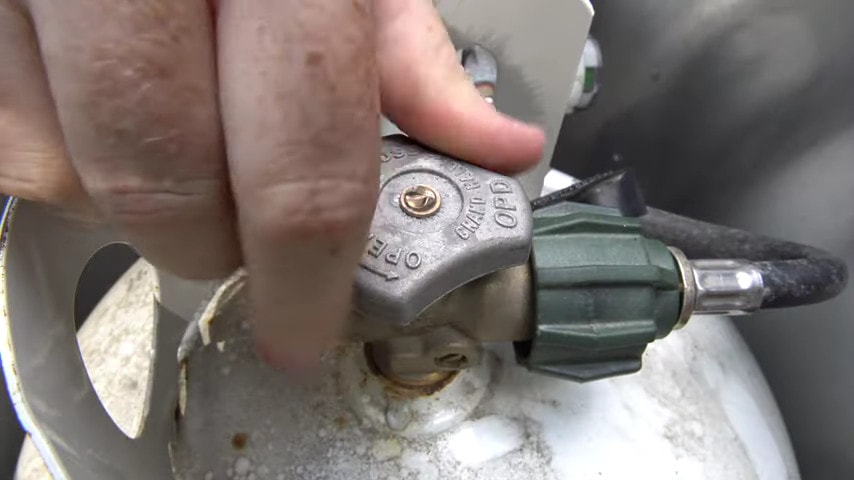
It is easy to identify the drip hose (copper loop) in the refrigerator vent that indicates the propane input to the fridge.
But before disconnecting this pipe, shut off your gas tank and drain any gas in the lines. You can turn the stove on until the pipeline’s gas is exhausted.
Note: Turn off the burners when the gas is exhausted from the pipelines.
With this out of the way, you can return to the refrigerator vent to disconnect the pipe supplying propane to the fridge.
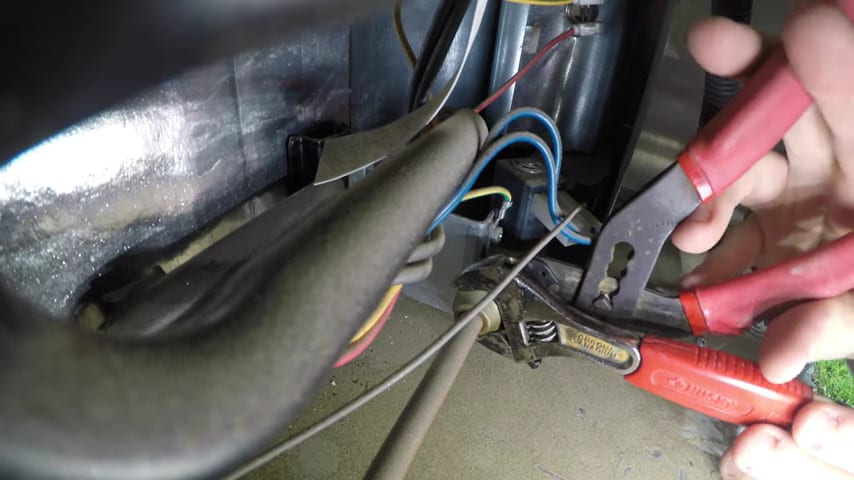
Pro Tip:
- Use a backing wrench when disconnecting or reconnecting the gas.
- There’s flexibility with the copper loop, but don’t bend it severely so it doesn’t wear out or get damaged.
5. Remove The Screws Holding The Refrigerator
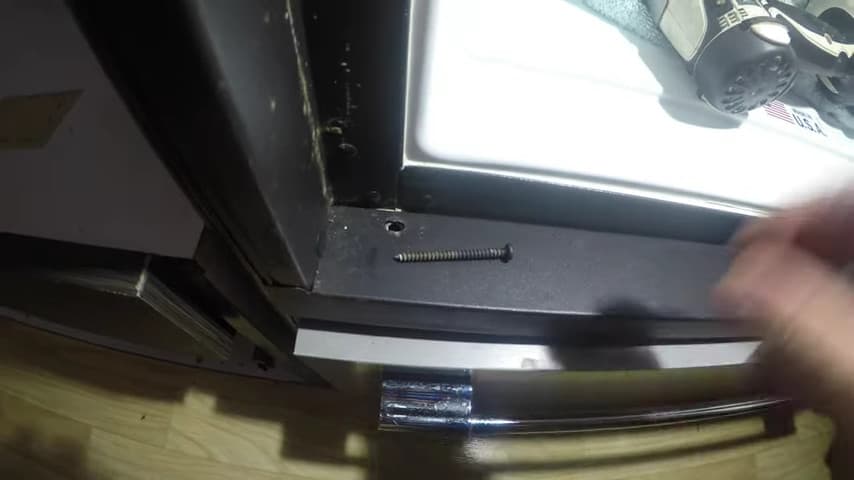
Now that you’ve disconnected the DC, AC, and propane supply to the fridge, you are ready to pull it out of the compartment in the RV. However, to do this, you need to remove the screws that are holding it in place.
Two securing points are located at the back of the fridge, 10mm anchor bolts each. Remove these anchor bolts and slide the condensation drain tube from the clamp.
This will leave you with four other screws to remove, which will be accessed from inside the RV, not the vent outside.
- Remove Phillips screws on hinge supports on each side of the top edge of the fridge. After unplugging both plugs, you can remove the control panel by pulling it straight out.
- Use 10mm wrenches to remove the top screw of the freezer door, then remove the freezer door by lifting it straight up and setting aside.
- With freezer and fridge doors removed, start removing the two screws located along the top edge of the fridge frame. Check for additional screws along the frame edge of the fridge.
- There should be only one on the latch side of the fridge, located towards the top.
- Remove two screws from the bottom edge of the fridge. That way, you can remove the bottom trim and set it aside.
- By now, you should see a bed of caulk between the fridge and cabinet. Use a putty knife to cut through the caulk.
Everything holding in the fridge from inside the trailer should now be free. So you only have to pull it out.
6. Make A “Table” In Place To Hold The Refrigerator As You Pull It Out
Before pulling the RV refrigerator out of its sitting compartment, you need to provide a table or any ideal substitute and place it in front of the fridge housing in such a way that when you pull out the fridge, it rests on the table all through the time you may need to work behind the refrigerator.
First, you must measure how high up you want the table to be and ensure it’s sturdy enough to support the refrigerator.
In my trailer, the height for the ideal “table” was 14 inches, but the other end was 13.5 inches. Luckily, I have a stool at exactly this height, so I didn’t have to spend my day building one from scratch. I had to attach a layer of plywood secured with double-faced tape to achieve the exact height.
Pro Tip:
- You don’t necessarily need to have a table. You can use a toolbox or milk crate if it’s sturdy enough.
- If the table or whatever you use isn’t up to the desired height to support the fridge, use double-faced tape to secure one or two layers of plywood on the table’s surface.
Pulling the fridge out will slide onto the table’s surface or whatever you’ve put in place underneath.
With all these done, you’ve just successfully removed your dometic RV refrigerator.
Images credit: Journeyman
Wrapping Up
You can see that moving a Dometic RV refrigerator is a lot easier than you might have assumed. Truly, I was intimidated to do it myself for the first time, even though I’m mechanically inclined. Removing the eight screws holding the refrigerator in place and removing the electrical connections only takes effort.
When you’re done with your installation and running whatever wires require you to pull out the fridge in the first place, you can install the appliance back into its housing.
While you do that, first ensure the enclosure is clean and debris-free, carefully slide the fridge back into its place, and reattach the mounting screws. Then, reconnect the gas supply line electrical connections and check for proper operation.
FAQs
How hard is it to remove an RV refrigerator?
Removing an RV refrigerator is not extremely hard but requires attention to detail and calculated effort. You’ll need to disconnect the gas and power and secure it properly. It’s doable if you’re open to DIY approaches; if not, seeking professional help for a smooth removal process is better.
How do you remove a Dometic refrigerator door?
To remove a domestic refrigerator door or duel, you open it and then press the back of the hinges. This will cause it to lift, and you can pull it out.
Depending on the modification of your RV refrigerator, you may need to locate the hinge cover on the top of the door, remove the hinge cover by prying it gently, and unscrew the hinge bolts using a suitable wrench.

