When your RV’s electrical outlets aren’t working, the frustration can go far beyond not being able to use your favorite appliances. It can really get in the way of enjoying your vacation while also leaving you scratching your head trying to figure out, “Why, oh why, have my RV’s power outlets decided to call it quits?”
A blown fuse, a tripped circuit breaker, or a GFCI outlet requiring a reset might cause your RV electrical outlet to stop working. However, more complex issues could involve the power inverter, house battery bank, or shore power connection.
When an RV outlet usually goes dead, a simple fix can often solve the mystery of a malfunctioning outlet, and you can save the cost of a service call by doing the work yourself. However, you might need professional repair for more complicated electrical problems.
In this article, I’ll help you troubleshoot the issue by walking through the most common causes behind a non-working camper outlet and how you can fix ’em up in a jiffy.
Taking the time to investigate some of the more common reasons why your RV’s outlets aren’t working requires a step-by-step approach. Troubleshooting each one to rule it out or assess its severity will help you determine if it’s an easy fix you can handle yourself.
Even if it’s something that’s beyond your ability, knowing more about what causes RV outlets to stop working will help you ask more informed questions from an electrician.
1. There’s a Problem with a GFCI Outlet
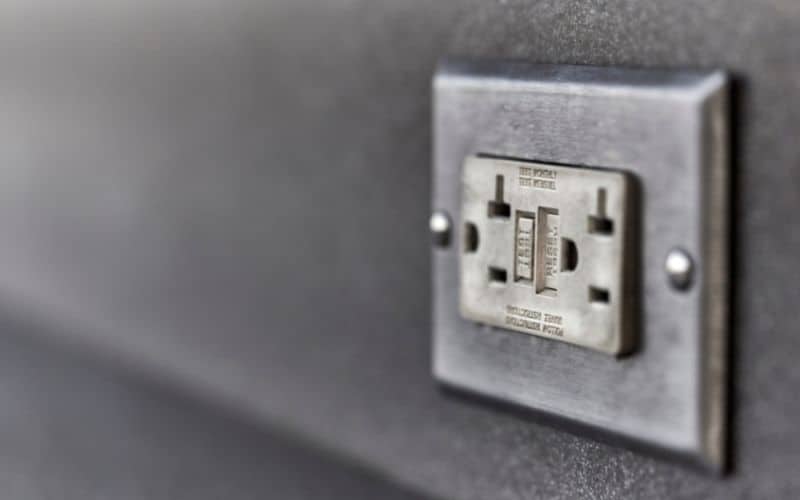
GFCI stands for Ground Fault Circuit Interrupter, which is a special type of outlet found in bathrooms, kitchens, laundry rooms, and just about anywhere in an RV where there’s a risk of water coming in contact with an outlet. The outlet itself has a tiny type of fuse built into it.
When a fault, like a drop of water, excess condensation, or any other short occurs in the outlet itself, it “Trips” and disconnects the electrical connection in the outlet, before it has a chance to cause problems elsewhere in the circuit at large.
Reset The GFCI Outlet & Check For Water Problems
When a GFCI trips a little button pops out. Resetting it is easy, but you need to make sure that the outlet is dry, or that you have otherwise rectified the original problem. Otherwise, it will continue to trip or could cause more damage to the rest of the circuit.
2. A Circuit Breaker Tripped or a Fuse Burned-Out
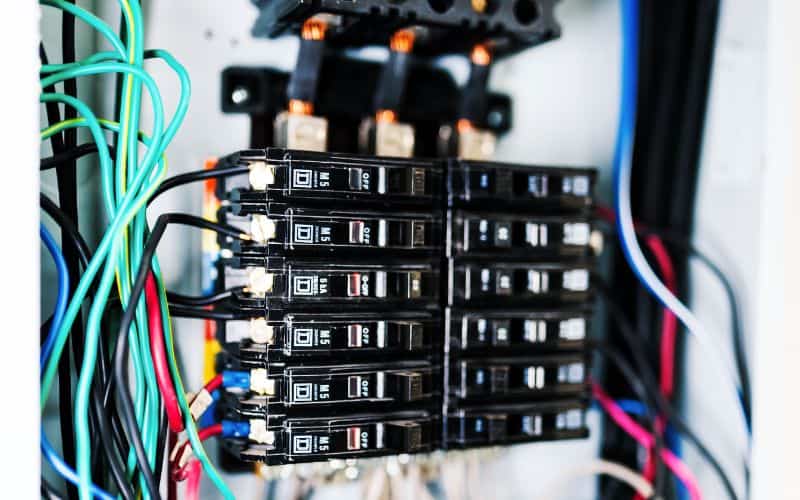
If you don’t have power going to a standard AC outlet, that isn’t a GFCI outlet, the next thing to check is your RV’s circuit panel. Most modern-day RVs have circuit breakers, though there are a few models that still use fuses.
When a specific breaker is tripped or a fuse is burned out, the power is cut from the corresponding circuit, including all of the RV electrical outlets connected to that circuit. To restore power, you can reset the breaker by flipping the switch or replace the faulty fuse.
Though first, you should ask yourself what caused it to trip or burn out. If you simply reset the circuit, dust your hands off and consider it a quick, easy fix, you might just be setting yourself up for a major problem later on.
Most of the time, when a fuse burns out or a circuit breaker trips it’s because there is a problem in the wiring, or you have too much plugged into one circuit.
Forcing power back to that problematic circuit, without correcting the problem can potentially damage appliances, burn out wiring, and even put your RV at higher risk of suffering an electrical fire.
What Caused the Circuit Breaker to Trip?
Right off the bat, this means assessing how much you have plugged in and drawing electricity from the problematic circuit. You can determine the wattage capacity of your circuit based on the Amperage rating on the breaker or fuse. To do the easy math, one Amp is equal to 120 Watts.
This means that a common 15 Amp circuit breaker can deliver a maximum of 1,800 Watts.
A 20 Amp circuit breaker can deliver a maximum of 2,400 Watts.
If you have so many things plugged into your outlets that your wattage demand is over the maximum capacity of the circuit breaker or fuse, you will continue to have the same problem over and over again.
You will need to either split up the demand to multiple outlets on different circuits or make some hard choices about what can be plugged in and turned on at the same time.
3. There’s a Problem with the RV’s Power Inverter
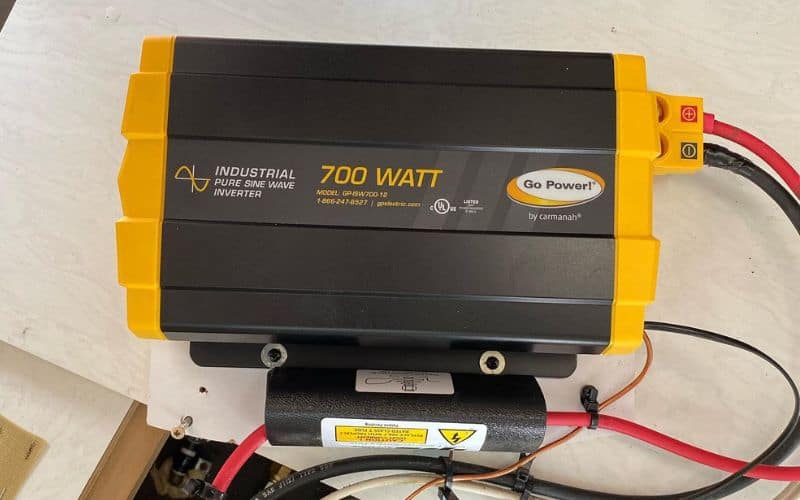
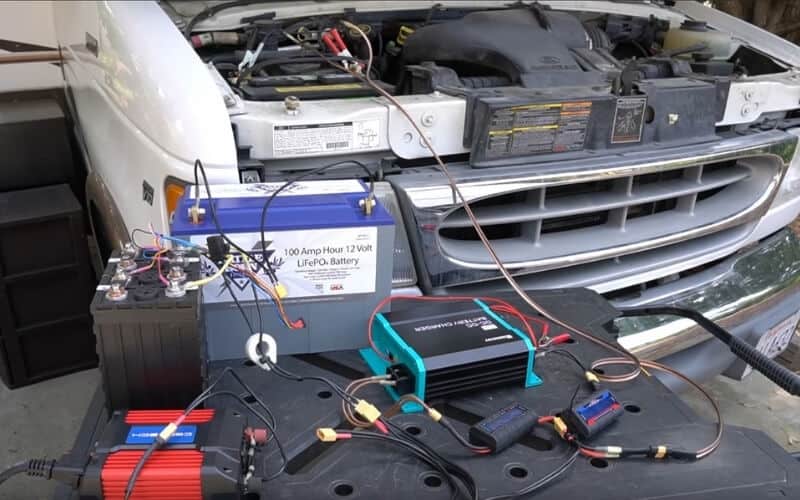
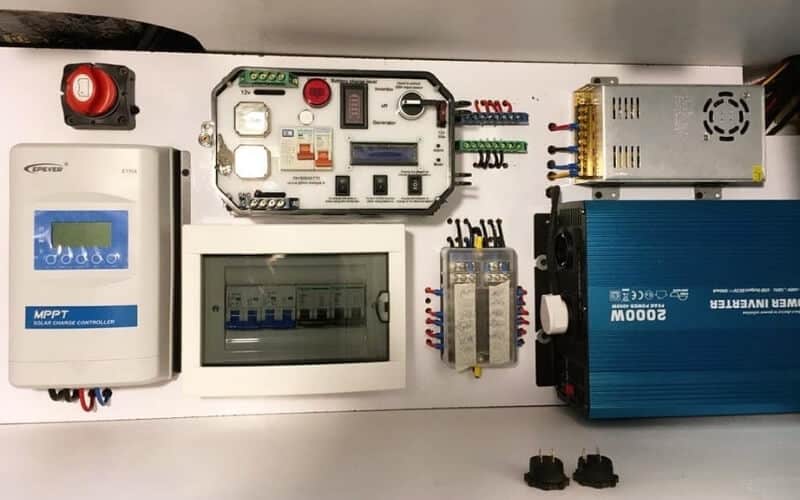
A problem with the power inverter is the second most common reason for an RV’s electric outlets not working. The inverter is designed to take the 12-volt DC electrical power from your RV batteries and convert it to the 120-volt AC electricity that many common RV appliances use. If the inverter experiences an issue, it might cause your outlet to fail, as it can stop providing electrical current to the entire RV’s outlets.
A lot of times, you can correct the problem by performing a hard reset of the inverter using the following steps.
How To Perform A Hard Reset Of An RV Inverter
4. The RV’s Battery Charge Level Might Be Low
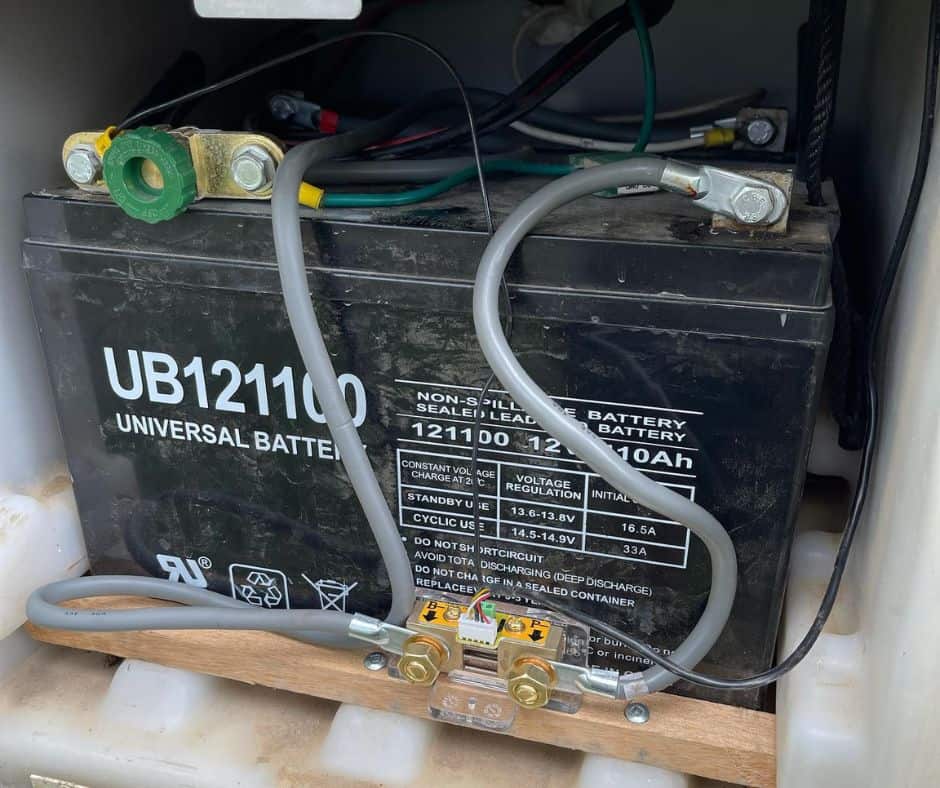
If you’ve been running on battery power overnight or for a day or more, chances are good you’ve put quite a drain on your RV’s house battery bank reserves. It’s important to remember that inverters aren’t all that efficient and tend to use more than a fair portion of your battery power.
Even if you believe your overall power consumption has been modest, you’ve likely been losing a small portion of electrical charge continuously to the inverter. This isn’t the inverter’s fault; it simply requires some additional charge to convert DC into the AC that most RV electrical outlets rely on.
Compounding this problem is that once a lead-acid battery is depleted below 50% the electrical charge it can deliver starts to fade. It can even fade to the point where the inverter and the rest of the RV’s electrical system simply cannot power the RV’s AC outlets.
How to Tell If Your Battery Charge Is Low
You can check your RV’s house battery charge using a charge monitor or a multimeter set to read voltage. If either of the devices is telling you that the house batteries are below 50%, chances are good that you need to recharge the batteries before your RV’s interior AC outlets will work again.
Note that this fading effect is only common in lead-acid deep cycle RV batteries. If your RV has cutting-edge lithium-ion batteries, then this fading effect doesn’t apply. Lithium batteries will deliver the same type of robust power at 98% that they do at 2%.
5. Power Is Interrupted by Corrosion on the Battery Posts
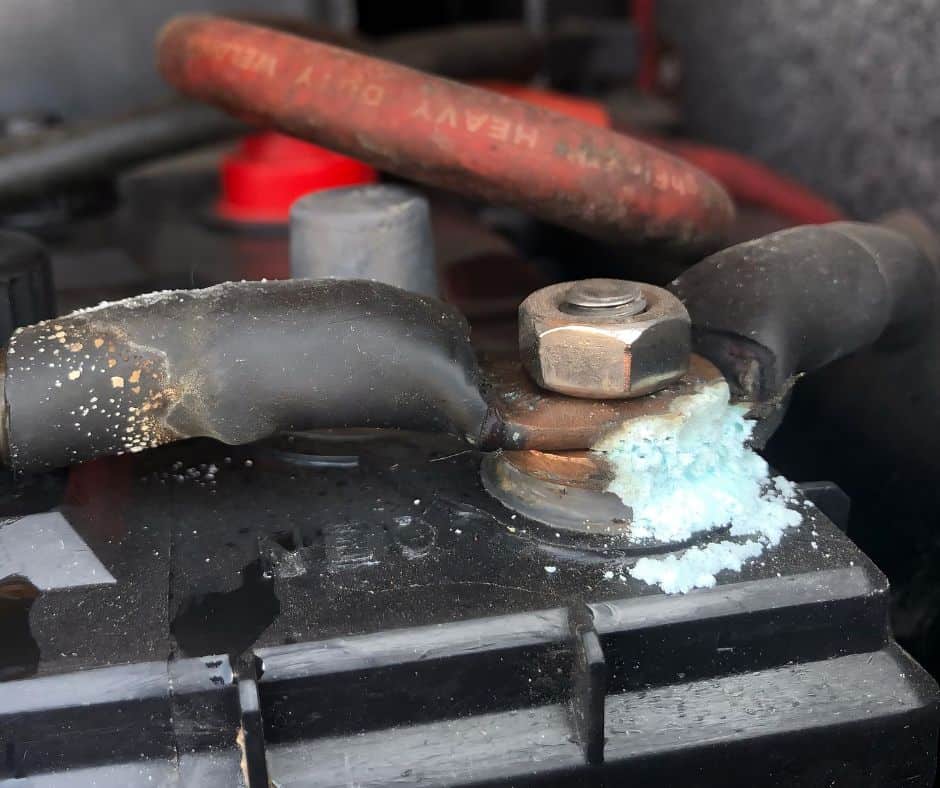
The process of electrolysis can start to affect the metal-on-metal contact of the battery terminals. It can gradually get to the point where electricity can’t get from your RV’s house battery bank to the inverter and the rest of the RV.
In a case like this, you won’t have power or insufficient power throughout the RV, and you’ll likely see a powdering white or perhaps green substance on the battery posts. Though you should be able to restore power by connecting to a shore power pedestal.
In a case like this, a simple battery cleaning might be all you need. You can do this using the following steps.
How To Clean RV Battery Posts
6. There’s a Problem with Your RV’s Shore Power Connection

So far, we’ve checked components of the RV’s electrical system that are related to the house batteries and internal power. If you are at a full-hookups campground that offers shore power electrical service as part of the campsite rental fee, then it could just as easily be an issue with the power pedestal itself.
These power pedestals see a lot of use and abuse over the course of a single year. They also tend to receive minimal maintenance in rustic campgrounds or older campgrounds that have a limited maintenance budget. A failure in the power pedestal itself can leave your entire RV without power.
Though will be more than just the outlets. All your RV’s electrical components will fail to run when you are connected to shore power instead of drawing from the RV’s 12 Volt DC house battery bank.
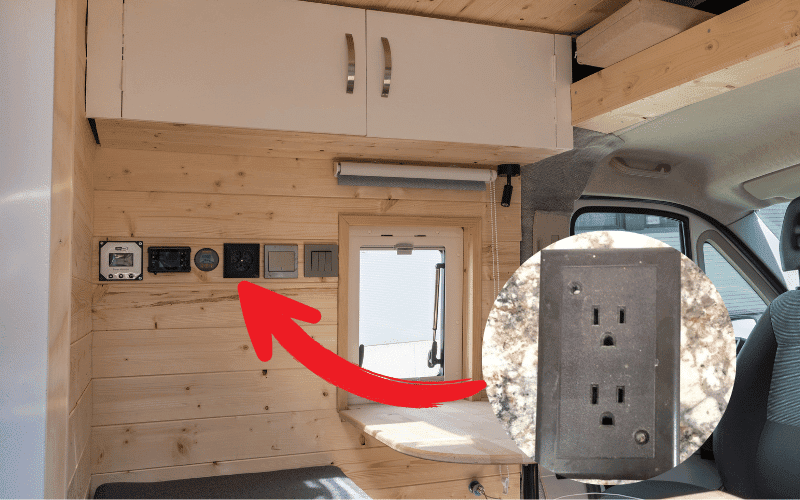
7. You Might Have One or More Burned-Out Outlets
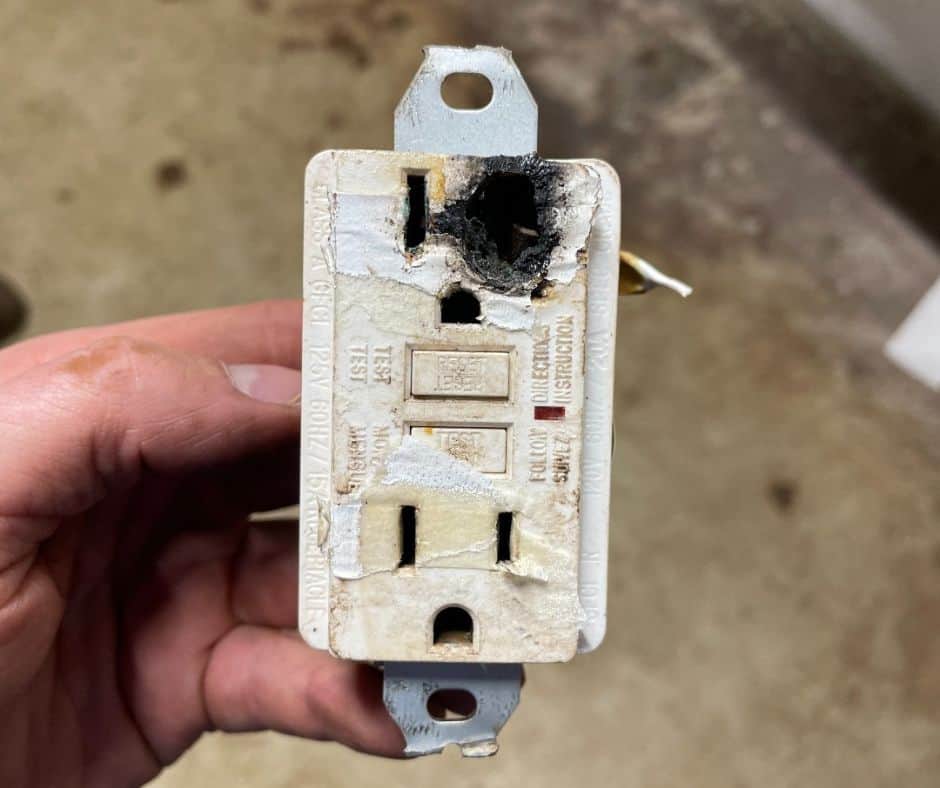
At this point, we’re down to a process of elimination to determine why your RV outlets are not working. Let’s say you’ve put in your due diligence. You’ve checked all the internal power systems, breaker, house batteries, GFCI outlets, and inverter as well as the external AC power sources like the shore power connection, and everything is fine. The next logical step is to check the outlet itself.
How to Tell If An Outlet Is Burned Out
This starts with a visual inspection of each outlet, starting with the one that is closest to your RV’s circuit breaker. Look for signs of a short circuit, such as:
Sometimes a bad outlet can cause a short circuit that is so severe it prevents the flow of electricity to all the other outlets on the circuit. With some RVs, this can also cause power to not be delivered to other major appliances such as the rooftop air conditioner or a built-in microwave.
Just make sure you turn off the main breaker and disconnect any power before you do anything more than perform a visual inspection.
How to Replace a Bad Electrical Outlet in Your RV
Let’s say your visual inspection turned up signs of an obviously bad electrical outlet in your RV. Before you can safely power up the other outlets you are going to need to remove and likely replace the burned-out electrical outlet. You should also be prepared to find other problems behind the outlet, such as melted, burned-out or short-circuited wires. Sometimes a wire might simply come loose due to vibration and cause the outlet to stop working
Removing and replacing the faulty RV electrical outlet can be done using the following steps
Frequently Asked Questions
Can RV Outlets Run on DC Battery Power?
RV outlets aren’t engineered to run directly off DC battery power. They are designed to run on 120 Volt AC electricity that is delivered by the inverter, which transforms the 12 Volt DC of your RV’s house battery bank into AC.
If you want to run your outlets off the RV’s inverter, make sure you have sufficient battery capacity to power your small appliances. Common AC appliances like a microwave, hairdryer, or coffee maker can quickly drain your battery to the point where it can’t supply enough power to the rest of your RV’s electrical outlets.
What’s The Difference Between an RV Inverter and a Converter?
An inverter turns DC electricity from the RV’s house battery bank into the AC that powers the standard outlets. A converter does the opposite, by taking AC current supplied by an external source and turning it into the DC electricity needed to do things like charge the RV’s 12 Volt house battery bank.
A converter’s primary job is to charge batteries while connected to shore power or perhaps an aftermarket generator. A converter also requires a separate fuse panel and breaker boxes to be installed.
When Should I Call an Electrician to Repair My RV’s Electrical Outlets?
Electricity is the sort of thing you need to take seriously. It’s definitely a time where safety does indeed come first, as electrocutions and electrical fires are caused every year by amateurs who tried to fix an electrical problem that was over their heads.
If you feel like you are out of your depth with an RV electrical problem, there is no shame in calling a professional electrician in to handle the situation. Especially if your RV is still under warranty, or there is a clause in your RV insurance voiding damage caused by self-repairs.
Conclusion
When determining why your RV’s outlets aren’t working, you need to troubleshoot some of the common culprits, in hopes of finding a relatively easy fix.
This starts with checking and resetting any GFCI outlets and checking the circuit panel for any tripped breakers or burned-out fuses. Reduce the demand on the outlet by unplugging things before resetting circuit.
If you are connected to a campground’s shore power, check the pedestal for signs of a maintenance problem. The campground hosts might need to make a simple repair.
Make sure to check the 12 Volt DC house battery bank, to make sure it has at least 50% of the maximum charge, pr you’ll need to recharge them. A good terminal post cleaning might also be in order.
From there, check the inverter. Sometimes performing a hard reset by powering it down and disconnecting all the leads is enough to get it operating normally again. Any time that you feel you are beyond your skill level, there is no shame in calling in a professional electrician. A lot of RV warranty plans and RV insurance policies even have language that can void your coverage if something is damaged by attempting self-repair.

